First, run command prompt as administrator. Then add Virtualbox folder to system PATH environment variable:
SET PATH=%PATH%;C:\Program Files\Oracle\VirtualBoxTo enable the Nested VT-x/AMD-v in VirtualBox, you need to know your VM name (eg. UbuntuVM) and use VBoxManage command:
VBoxManage modifyvm UbuntuVM --nested-hw-virt onThen you have to verify if the change have affected VM System settings in the VirtualBox. See if tick mark on Enable Nested VT-x/AMD-v option appears as expected.
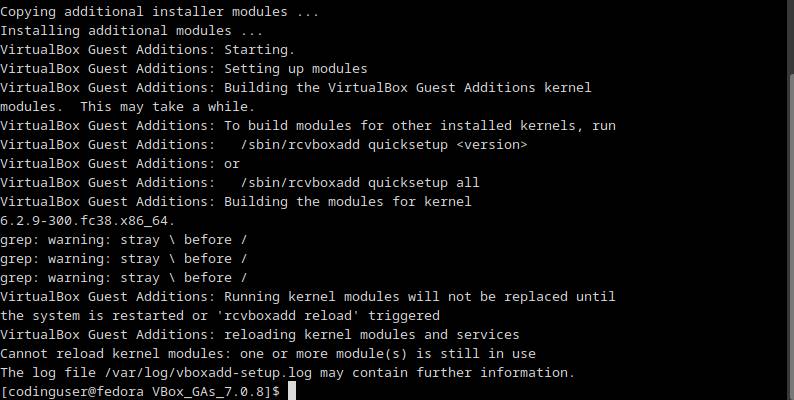
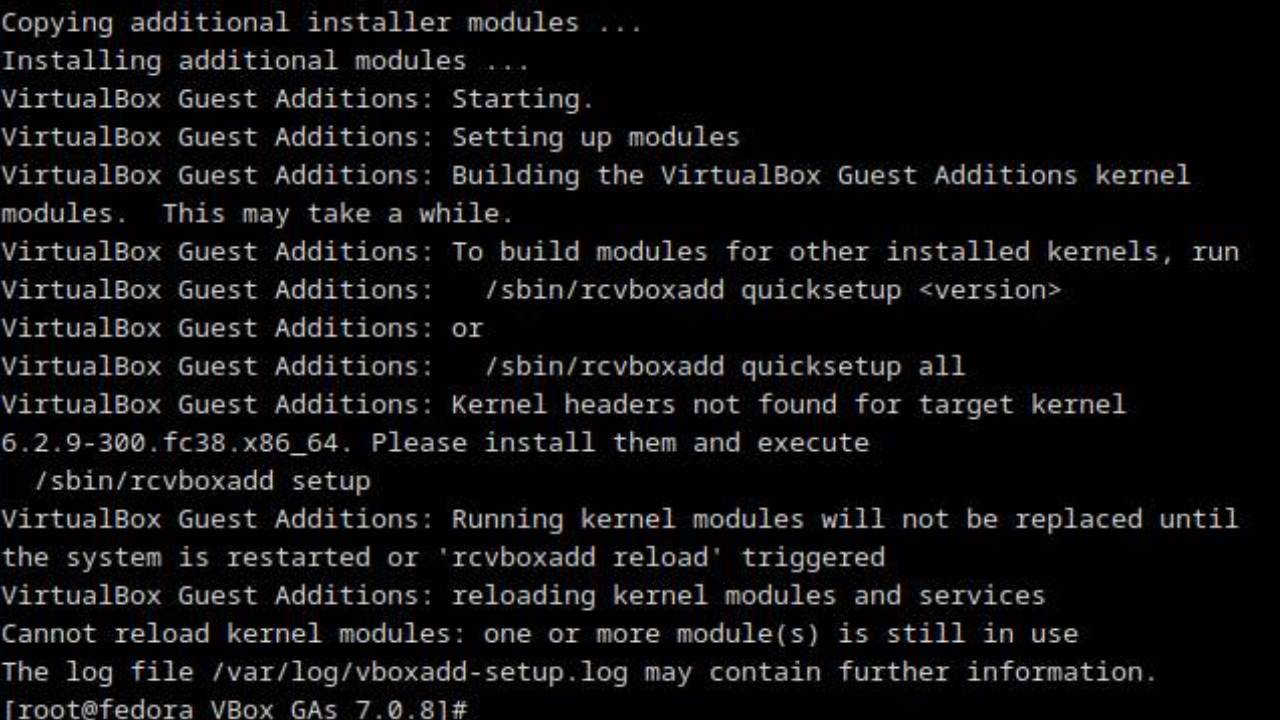
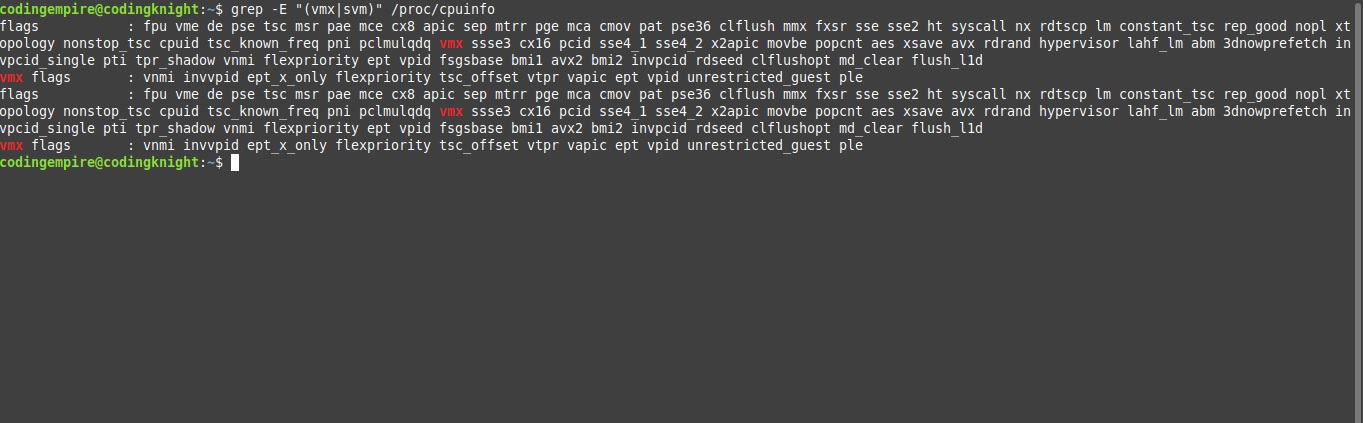
Next start the VM and test if the nested virtualization support is enabled in the VM.
grep -E "(vmx|svm)" /proc/cpuinfoThe output should similar to:
If the output shows nothing then you need to disable Hyper-V in your Windows System. Once again, run command prompt as administrator. Then run the following commands:
DISM /Online /Disable-Feature:Microsoft-Hyper-VPowerShell Disable-WindowsOptionalFeature -Online -FeatureName Microsoft-Hyper-V-Hypervisor -All
bcdedit /set hypervisorlaunchtype offAfter that you restart your Windows.
Now you can try to start the VM again and test if the nested virtualization support is enabled in the VM.