A Kubernetes cluster has two main components: the control plane (master node) and data plane (worker node).
So our cluster will have 1 master node and 1 worker node. The Operating system used for the master node and worker node are Fedora 38.
We'll assume:
- The first LAN subnet of 172.16.0.0/24
- The second LAN subnet of 114.122.37.0/24
- The first LAN Gateway IP address is 172.16.0.1
- The second LAN Gateway IP address is 114.122.37.1
- The first LAN is for kubernetes nodes
- The second LAN is for local clients
- Master Node's first IP address is 172.16.0.21
- Master Node's second IP address is 114.122.37.100
- Worker Node's IP address is 172.16.0.22
Install Fedora Server 38 on Virtualbox
Download Fedora image file by visiting Fedora's official website.
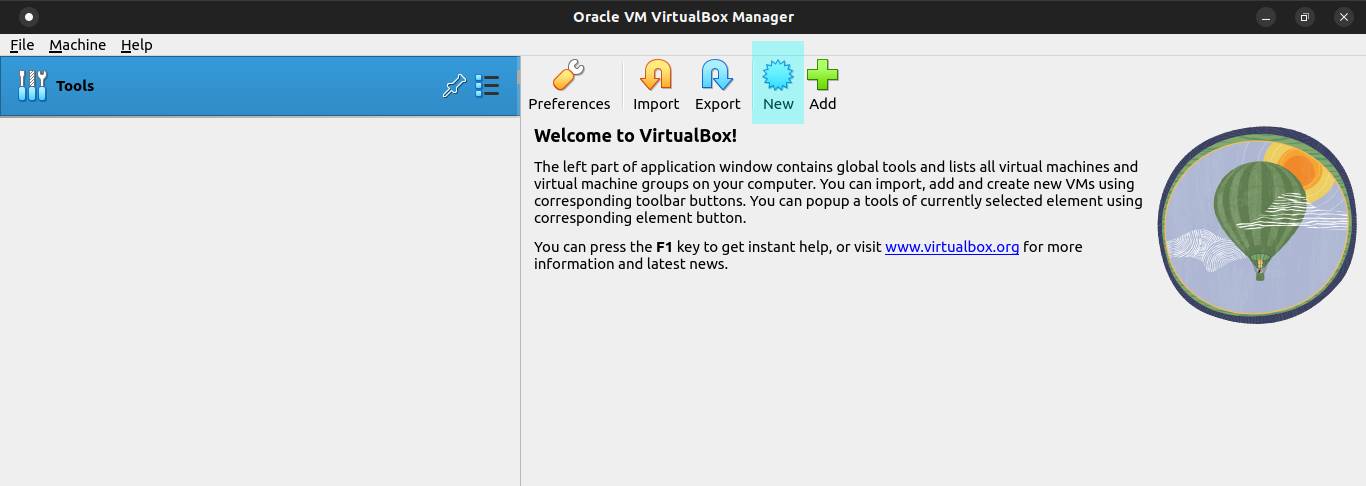
Start the virtualbox and click on the New button.
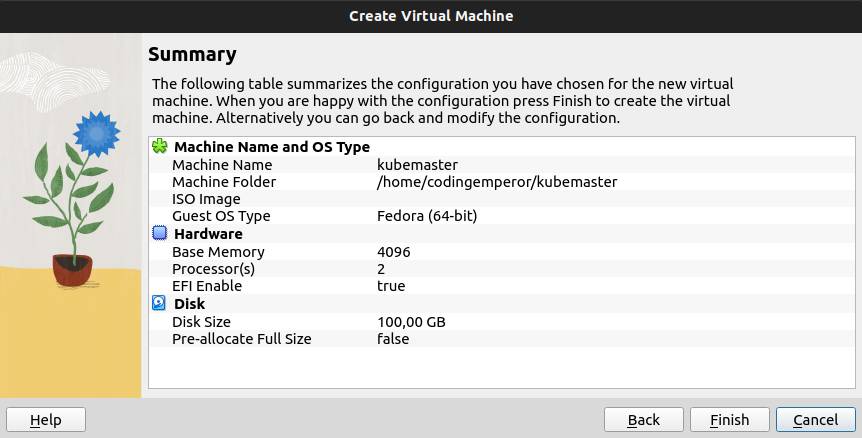
Write the name of the VM. Select the OS type and version. Click on Next button.

The minimum Kubernetes requirements are: 2 GB or more of RAM and 2 CPUs or more. Check the Enable EFI (special OSes only) and click on Next button.

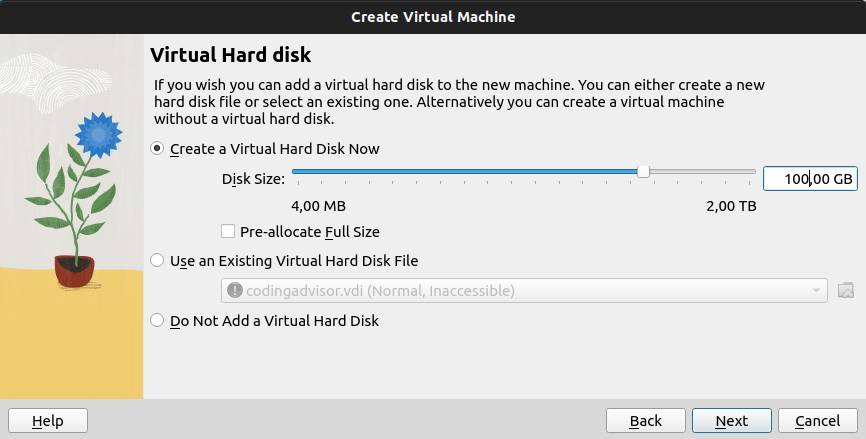
Select Create a Virtual Hard Disk Now and allocate how much space to your VM. Click on Next button.
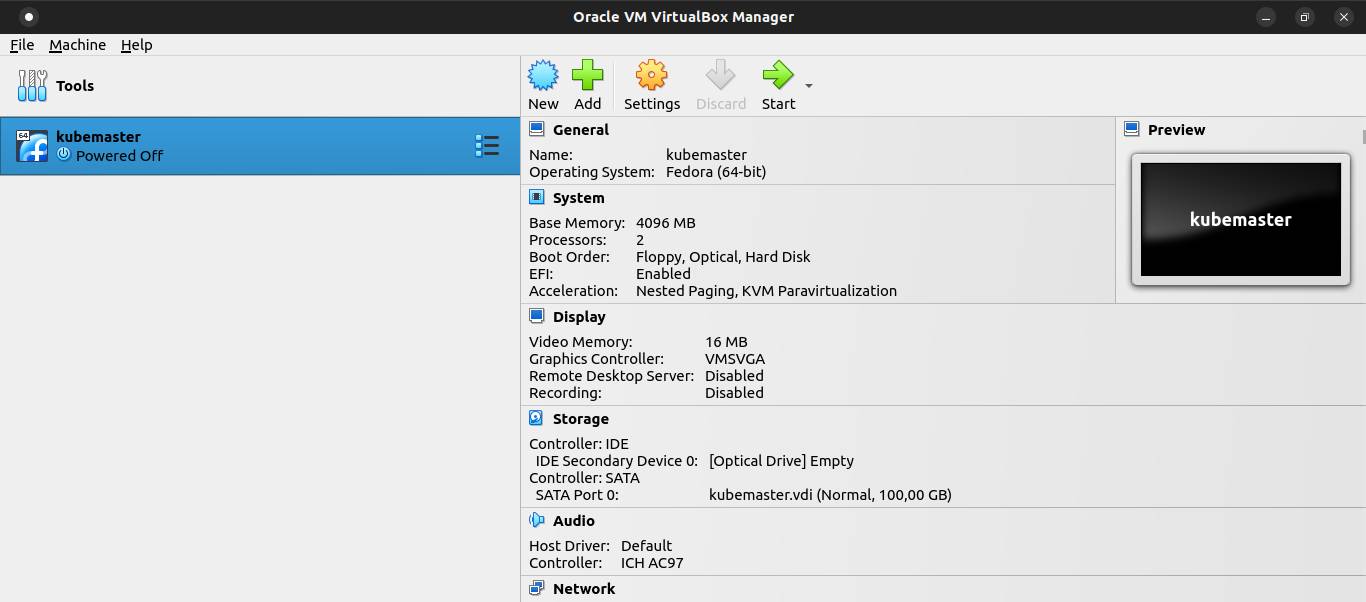
Next, click on Finish button.
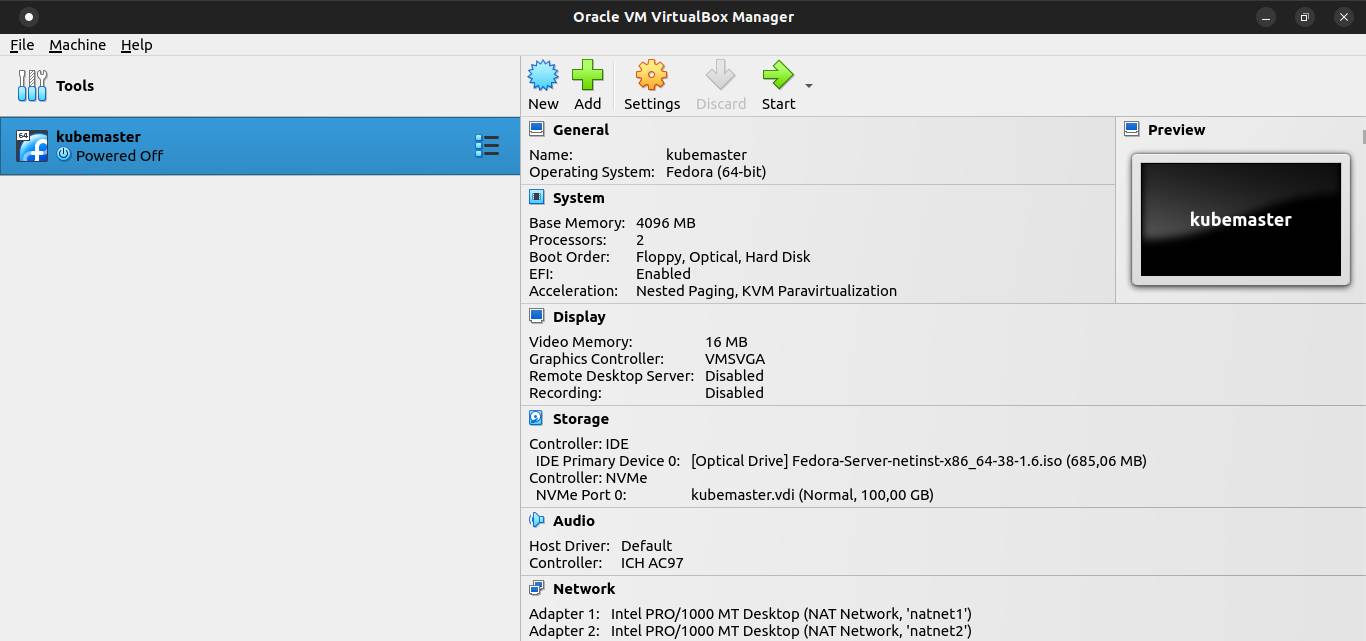
Then, click on Setting button.
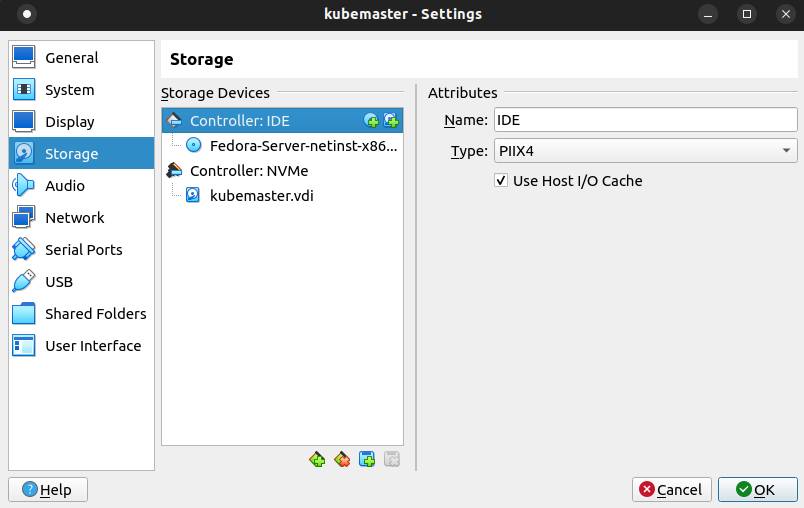
Select Storage menu and click on Adds optical drive. Navigate to where the Fedora Server ISO image saved. Then click on Ok button.
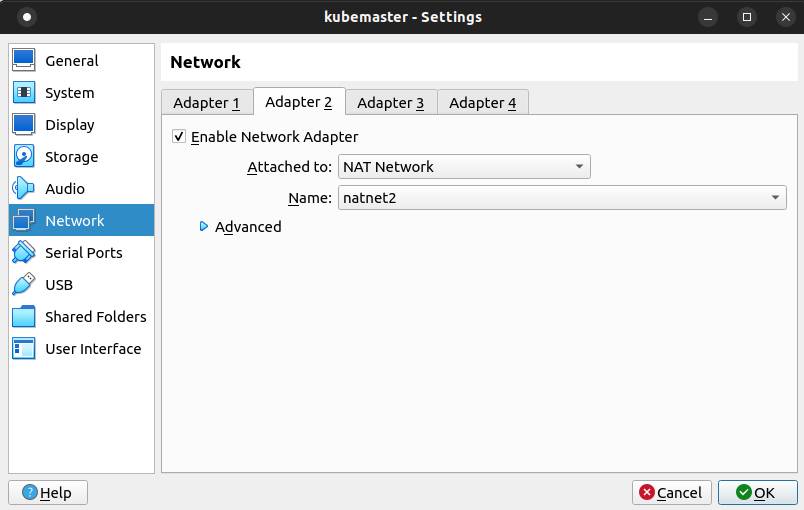
Open terminal and add new nat networks for kubernetes nodes and local clients using VBoxManage command.
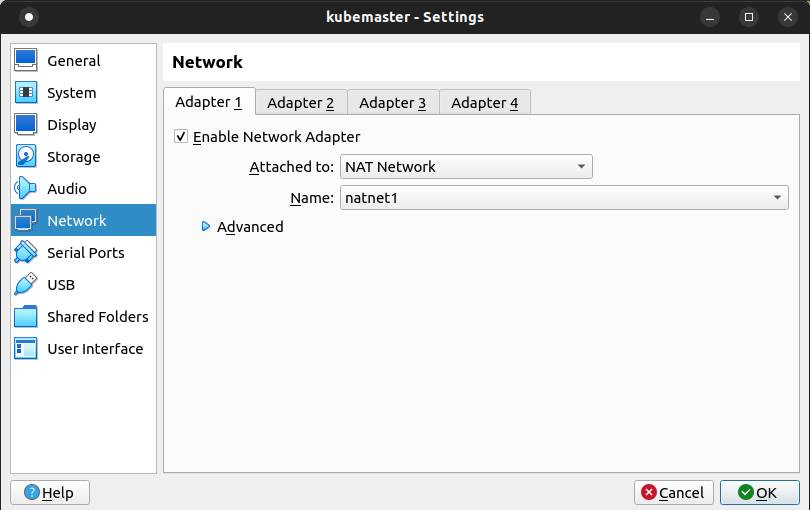
VBoxManage natnetwork add --netname natnet1 --network "172.16.0.0/24" --enable --ipv6 on --dhcp onVBoxManage natnetwork add --netname natnet2 --network "114.122.37.0/24" --enable --ipv6 on --dhcp onGo back to Virtualbox. Click on Setting button again. Then go to Network menu. Set network adapter 1 type and network adapter 2 type to NAT Network. Then click on Ok button.
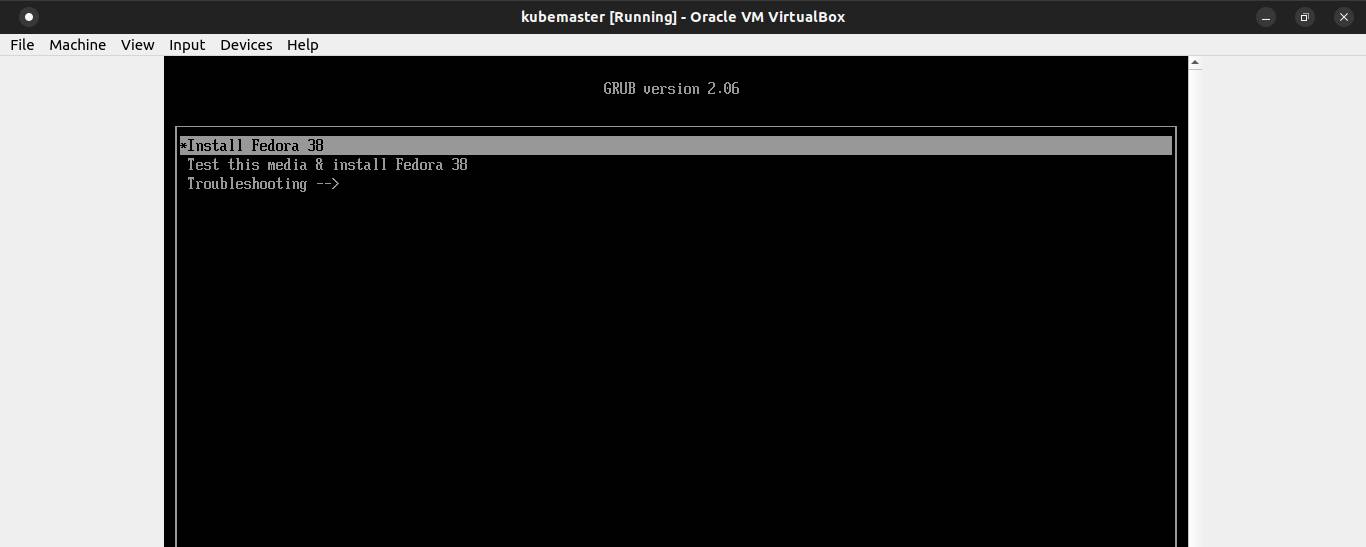
Click on Start button.
Select Install Fedora 38 on the boot menu.
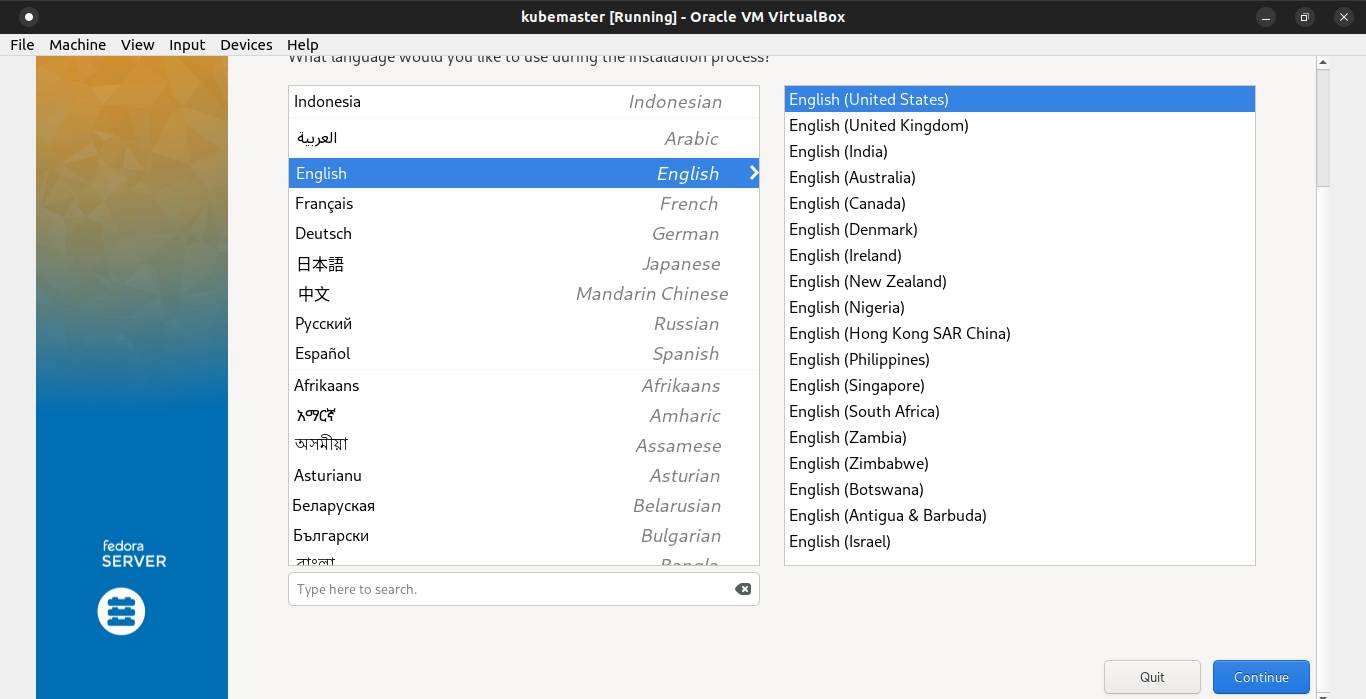
Select your language and click Continue.
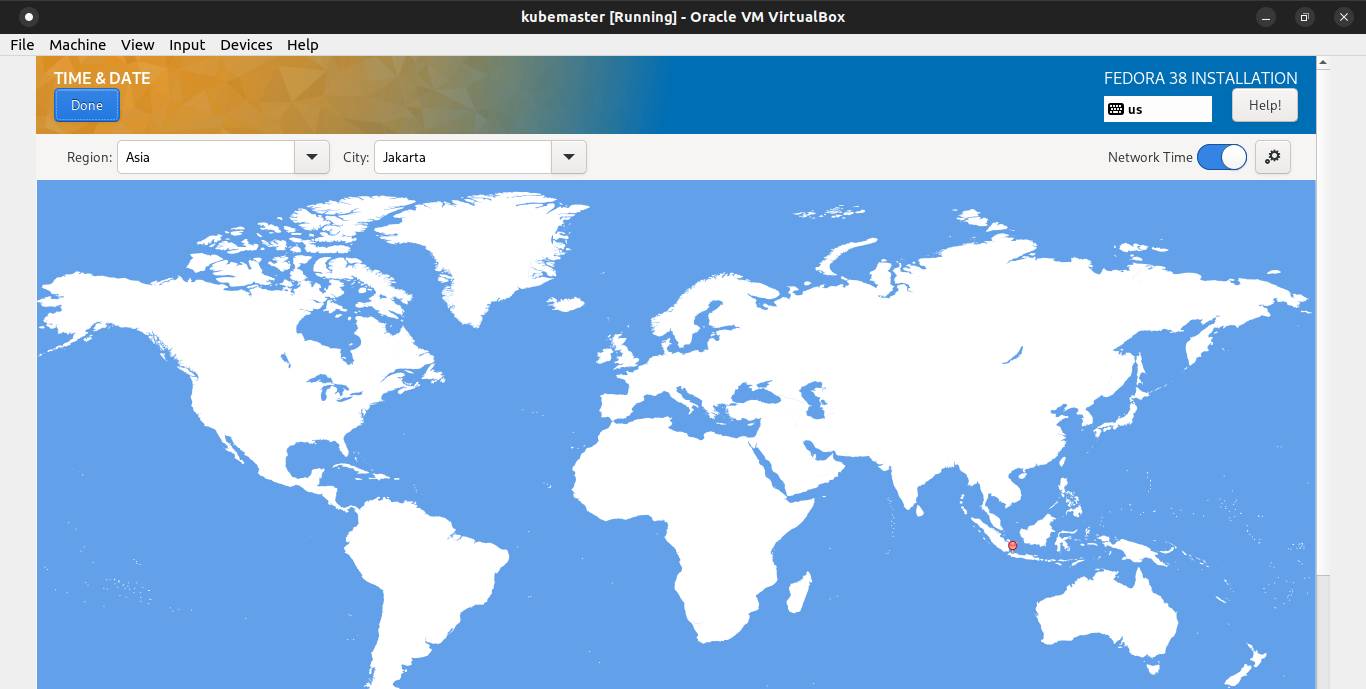
Configure Timezone.
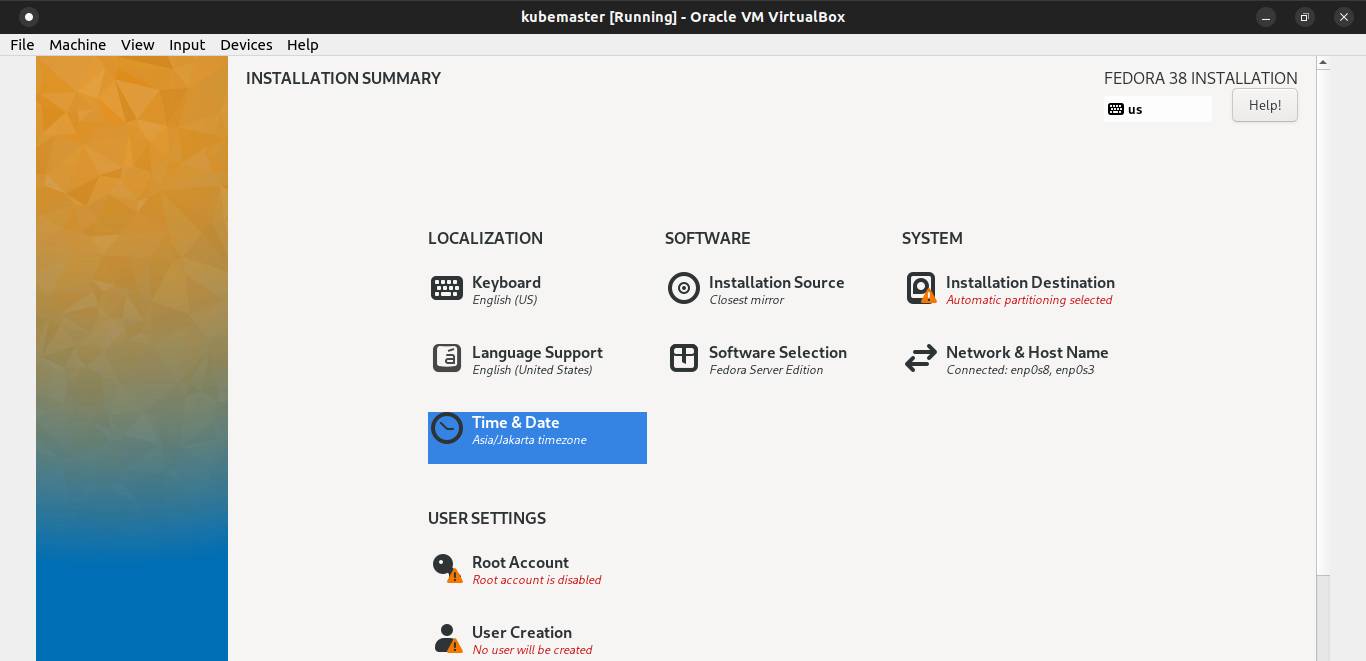
Select your region and city. Then click Done.
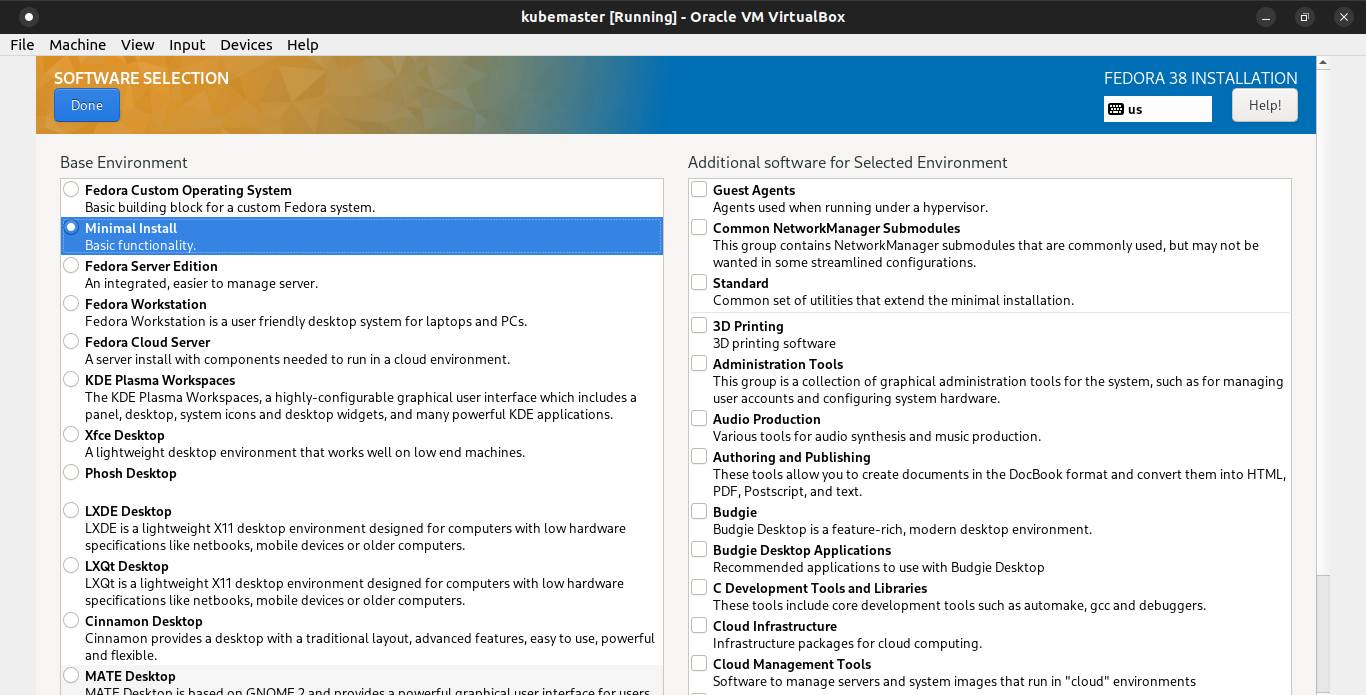
Configure Software Selection.
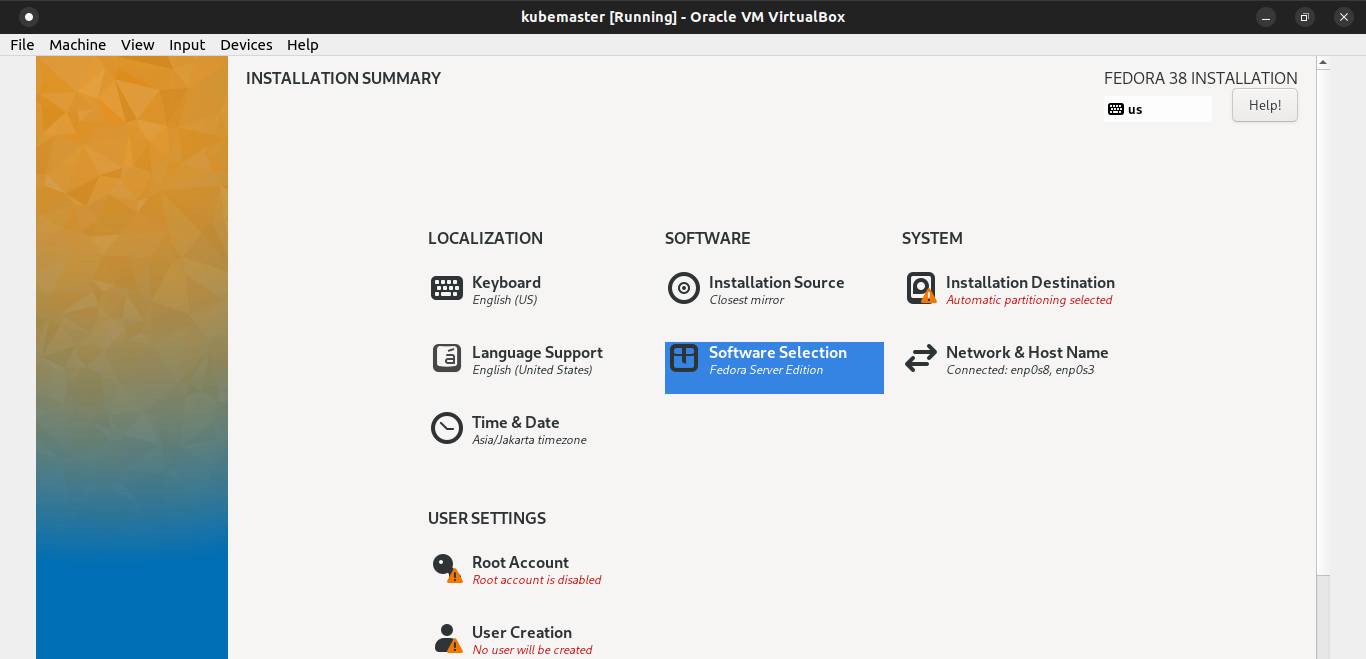
Select minimal install. Then click Done.
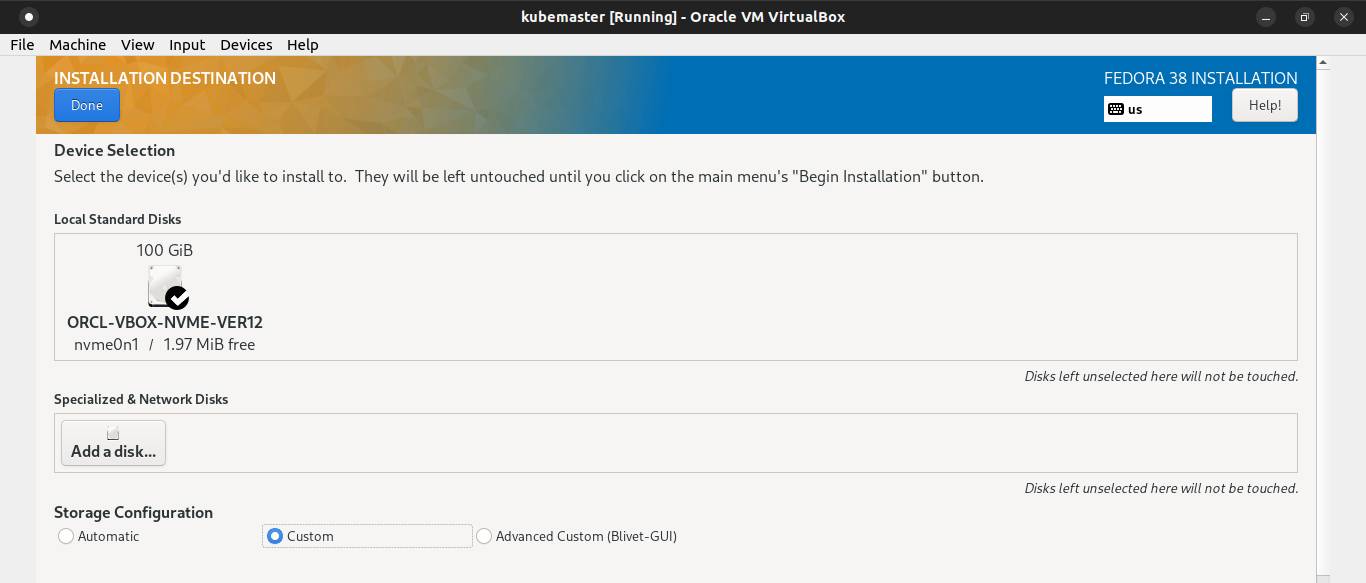
Configure installation destination.
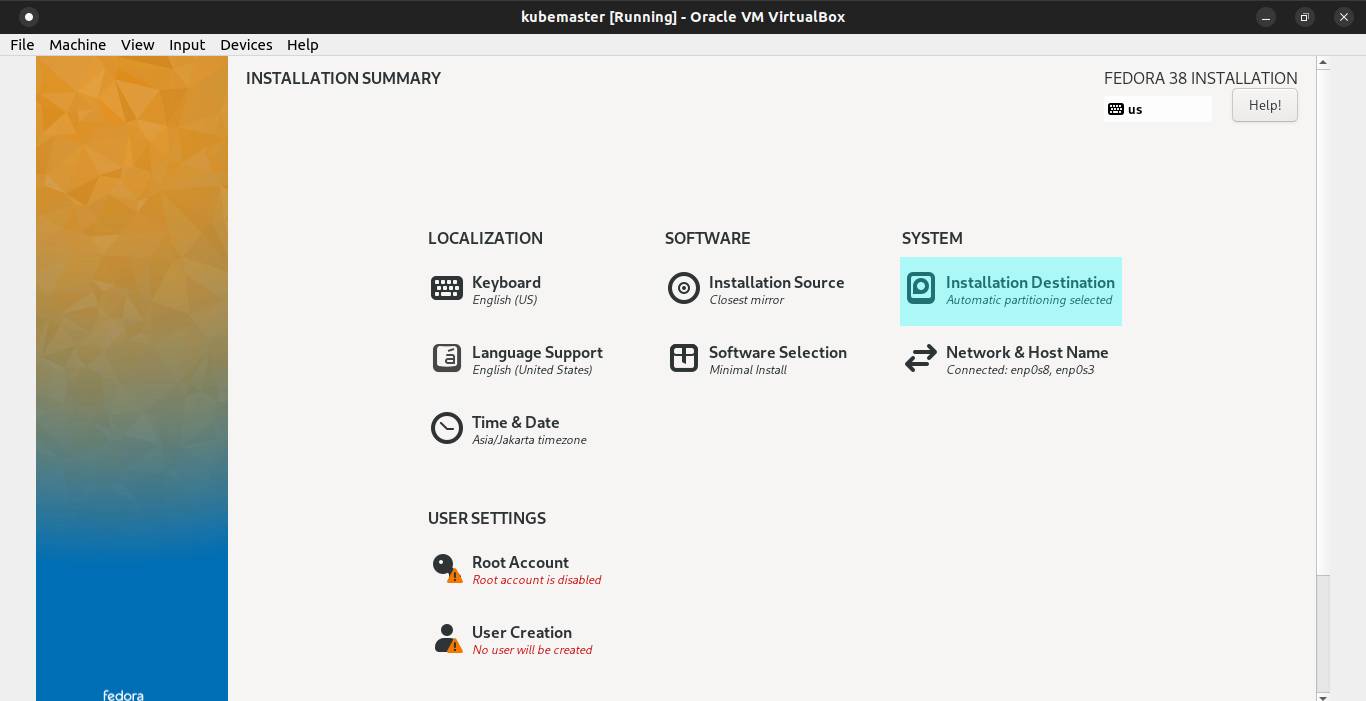
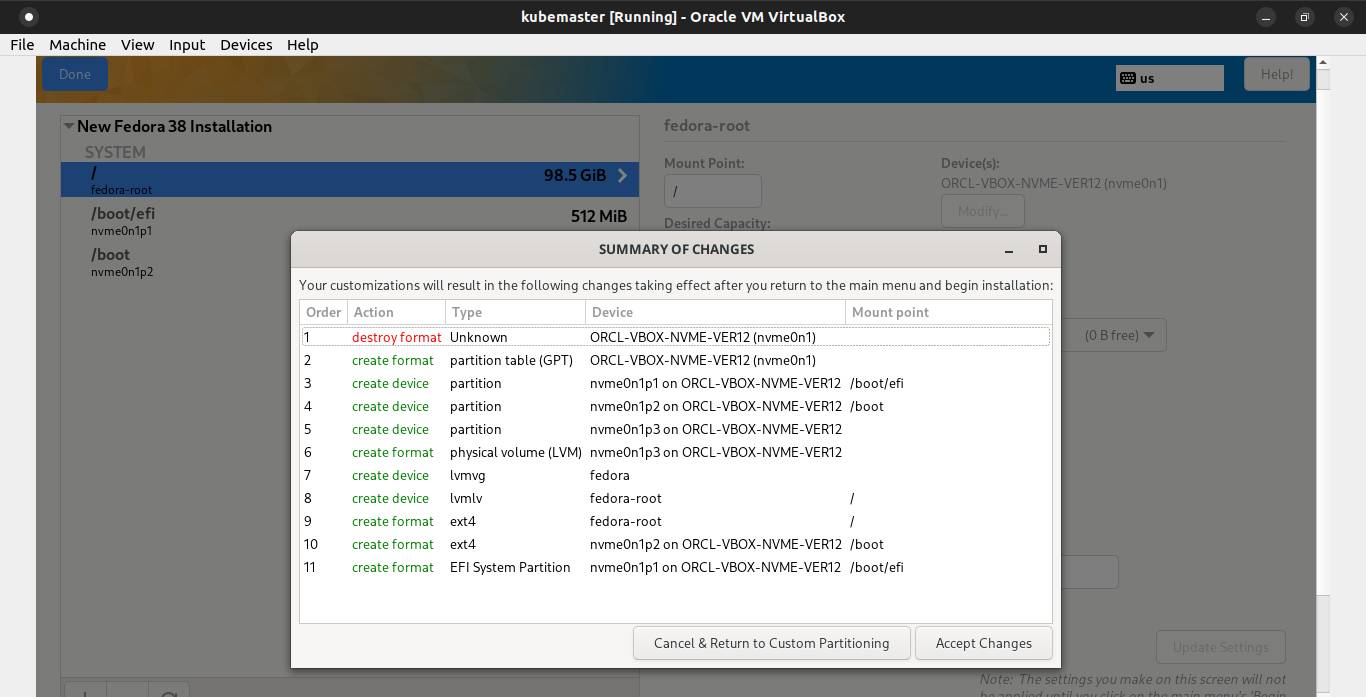
On the Storage Configuration, choose custom. Then click Done button.
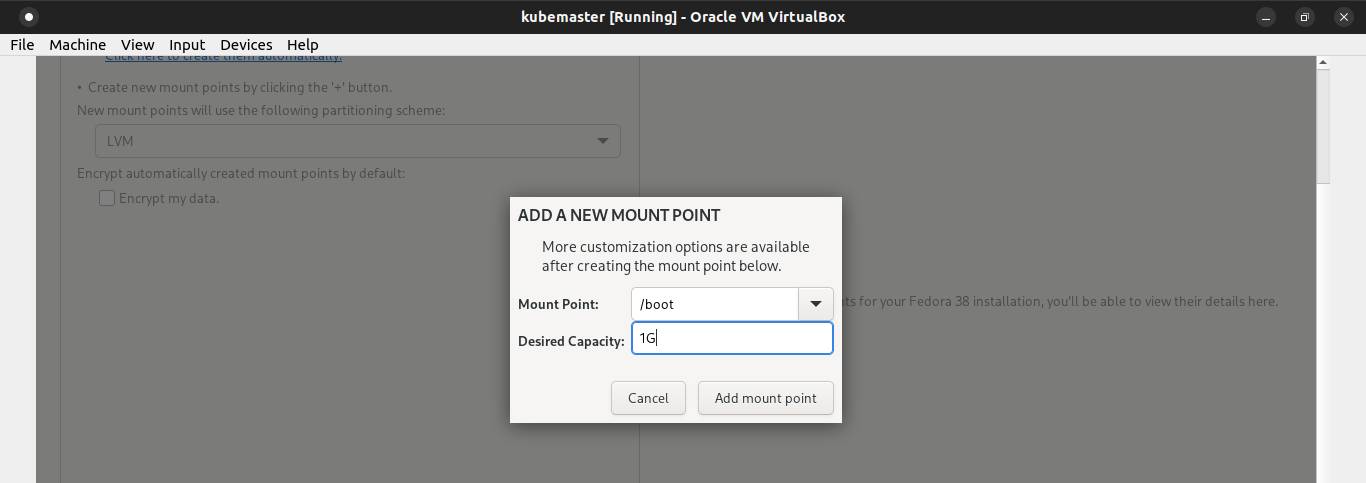
Choose LVM filesystem.

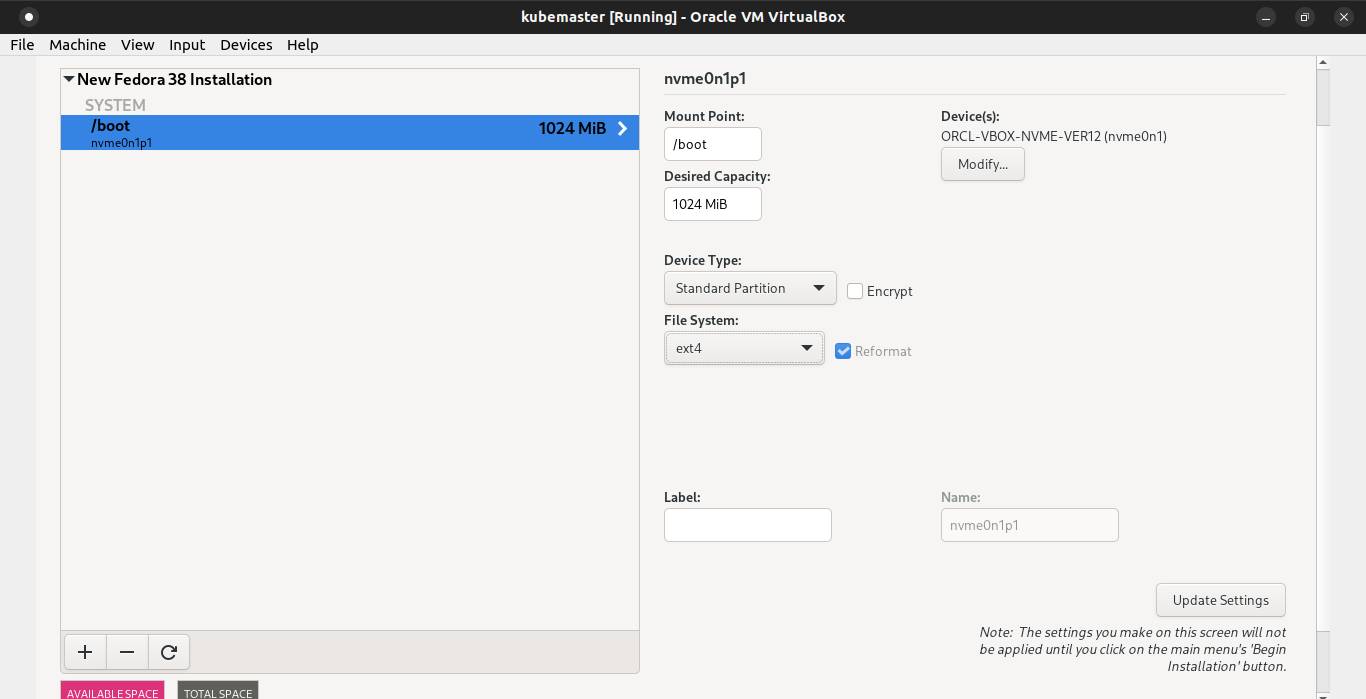
Then click the + symbol to add boot partition and the desired capacity 1GB. Click Add mount point button.
Pick ext4 as its default filesystem.
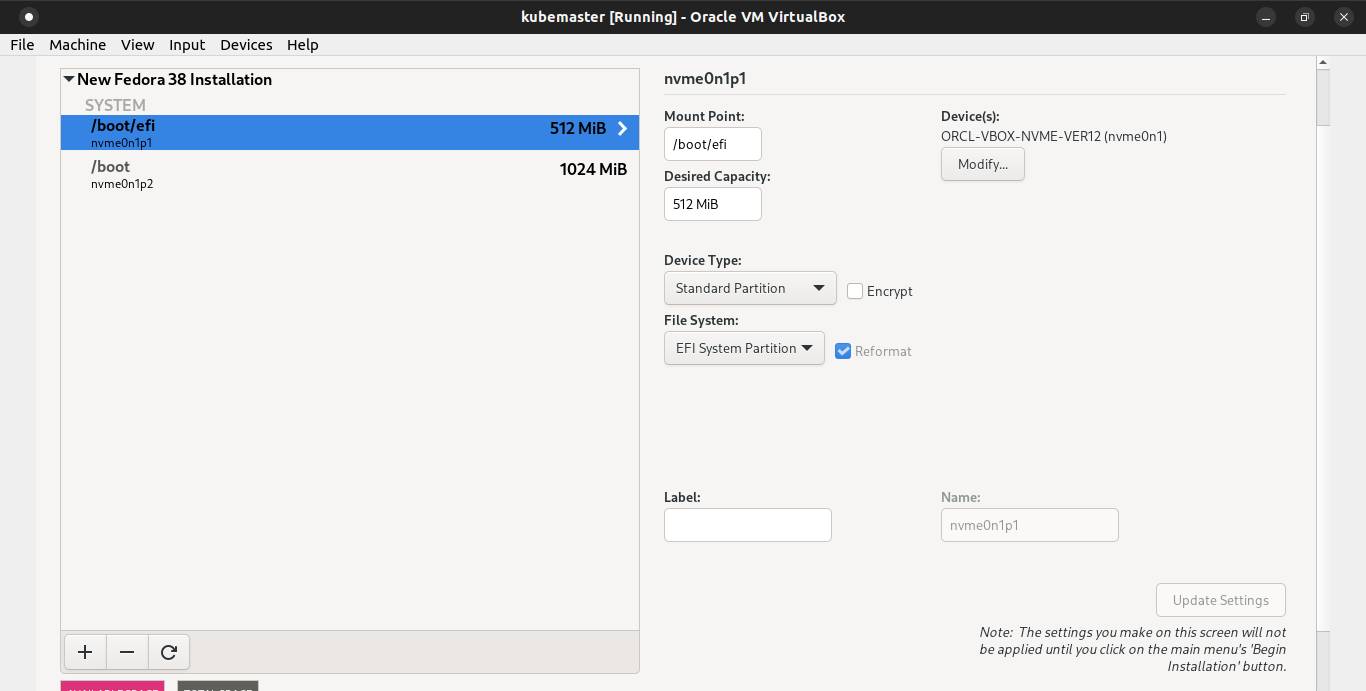
Click the + symbol again to add EFI partition and the desired capacity 512MB. Click Add mount point button.
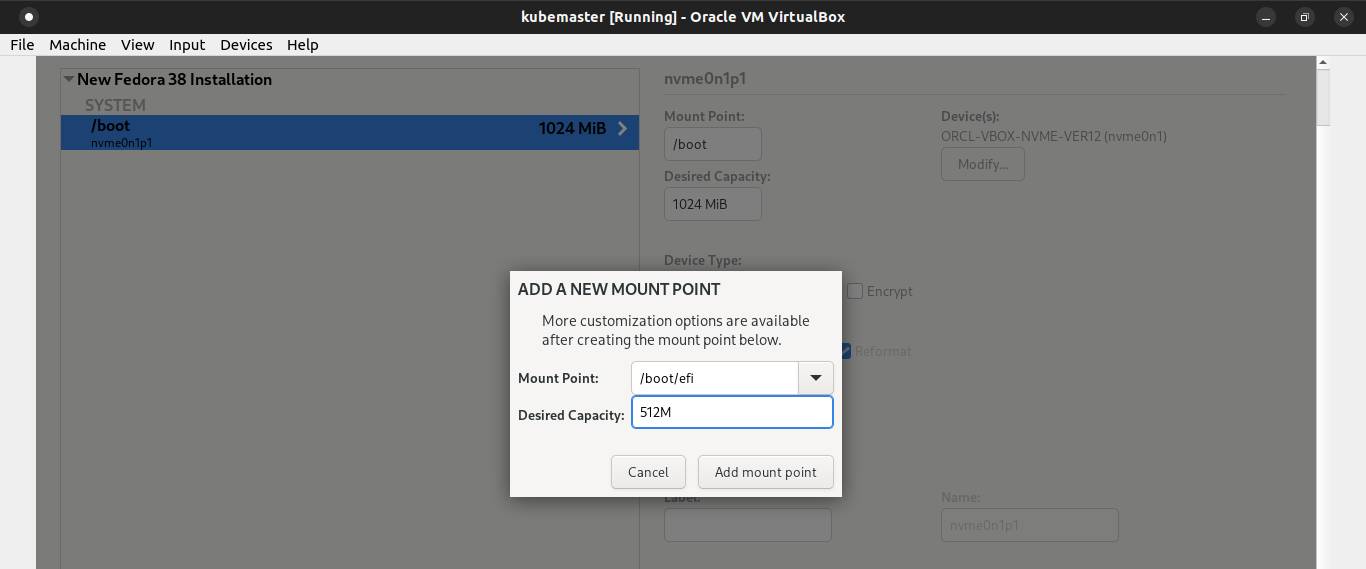
Pick EFI System Partition as its default filesystem.
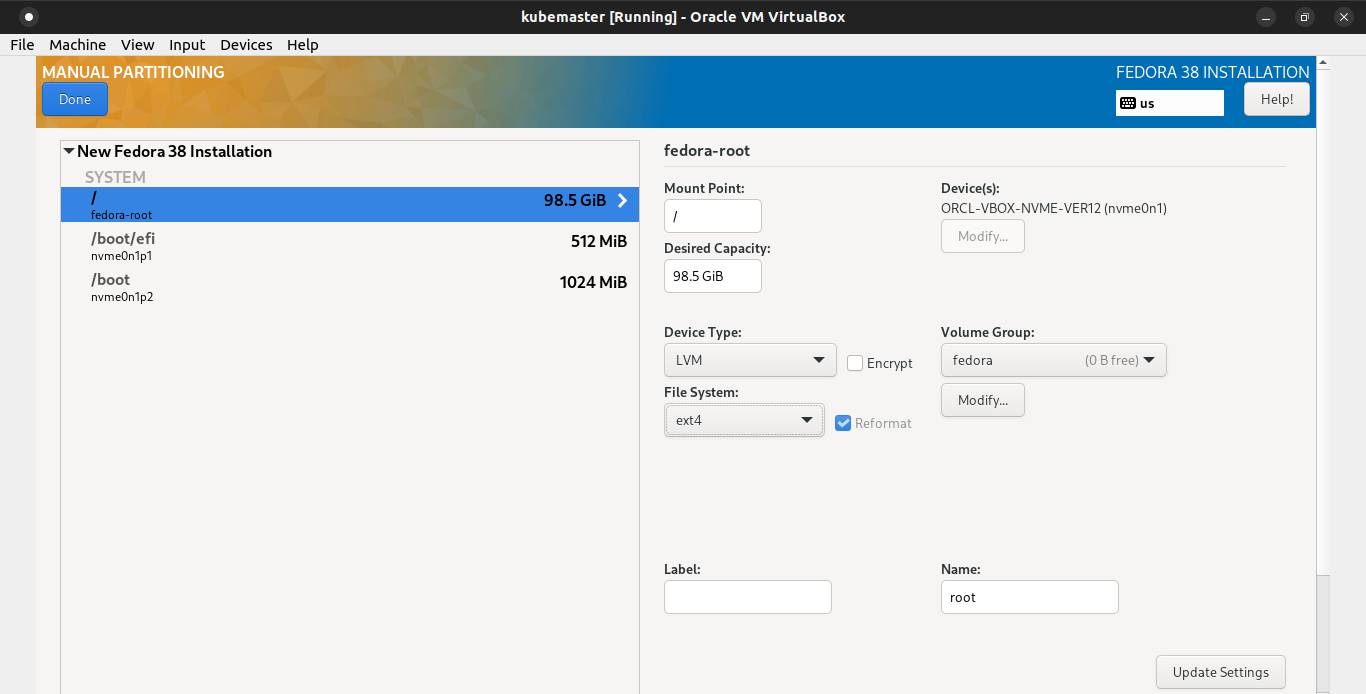
Click the + symbol again to add root partition and don't need to fill the desired capacity. Click Add mount point button.
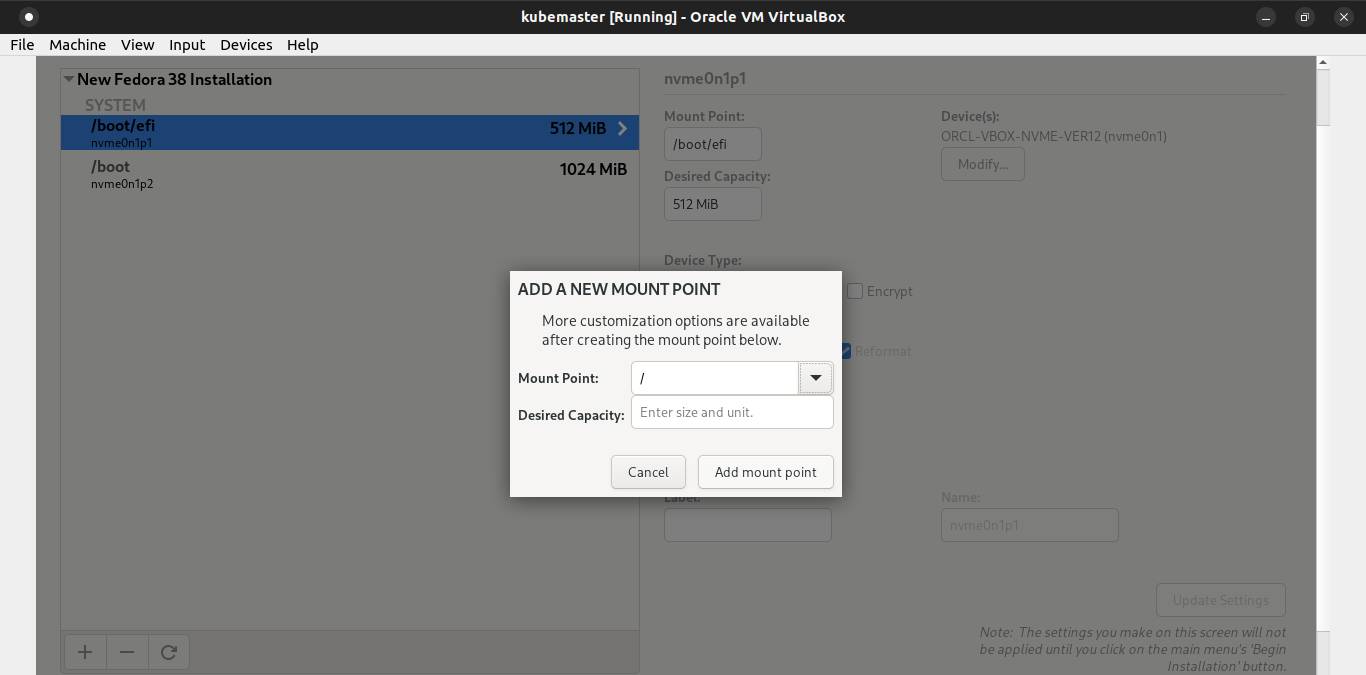
Pick LVM as its device type and ext4 ad its filesystem. Click Done button.
A window show up, and click Accept Changes.
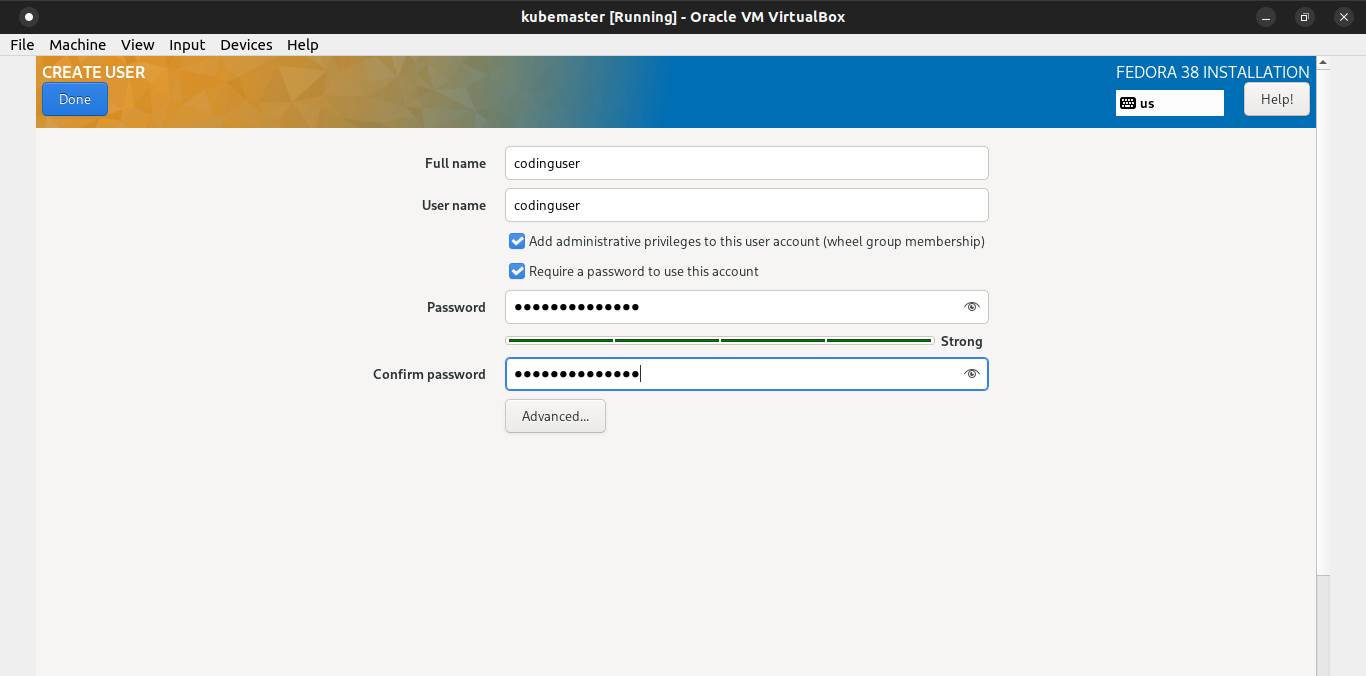
Next, configure the user creation.
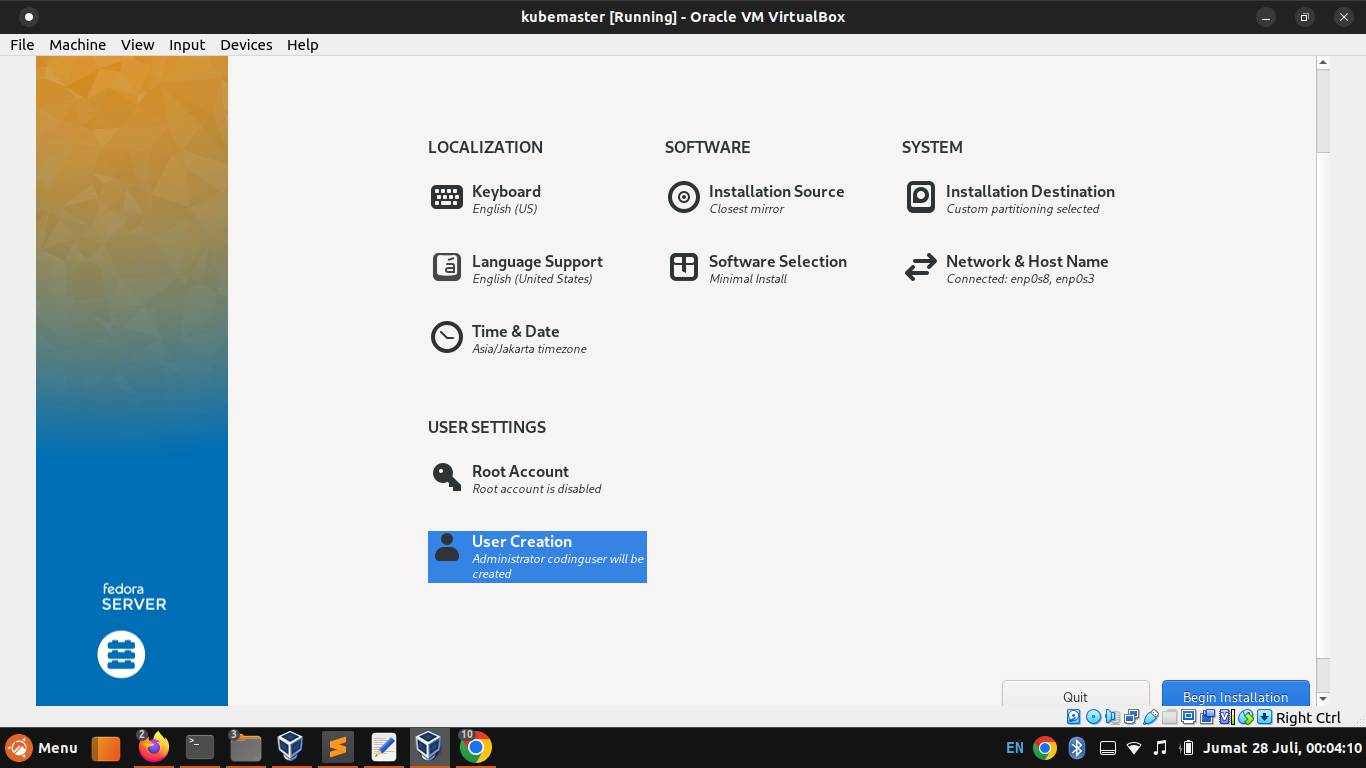
Create a common user account. Then click Done button.
After that, click Begin Installation button.
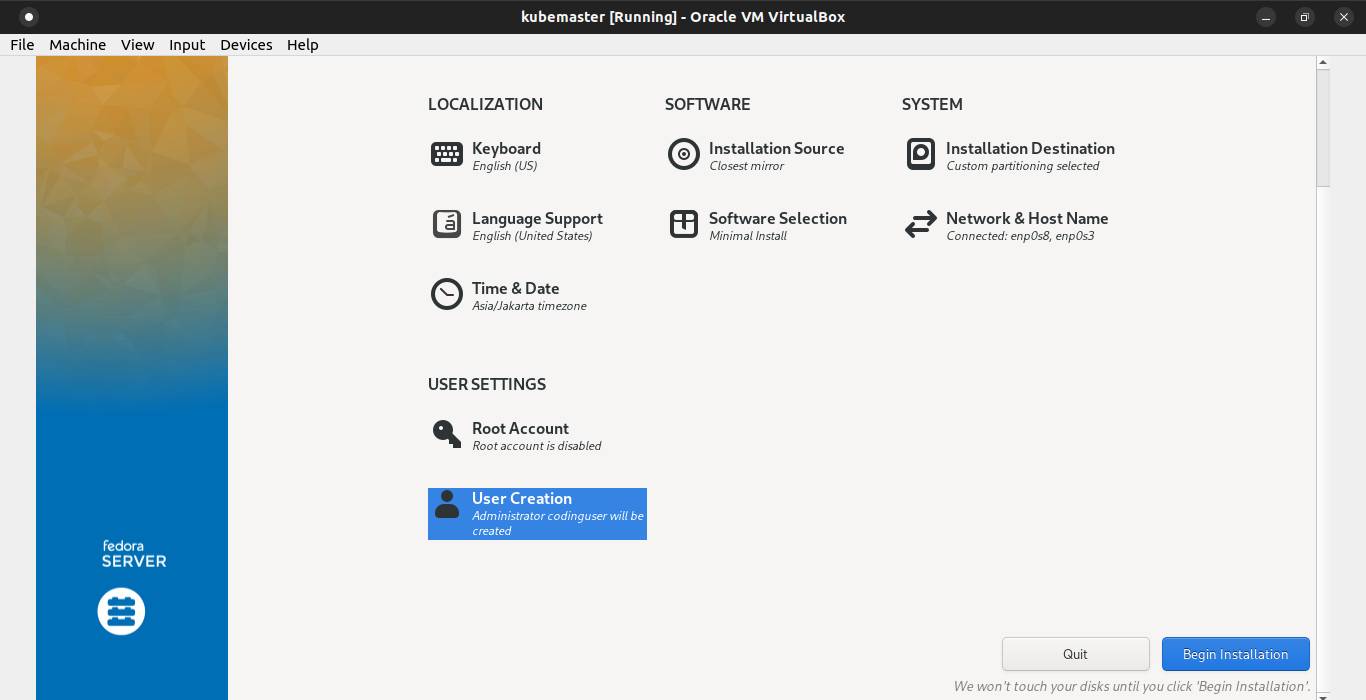
Once the Fedora 38 installation is completed, click Reboot System button.
Close the virtual machine. Then select Power off the machine and click on Ok button.
Open terminal, run the following command to clone the VM and make sure not be run as root:
VBoxManage clonevm "kubemaster" --basefolder=$HOME --mode=machine --name="kubeworker1" --register"kubemaster"is the VM name to be cloned--basefolder=$HOMEspecifies the name of the folder in which to save the configuration for the new VM--mode=machinespecifies to clone the current state of the existing VM without any snapshots--name="kubeworker1"specifies a new name for the new VM--registerspecifies to automatically register the new clone, so it will show up on the Virtualbox Manager without have to be added again
If the clone is successful, you will see the output similar to the following:
0%...10%...20%...30%...40%...50%...60%...70%...80%...90%...100%
Machine has been successfully cloned as "kubeworker1"
Setting Static IP Address on Master Node
Use ip command to identify the name of the ethernet interface you want to configure:
ip addr show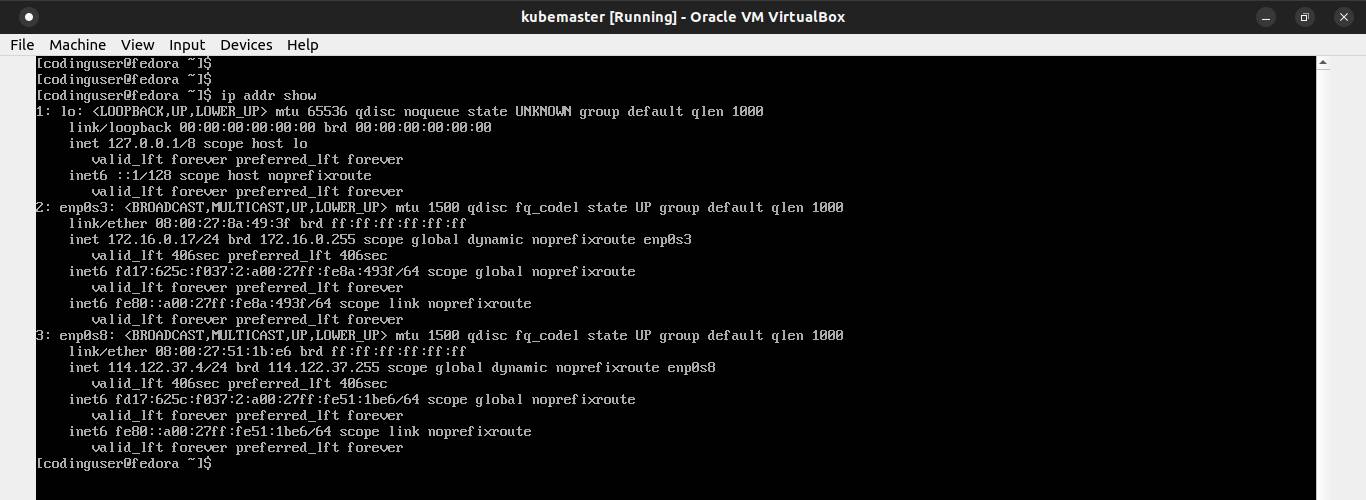
The interface named lo is the loopback interface, used for processes that communicate via the IP protocol. The important interfaces in the listing are enp0s3 and enp0s8, the Ethernet interfaces.
Add static IP address using nmcli command:
sudo nmcli connection modify enp0s3 ipv4.addresses 172.16.0.21/24sudo nmcli connection modify enp0s8 ipv4.addresses 114.122.37.100/24Add the gateway IP:
sudo nmcli connection modify enp0s3 ipv4.gateway 172.16.0.1sudo nmcli connection modify enp0s8 ipv4.gateway 114.122.37.1Add the dns IP address:
sudo nmcli connection modify enp0s3 ipv4.dns 172.16.0.1sudo nmcli connection modify enp0s8 ipv4.dns 114.122.37.1Change the addressing from DHCP to static.
sudo nmcli connection modify enp0s3 ipv4.method manualsudo nmcli connection modify enp0s8 ipv4.method manualTo make changes into the effect, disable and enable the connection:
sudo nmcli connection down enp0s3sudo nmcli connection up enp0s3sudo nmcli connection down enp0s8sudo nmcli connection up enp0s8Setting hostname on Master Node
Set the hostname using the following command:
sudo echo "kubemaster" > /etc/hostnameAdd the following line to /etc/hosts to map the hostname to a IP address:
172.16.0.21 kubemasterDisable systemd-resolved service on Master Node
The systemd-resolved service can be disabled with:
sudo systemctl stop systemd-resolved
sudo systemctl disable systemd-resolved
sudo systemctl mask systemd-resolved
Delete the symlink /etc/resolv.conf
sudo rm /etc/resolv.confCreate a new /etc/resolv.conf file:
sudo touch /etc/resolv.confAdd the following line to /etc/resolv.conf:
nameserver 172.16.0.1Install containerd (container runtime) on Master Node
First, install the required packages to run kubernetes:
sudo dnf -y install ethtool
sudo dnf -y install socat
sudo dnf -y install iproute-tc
sudo dnf -y install conntrack
sudo dnf -y install openssl
sudo dnf -y install tar
sudo dnf -y install net-tools
Next, you need to install a container runtime into each node in the cluster so that pods can run there.
Before install containerd, you need to enable overlay and br_netfilter kernel modules, and net.bridge.bridge-nf-call-iptables, net.bridge.bridge-nf-call-ip6tables, and net.ipv4.ip_forward kernel parameter.
overlay kernel module is required to enable Overlay filesystem support.
br_netfilter kernel module is required to enable transparent masquerading and to facilitate Virtual Extensible LAN (VxLAN) traffic for communication between Kubernetes pods across the cluster.
net.bridge.bridge-nf-call-iptables and net.bridge.bridge-nf-call-ip6tables kernel parameters is required to control whether or not packets traversing the bridge are sent to iptables for processing. In the case of using bridges to connect virtual machines to the network, generally such processing is *not* desired, as it results in guest traffic being blocked due to host iptables rules that only account for the host itself, and not for the guests.
net.ipv4.ip_forward kernel parameter is required to enable IP forwarding.
Create a file in the /etc/modules-load.d/ directory which contains kernel module names to be loaded at boot time.
cat <<EOF | sudo tee /etc/modules-load.d/k8s.conf
overlay
br_netfilter
EOF
Load overlay and br_netfilter kernel modules now using the modprobe command.
sudo modprobe overlay
sudo modprobe br_netfilter
Create a file in the /etc/sysctl.d/ directory which contains net.bridge.bridge-nf-call-iptables, net.bridge.bridge-nf-call-ip6tables, and net.ipv4.ip_forward kernel parameters to be set at boot time.
cat <<EOF | sudo tee /etc/sysctl.d/k8s.conf
net.bridge.bridge-nf-call-iptables  = 1
net.bridge.bridge-nf-call-ip6tables = 1
net.ipv4.ip_forward                 = 1
EOF
Apply the kernel parameters without reboot using sysctl command.
sudo sysctl --systemVerify that the br_netfilter, overlay modules are loaded by running the following commands:
lsmod | grep br_netfilter
lsmod | grep overlay
Verify that the net.bridge.bridge-nf-call-iptables, net.bridge.bridge-nf-call-ip6tables, and net.ipv4.ip_forward system variables are set to 1 in your sysctl config by running the following command:
sysctl net.bridge.bridge-nf-call-iptables net.bridge.bridge-nf-call-ip6tables net.ipv4.ip_forwardDownload the containerd from https://github.com/containerd/containerd/releases.
curl -OJL https://github.com/containerd/containerd/releases/download/v1.7.2/containerd-1.7.2-linux-amd64.tar.gzExtract the containerd under /usr/local
sudo tar Cxzvf /usr/local containerd-1.7.2-linux-amd64.tar.gzDownload the containerd.service unit file from https://raw.githubusercontent.com/containerd/containerd/main/containerd.service into /usr/lib/systemd/system/ directory
curl -o /usr/lib/systemd/system/containerd.service https://raw.githubusercontent.com/containerd/containerd/main/containerd.serviceReload systemd manager configuration and enable the containerd service.
sudo systemctl daemon-reload
sudo systemctl enable --now containerd
Download the runc binary from https://github.com/opencontainers/runc/releases and install it as /usr/local/sbin/runc.
curl -OJL https://github.com/opencontainers/runc/releases/download/v1.1.7/runc.amd64
sudo install -m 755 runc.amd64 /usr/local/sbin/runc
Download the cni-plugins from https://github.com/containernetworking/plugins/releases and extract it under /opt/cni/bin
curl -OJL https://github.com/containernetworking/plugins/releases/download/v1.3.0/cni-plugins-linux-amd64-v1.3.0.tgz
sudo mkdir -p /opt/cni/bin
sudo tar Cxzvf /opt/cni/bin cni-plugins-linux-amd64-v1.3.0.tgz
Once, we have successfully installed the Containerd. We need to load the Containerd configurations.
Create /etc/containerd directory and generate the confguration file using containerd command.
sudo mkdir -p /etc/containerd
sudo containerd config default > /etc/containerd/config.toml
Open the configuration file /etc/containerd/config.toml and set SystemdCgroup = true
[plugins."io.containerd.grpc.v1.cri".containerd.runtimes.runc]
  ...
  [plugins."io.containerd.grpc.v1.cri".containerd.runtimes.runc.options]
    SystemdCgroup = true
To apply the changes, restart the containerd service.
sudo systemctl restart containerdInstall kubectl, kubeadm, and kubelet on Master Node
You will install these packages on all of your nodes (master node and worker node):
kubeadm: the command to bootstrap the clusterkubelet: the component that runs on all of the machines in your cluster and does things like starting pods and containerskubectl: the command line util to talk to your cluster.
Kubernetes versions are expressed as x.y.z, where x is the major version, y is the minor version, and z is the patch version.
kubelet, kube-proxy, kube-controller-manager, kube-scheduler, and cloud-controller-manager version must not be newer than kube-apiserver version.
The requirements of kubeadm before you begin to install.
- 2 GB or more of RAM per node (master node or worker node)
- 2 CPUs or more
- Check hostname, machine ID, MAC address, and product_uuid for every node are unique
- Check required ports
- Swap disabled
You can get the hostname using the command cat /etc/hostname.
To change the hostname, edit the /etc/hostname file.
You can get the machine ID using the command cat /etc/machine-id.
To generate the new machine ID, first remove the /etc/machine-id file. Then generate the new one using this command:
systemd-machine-id-setupYou can get the MAC address of the network interfaces using the command ip link.
To generate the new MAC address of the network interfaces, run the following command on terminal.
VBoxManage modifyvm "kubemaster" --macaddress1 auto"kubemaster"is the VM name--macaddress1is the MAC address of the first network interface
To list the network interfaces of your VM, run the following command:
VBoxManage showvminfo kubemaster | grep NICThe output should be similar to:
NIC 1:                       MAC: 080027EECD2E, Attachment: NAT Network 'natnet1', Cable connected: on, Trace: off (file: none), Type: 82540EM, Reported speed: 0 Mbps, Boot priority: 0, Promisc Policy: deny, Bandwidth group: none
NIC 2:                       disabled
NIC 3:                       disabled
NIC 4:                       disabled
NIC 5:                       disabled
NIC 6:                       disabled
NIC 7:                       disabled
NIC 8:                       disabled
You can get the product_uuid using the command sudo cat /sys/class/dmi/id/product_uuid.
To generate the new product_uuid, run the command three times on terminal and make sure not be run as root:
VBoxManage internalcommands sethduuid "$HOME/kubemaster/kubemaster.vdi"
        VBoxManage internalcommands sethduuid "$HOME/kubemaster/kubemaster.vdi"
        VBoxManage internalcommands sethduuid "$HOME/kubemaster/kubemaster.vdi"
The output should be similar to:
UUID changed to: 35ddda67-7a61-4c6f-b6ed-31a4a442af8b
UUID changed to: 2fd3c5d1-362e-4db5-a67b-84d67c57cde0
UUID changed to: 23338733-eac6-471e-bbf5-4f9414fcca61
The first UUID will be used as Machine uuid and Hardware uuid.
Edit $HOME/kubemaster/kubemaster.vbox file. Find the Machine uuid and Hardware uuid and change to 35ddda67-7a61-4c6f-b6ed-31a4a442af8b.
<Machine uuid="{35ddda67-7a61-4c6f-b6ed-31a4a442af8b}" name="kubeworker1" OSType="RedHat_64" snapshotFolder="Snapshots" lastStateChange="2023-07-13T10:05:46Z">
    ...
</Machine>
<Hardware uuid="{35ddda67-7a61-4c6f-b6ed-31a4a442af8b}">
...
</Hardware>The second UUID will be used as System uuid. To set System uuid, run the command:
VBoxManage setextradata "kubemaster" "VBoxInternal/Devices/efi/0/Config/DmiSystemUuid" "2fd3c5d1-362e-4db5-a67b-84d67c57cde0"The third UUID will be used as Harddisk uuid and Image uuid.
Edit $HOME/kubemaster/kubemaster.vbox file. Find the Harddisk uuid and Image uuid and change to 941f4e75-d29f-4c58-93d5-53172c07e50e.
<HardDisks>
        <HardDisk uuid="{941f4e75-d29f-4c58-93d5-53172c07e50e}" location="kubemaster.vdi" format="VDI" type="Normal"/>
      </HardDisks>
<StorageController name="NVMe" type="NVMe" PortCount="1" useHostIOCache="false" Bootable="true">
<AttachedDevice type="HardDisk" hotpluggable="false" port="0" device="0">
<Image uuid="{941f4e75-d29f-4c58-93d5-53172c07e50e}"/>
</AttachedDevice>
</StorageController>Detach and remove the storage medium from the VM:
VBoxManage storageattach kubemaster --storagectl "NVMe" --port 0 --device 0 --medium nonefedoraworker1specifies the VM name--storagectlspecifies the name of the storage controller--portspecifies the number of the storage controller's port--devicespecifies the number of the port's device--medium nonespecifies to remove storage medium
Remove the storage medium from VirtualBox media registry.
VBoxManage closemedium disk "$HOME/kubemaster/kubemaster.vdi"Then attach the storage medium to the VM:
VBoxManage storageattach "kubemaster" --storagectl "NVMe" --port 0 --device 0 --type hdd --medium $HOME/kubemaster/kubemaster.vdiThe ports required for master node are:
| Protocol | Port Range | Used By |
|---|---|---|
| TCP | 6443 | kube-apiserver |
| TCP | 2379-2380 | kube-apiserver, etcd |
| TCP | 10250 | Kubelet API |
| TCP | 10259 | kube-scheduler |
| TCP | 10257 | kube-controller-manager |
The ports are required to be open in the firewall.
sudo firewall-cmd --permanent --add-port=6443/tcp
sudo firewall-cmd --permanent --add-port=2379-2380/tcp
sudo firewall-cmd --permanent --add-port=10250/tcp
sudo firewall-cmd --permanent --add-port=10259/tcp
sudo firewall-cmd --permanent --add-port=10257/tcp
sudo firewall-cmd --permanent --add-port=9153/tcp
sudo firewall-cmd --permanent --add-port=53/tcp
sudo firewall-cmd --permanent --add-port=53/udp
sudo firewall-cmd --permanent --add-masquerade
sudo firewall-cmd --reload
Swap must be disabled in order for the kubelet to work properly. To check if swap is active:
cat /proc/meminfo | grep Swapto see total swap, and free swapcat /proc/swapsandswapon -sto see which swap devices are being usedvmstatfor current virtual memory statistics
To permanently disable swap:
- Open the
/etc/fstabfile, search for a swap line and add a # (hashtag) sign in front of the line to comment on the entire line - The swap-on-zram feature can be disabled with:
sudo systemctl stop systemd-zram-setup@zram0
sudo systemctl disable systemd-zram-setup@zram0
sudo systemctl mask systemd-zram-setup@zram0 - Run
swapoff -vato disable memory swapping
Download the latest release kubectl with the command:
curl -LO "https://dl.k8s.io/release/$(curl -L -s https://dl.k8s.io/release/stable.txt)/bin/linux/amd64/kubectl"Download the kubectl checksum file:
curl -LO "https://dl.k8s.io/$(curl -L -s https://dl.k8s.io/release/stable.txt)/bin/linux/amd64/kubectl.sha256"Validate the kubectl binary against the checksum file:
echo "$(cat kubectl.sha256) kubectl" | sha256sum --checkIf valid, the output is:
kubectl: OKInstall kubectl:
sudo install -o root -g root -m 0755 kubectl /usr/local/bin/kubectlCheck the kubectl version you installed:
kubectl version --shortInstall CNI plugins (required for most pod network):
CNI_PLUGINS_VERSION="v1.3.0"
ARCH="amd64"
DEST="/opt/cni/bin"
sudo mkdir -p "$DEST"
curl -L "https://github.com/containernetworking/plugins/releases/download/${CNI_PLUGINS_VERSION}/cni-plugins-linux-${ARCH}-${CNI_PLUGINS_VERSION}.tgz" | sudo tar -C "$DEST" -xz
Define the directory to download command files:
DOWNLOAD_DIR="/usr/local/bin"
sudo mkdir -p "$DOWNLOAD_DIR"
Install crictl (required for kubeadm/kubelet Container Runtime Interface (CRI)).
CRICTL_VERSION="v1.27.0"
ARCH="amd64"
curl -L "https://github.com/kubernetes-sigs/cri-tools/releases/download/${CRICTL_VERSION}/crictl-${CRICTL_VERSION}-linux-${ARCH}.tar.gz" | sudo tar -C $DOWNLOAD_DIR -xz
Install kubeadm, kubelet, kubectl and add a kubelet systemd service:
RELEASE="$(curl -sSL https://dl.k8s.io/release/stable.txt)"
ARCH="amd64"
cd $DOWNLOAD_DIR
sudo curl -L --remote-name-all https://dl.k8s.io/release/${RELEASE}/bin/linux/${ARCH}/{kubeadm,kubelet}
sudo chmod +x {kubeadm,kubelet}
cd -
RELEASE_VERSION="v0.15.1"
curl -sSL "https://raw.githubusercontent.com/kubernetes/release/${RELEASE_VERSION}/cmd/kubepkg/templates/latest/deb/kubelet/lib/systemd/system/kubelet.service" | sed "s:/usr/bin:${DOWNLOAD_DIR}:g" | sudo tee /etc/systemd/system/kubelet.service
sudo mkdir -p /etc/systemd/system/kubelet.service.d
curl -sSL "https://raw.githubusercontent.com/kubernetes/release/${RELEASE_VERSION}/cmd/kubepkg/templates/latest/deb/kubeadm/10-kubeadm.conf" | sed "s:/usr/bin:${DOWNLOAD_DIR}:g" | sudo tee /etc/systemd/system/kubelet.service.d/10-kubeadm.confCreate /etc/kubernetes/manifests directory where kubelet should look for static Pod manifests.
mkdir -p /etc/kubernetes/manifestsEnable and start kubelet:
sudo systemctl enable --now kubeletNow let's initialize the cluster on master node by passing a flag that is later needed for the container network.
sudo kubeadm init --pod-network-cidr=192.168.0.0/16 --control-plane-endpoint=kubemasterIf the cluster initialization is success, it will print output similar to follow:
[init] Using Kubernetes version: v1.27.3
[preflight] Running pre-flight checks
    [WARNING Firewalld]: firewalld is active, please ensure ports [6443 10250] are open or your cluster may not function correctly
[preflight] Pulling images required for setting up a Kubernetes cluster
[preflight] This might take a minute or two, depending on the speed of your internet connection
[preflight] You can also perform this action in beforehand using 'kubeadm config images pull'
W0719 21:22:19.276005     867 checks.go:835] detected that the sandbox image "registry.k8s.io/pause:3.8" of the container runtime is inconsistent with that used by kubeadm. It is recommended that using "registry.k8s.io/pause:3.9" as the CRI sandbox image.
[certs] Using certificateDir folder "/etc/kubernetes/pki"
[certs] Generating "ca" certificate and key
[certs] Generating "apiserver" certificate and key
[certs] apiserver serving cert is signed for DNS names [kubemaster kubernetes kubernetes.default kubernetes.default.svc kubernetes.default.svc.cluster.local] and IPs [10.96.0.1 172.16.0.21]
[certs] Generating "apiserver-kubelet-client" certificate and key
[certs] Generating "front-proxy-ca" certificate and key
[certs] Generating "front-proxy-client" certificate and key
[certs] Generating "etcd/ca" certificate and key
[certs] Generating "etcd/server" certificate and key
[certs] etcd/server serving cert is signed for DNS names [kubemaster localhost] and IPs [172.16.0.21 127.0.0.1 ::1]
[certs] Generating "etcd/peer" certificate and key
[certs] etcd/peer serving cert is signed for DNS names [kubemaster localhost] and IPs [172.16.0.21 127.0.0.1 ::1]
[certs] Generating "etcd/healthcheck-client" certificate and key
[certs] Generating "apiserver-etcd-client" certificate and key
[certs] Generating "sa" key and public key
[kubeconfig] Using kubeconfig folder "/etc/kubernetes"
[kubeconfig] Writing "admin.conf" kubeconfig file
[kubeconfig] Writing "kubelet.conf" kubeconfig file
[kubeconfig] Writing "controller-manager.conf" kubeconfig file
[kubeconfig] Writing "scheduler.conf" kubeconfig file
[kubelet-start] Writing kubelet environment file with flags to file "/var/lib/kubelet/kubeadm-flags.env"
[kubelet-start] Writing kubelet configuration to file "/var/lib/kubelet/config.yaml"
[kubelet-start] Starting the kubelet
[control-plane] Using manifest folder "/etc/kubernetes/manifests"
[control-plane] Creating static Pod manifest for "kube-apiserver"
[control-plane] Creating static Pod manifest for "kube-controller-manager"
[control-plane] Creating static Pod manifest for "kube-scheduler"
[etcd] Creating static Pod manifest for local etcd in "/etc/kubernetes/manifests"
[wait-control-plane] Waiting for the kubelet to boot up the control plane as static Pods from directory "/etc/kubernetes/manifests". This can take up to 4m0s
[apiclient] All control plane components are healthy after 18.503832 seconds
[upload-config] Storing the configuration used in ConfigMap "kubeadm-config" in the "kube-system" Namespace
[kubelet] Creating a ConfigMap "kubelet-config" in namespace kube-system with the configuration for the kubelets in the cluster
[upload-certs] Skipping phase. Please see --upload-certs
[mark-control-plane] Marking the node kubemaster as control-plane by adding the labels: [node-role.kubernetes.io/control-plane node.kubernetes.io/exclude-from-external-load-balancers]
[mark-control-plane] Marking the node kubemaster as control-plane by adding the taints [node-role.kubernetes.io/control-plane:NoSchedule]
[bootstrap-token] Using token: nr9zk2.2ysjxp5tceb5h83t
[bootstrap-token] Configuring bootstrap tokens, cluster-info ConfigMap, RBAC Roles
[bootstrap-token] Configured RBAC rules to allow Node Bootstrap tokens to get nodes
[bootstrap-token] Configured RBAC rules to allow Node Bootstrap tokens to post CSRs in order for nodes to get long term certificate credentials
[bootstrap-token] Configured RBAC rules to allow the csrapprover controller automatically approve CSRs from a Node Bootstrap Token
[bootstrap-token] Configured RBAC rules to allow certificate rotation for all node client certificates in the cluster
[bootstrap-token] Creating the "cluster-info" ConfigMap in the "kube-public" namespace
[kubelet-finalize] Updating "/etc/kubernetes/kubelet.conf" to point to a rotatable kubelet client certificate and key
[addons] Applied essential addon: CoreDNS
[addons] Applied essential addon: kube-proxy

Your Kubernetes control-plane has initialized successfully!

To start using your cluster, you need to run the following as a regular user:

  mkdir -p $HOME/.kube
  sudo cp -i /etc/kubernetes/admin.conf $HOME/.kube/config
  sudo chown $(id -u):$(id -g) $HOME/.kube/config

Alternatively, if you are the root user, you can run:

  export KUBECONFIG=/etc/kubernetes/admin.conf

You should now deploy a pod network to the cluster.
Run "kubectl apply -f [podnetwork].yaml" with one of the options listed at:
  https://kubernetes.io/docs/concepts/cluster-administration/addons/

You can now join any number of control-plane nodes by copying certificate authorities
and service account keys on each node and then running the following as root:

  kubeadm join kubemaster:6443 --token nr9zk2.2ysjxp5tceb5h83t \
    --discovery-token-ca-cert-hash sha256:ff308c648fefa963b3f5f7ac320141b33c761a58ed62c0087ae382db3b98e653 \
    --control-plane

Then you can join any number of worker nodes by running the following on each as root:

kubeadm join kubemaster:6443 --token nr9zk2.2ysjxp5tceb5h83t \
    --discovery-token-ca-cert-hash sha256:ff308c648fefa963b3f5f7ac320141b33c761a58ed62c0087ae382db3b98e653
To start using your cluster, you need to run the following as a regular user:
sudo mkdir -p $HOME/.kube
sudo cp -i /etc/kubernetes/admin.conf $HOME/.kube/config
sudo chown $(id -u):$(id -g) $HOME/.kube/config
Alternatively, if you are the root user, you can run:
export KUBECONFIG=/etc/kubernetes/admin.confCheck if kubectl is working:
kubectl get nodesIf kubectl is working then it will show output similar to:
NAME         STATUS     ROLES           AGE    VERSION
kubemaster   NotReady   control-plane   4m2s   v1.27.3
kubectl taint node fedoramaster node.kubernetes.io/not-ready:NoSchedule-
The status will be NotReady as we haven't set up our networking yet.
To list all namespaces, use the command:
kubectl get namespacesThe response should look similar to this:
NAME              STATUS   AGE
default           Active   8m26s
kube-node-lease   Active   8m26s
kube-public       Active   8m27s
kube-system       Active   8m27s
To list all resources in default namespace, use the command:
kubectl get allNAME TYPE CLUSTER-IP EXTERNAL-IP PORT(S) AGE
service/kubernetes ClusterIP 10.96.0.1 <none> 443/TCP 5m37sTo list all resources in kube-system namespace, use the command:
kubectl get all -n kube-systemThe response should look similar to this:
NAME                                     READY   STATUS    RESTARTS   AGE
pod/coredns-5d78c9869d-ckcr4             0/1     Pending   0          2m31s
pod/coredns-5d78c9869d-fljqv             0/1     Pending   0          2m31s
pod/etcd-kubemaster                      1/1     Running   0          2m44s
pod/kube-apiserver-kubemaster            1/1     Running   0          2m43s
pod/kube-controller-manager-kubemaster   1/1     Running   0          2m43s
pod/kube-proxy-6bj2x                     1/1     Running   0          2m32s
pod/kube-scheduler-kubemaster            1/1     Running   0          2m43s

NAME               TYPE        CLUSTER-IP   EXTERNAL-IP   PORT(S)                  AGE
service/kube-dns   ClusterIP   10.96.0.10   <none>        53/UDP,53/TCP,9153/TCP   2m43s

NAME                        DESIRED   CURRENT   READY   UP-TO-DATE   AVAILABLE   NODE SELECTOR            AGE
daemonset.apps/kube-proxy   1         1         1       1            1           kubernetes.io/os=linux   2m43s

NAME                      READY   UP-TO-DATE   AVAILABLE   AGE
deployment.apps/coredns   0/2     2            0           2m44s

NAME                                 DESIRED   CURRENT   READY   AGE
replicaset.apps/coredns-5d78c9869d   2         2         0       2m32s
Install calico (container network) on Master Node
The ports required for master node are:
| Protocol | Port Range | Used By |
|---|---|---|
| TCP | 179 | Calico BGP Port |
| TCP | 5473 | Calico Typha |
The ports are required to be open in the firewall.
sudo firewall-cmd --permanent --add-port=179/tcp
sudo firewall-cmd --permanent --add-port=5473/tcp
sudo firewall-cmd --reload
Download the tigera operator manifest file.
curl -OJL https://raw.githubusercontent.com/projectcalico/calico/v3.26.1/manifests/tigera-operator.yamlApply the manifest using the following command:
kubectl create -f tigera-operator.yamlThe response should look similar to this:
namespace/tigera-operator created
customresourcedefinition.apiextensions.k8s.io/bgpconfigurations.crd.projectcalico.org created
customresourcedefinition.apiextensions.k8s.io/bgpfilters.crd.projectcalico.org created
customresourcedefinition.apiextensions.k8s.io/bgppeers.crd.projectcalico.org created
customresourcedefinition.apiextensions.k8s.io/blockaffinities.crd.projectcalico.org created
customresourcedefinition.apiextensions.k8s.io/caliconodestatuses.crd.projectcalico.org created
customresourcedefinition.apiextensions.k8s.io/clusterinformations.crd.projectcalico.org created
customresourcedefinition.apiextensions.k8s.io/felixconfigurations.crd.projectcalico.org created
customresourcedefinition.apiextensions.k8s.io/globalnetworkpolicies.crd.projectcalico.org created
customresourcedefinition.apiextensions.k8s.io/globalnetworksets.crd.projectcalico.org created
customresourcedefinition.apiextensions.k8s.io/hostendpoints.crd.projectcalico.org created
customresourcedefinition.apiextensions.k8s.io/ipamblocks.crd.projectcalico.org created
customresourcedefinition.apiextensions.k8s.io/ipamconfigs.crd.projectcalico.org created
customresourcedefinition.apiextensions.k8s.io/ipamhandles.crd.projectcalico.org created
customresourcedefinition.apiextensions.k8s.io/ippools.crd.projectcalico.org created
customresourcedefinition.apiextensions.k8s.io/ipreservations.crd.projectcalico.org created
customresourcedefinition.apiextensions.k8s.io/kubecontrollersconfigurations.crd.projectcalico.org created
customresourcedefinition.apiextensions.k8s.io/networkpolicies.crd.projectcalico.org created
customresourcedefinition.apiextensions.k8s.io/networksets.crd.projectcalico.org created
customresourcedefinition.apiextensions.k8s.io/apiservers.operator.tigera.io created
customresourcedefinition.apiextensions.k8s.io/imagesets.operator.tigera.io created
customresourcedefinition.apiextensions.k8s.io/installations.operator.tigera.io created
customresourcedefinition.apiextensions.k8s.io/tigerastatuses.operator.tigera.io created
serviceaccount/tigera-operator created
clusterrole.rbac.authorization.k8s.io/tigera-operator created
clusterrolebinding.rbac.authorization.k8s.io/tigera-operator created
deployment.apps/tigera-operator created
List all resources in tigera-operator namespace, use the following command:
kubectl get all -n tigera-operatorThe response should look similar to this:
NAME                                  READY   STATUS    RESTARTS   AGE
pod/tigera-operator-5f4668786-mchkg   1/1     Running   0          7m17s

NAME                              READY   UP-TO-DATE   AVAILABLE   AGE
deployment.apps/tigera-operator   1/1     1            1           7m17s

NAME                                        DESIRED   CURRENT   READY   AGE
replicaset.apps/tigera-operator-5f4668786   1         1         1       7m17s
Download the custom resources necessary to configure Calico.
curl -OJL https://raw.githubusercontent.com/projectcalico/calico/v3.26.1/manifests/custom-resources.yamlApply the manifest using the following command:
kubectl create -f custom-resources.yamlinstallation.operator.tigera.io/default created
apiserver.operator.tigera.io/default createdList all resources in calico-system namespace, use the following command:
kubectl get all -n calico-systemThe response should look similar to this:
NAME                                           READY   STATUS              RESTARTS   AGE
pod/calico-kube-controllers-6cb95b98f5-bpx9g   0/1     Pending             0          9s
pod/calico-node-phxjc                          0/1     Init:0/2            0          9s
pod/calico-typha-69856d85d5-frh2j              0/1     ContainerCreating   0          9s
pod/csi-node-driver-8k2x6                      0/2     ContainerCreating   0          9s

NAME                   TYPE        CLUSTER-IP       EXTERNAL-IP   PORT(S)    AGE
service/calico-typha   ClusterIP   10.100.194.232   <none>        5473/TCP   9s

NAME                             DESIRED   CURRENT   READY   UP-TO-DATE   AVAILABLE   NODE SELECTOR            AGE
daemonset.apps/calico-node       1         1         0       1            0           kubernetes.io/os=linux   9s
daemonset.apps/csi-node-driver   1         1         0       1            0           kubernetes.io/os=linux   9s

NAME                                      READY   UP-TO-DATE   AVAILABLE   AGE
deployment.apps/calico-kube-controllers   0/1     1            0           9s
deployment.apps/calico-typha              0/1     1            0           9s

NAME                                                 DESIRED   CURRENT   READY   AGE
replicaset.apps/calico-kube-controllers-6cb95b98f5   1         1         0       9s
replicaset.apps/calico-typha-69856d85d5              1         1         0       9s
You can see that all the resources are still not in running state. Wait for everything to be in running state.
At this point Kubernetes nodes will become Ready because Kubernetes has a networking provider and configuration installed.
kubectl get nodesThe output should be similar to:
NAME         STATUS   ROLES           AGE   VERSION
kubemaster   Ready    control-plane   44m   v1.27.3
kubectl get all -n kube-systemThe output should be similar to:
NAME                                     READY   STATUS    RESTARTS   AGE
pod/coredns-5d78c9869d-ngzq8             1/1     Running   0          43m
pod/coredns-5d78c9869d-x7pbv             1/1     Running   0          43m
pod/etcd-kubemaster                      1/1     Running   0          43m
pod/kube-apiserver-kubemaster            1/1     Running   0          43m
pod/kube-controller-manager-kubemaster   1/1     Running   0          43m
pod/kube-proxy-5frjt                     1/1     Running   0          43m
pod/kube-scheduler-kubemaster            1/1     Running   0          43m

NAME               TYPE        CLUSTER-IP   EXTERNAL-IP   PORT(S)                  AGE
service/kube-dns   ClusterIP   10.96.0.10   <none>        53/UDP,53/TCP,9153/TCP   43m

NAME                        DESIRED   CURRENT   READY   UP-TO-DATE   AVAILABLE   NODE SELECTOR            AGE
daemonset.apps/kube-proxy   1         1         1       1            1           kubernetes.io/os=linux   43m

NAME                      READY   UP-TO-DATE   AVAILABLE   AGE
deployment.apps/coredns   2/2     2            2           43m

NAME                                 DESIRED   CURRENT   READY   AGE
replicaset.apps/coredns-5d78c9869d   2         2         2       43m
Use the following command to download the calicoctl binary.
curl -L https://github.com/projectcalico/calico/releases/latest/download/calicoctl-linux-amd64 -o calicoctlMove the calicoctl binary to directory /usr/local/bin/:
mv calicoctl /usr/local/bin/Set the file to be executable:
chmod +x /usr/local/bin/calicoctlChange MAC Address of the network interface on Worker Node
First, make sure your Worker Node VM is off.
Then to generate the new MAC address of the network interfaces, use VBoxManage modifyvm:
VBoxManage modifyvm "kubeworker1" --macaddress1 auto"kubeworker1"is the VM name--macaddress1is the MAC address of the first network interface
Set NIC to NAT Network mode:
VBoxManage modifyvm "kubeworker1" --nic1 natnetworkSet NIC connected to natnet1 network:
VBoxManage modifyvm "kubeworker1" --natnetwork1 "natnet1"Change Hardware ID on Worker Node
Make sure your Worker Node VM is off.
To generate the new product_uuid, run the command three times on terminal and make sure not be run as root:
VBoxManage internalcommands sethduuid "$HOME/kubeworker1/kubeworker1.vdi"
VBoxManage internalcommands sethduuid "$HOME/kubeworker1/kubeworker1.vdi"
VBoxManage internalcommands sethduuid "$HOME/kubeworker1/kubeworker1.vdi"
The output should be similar to:
UUID changed to: 659d2b89-91aa-4b42-9e32-1a0c6ca73fb9
UUID changed to: 48ac2a50-0c97-4aab-a5a4-694bf5700359
UUID changed to: 0b43b0b9-b2b9-456c-b271-3619069072c5
The first UUID will be used as Machine uuid and Hardware uuid.
Edit $HOME/kubeworker1/kubeworker1.vbox file. Find the Machine uuid and Hardware uuid and change to 659d2b89-91aa-4b42-9e32-1a0c6ca73fb9.
<Machine uuid="{659d2b89-91aa-4b42-9e32-1a0c6ca73fb9}" name="kubeworker1" OSType="RedHat_64" snapshotFolder="Snapshots" lastStateChange="2023-07-13T10:05:46Z">
    ...
</Machine>
<Hardware uuid="{659d2b89-91aa-4b42-9e32-1a0c6ca73fb9}">
...
</Hardware>The second UUID will be used as System uuid. To set System uuid, run the command:
VBoxManage setextradata "kubeworker1" "VBoxInternal/Devices/efi/0/Config/DmiSystemUuid" "48ac2a50-0c97-4aab-a5a4-694bf5700359"The third UUID will be used as Harddisk uuid and Image uuid.
Edit $HOME/kubeworker1/kubeworker1.vbox file. Find the Harddisk uuid and Image uuid and change to 0b43b0b9-b2b9-456c-b271-3619069072c5.
<HardDisks>
        <HardDisk uuid="{0b43b0b9-b2b9-456c-b271-3619069072c5}" location="kubeworker1.vdi" format="VDI" type="Normal"/>
      </HardDisks>
<StorageController name="NVMe" type="NVMe" PortCount="1" useHostIOCache="false" Bootable="true">
<AttachedDevice type="HardDisk" hotpluggable="false" port="0" device="0">
<Image uuid="{0b43b0b9-b2b9-456c-b271-3619069072c5}"/>
</AttachedDevice>
</StorageController>Detach and remove the storage medium from the VM:
VBoxManage storageattach kubeworker1 --storagectl "NVMe" --port 0 --device 0 --medium nonekubeworker1specifies the VM name--storagectlspecifies the name of the storage controller--portspecifies the number of the storage controller's port--devicespecifies the number of the port's device--medium nonespecifies to remove storage medium
Remove the storage medium from VirtualBox media registry.
VBoxManage closemedium disk "$HOME/kubeworker1/kubeworker1.vdi"Then attach the storage medium to the VM:
VBoxManage storageattach "kubeworker1" --storagectl "NVMe" --port 0 --device 0 --type hdd --medium $HOME/kubeworker1/kubeworker1.vdiSetting Static IP Address on Worker Node
Use ip command to identify the name of the ethernet interface you want to configure:
ip addr showThe interface named lo is the loopback interface, used for processes that communicate via the IP protocol. The important interface in the listing is enp0s3, the Ethernet interface.
Add static IP address using nmcli command:
sudo nmcli connection modify enp0s3 ipv4.addresses 172.16.0.22/24Add the gateway IP:
sudo nmcli connection modify enp0s3 ipv4.gateway 172.16.0.1Add the dns IP address:
sudo nmcli connection modify enp0s3 ipv4.dns 172.16.0.1Change the addressing from DHCP to static.
sudo nmcli connection modify enp0s3 ipv4.method manualTo make changes into the effect, disable and enable the connection:
sudo nmcli connection down enp0s3sudo nmcli connection up enp0s3Setting hostname on Worker Node
Set the hostname using the following command:
sudo echo "kubeworker1" > /etc/hostnameAdd the following line to /etc/hosts to map the hostname to a IP address:
172.16.0.21    kubemaster
172.16.0.22    kubeworker1
Disable systemd-resolved service on Worker Node
The systemd-resolved service can be disabled with:
sudo systemctl stop systemd-resolved
sudo systemctl disable systemd-resolved
sudo systemctl mask systemd-resolved
Delete the symlink /etc/resolv.conf:
sudo rm /etc/resolv.confCreate a new /etc/resolv.conf file:
sudo touch /etc/resolv.confAdd the following line to /etc/resolv.conf:
nameserver 172.16.0.1Setting Machine ID on Worker Node
First, remove the /etc/machine-id file:
sudo rm /etc/machine-idThen generate the new one using this command:
systemd-machine-id-setupInstall containerd (container runtime) on Worker Node
First, install the required packages to run kubernetes:
sudo dnf -y install ethtool
sudo dnf -y install socat
sudo dnf -y install iproute-tc
sudo dnf -y install conntrack
sudo dnf -y install openssl
sudo dnf -y install tar
sudo dnf -y install net-tools
Before install containerd, you need to enable overlay and br_netfilter kernel modules, and net.bridge.bridge-nf-call-iptables, net.bridge.bridge-nf-call-ip6tables, and net.ipv4.ip_forward kernel parameter.
Create a file in the /etc/modules-load.d/ directory which contains kernel module names to be loaded at boot time.
cat <<EOF | sudo tee /etc/modules-load.d/k8s.conf
overlay
br_netfilter
EOF
Load overlay and br_netfilter kernel modules now using the modprobe command.
sudo modprobe overlay
sudo modprobe br_netfilter
Create a file in the /etc/sysctl.d/ directory which contains net.bridge.bridge-nf-call-iptables, net.bridge.bridge-nf-call-ip6tables, and net.ipv4.ip_forward kernel parameters to be set at boot time.
cat <<EOF | sudo tee /etc/sysctl.d/k8s.conf
net.bridge.bridge-nf-call-iptables  = 1
net.bridge.bridge-nf-call-ip6tables = 1
net.ipv4.ip_forward                 = 1
EOF
Apply the kernel parameters without reboot using sysctl command.
sudo sysctl --systemVerify that the br_netfilter, overlay modules are loaded by running the following commands:
lsmod | grep br_netfilter
lsmod | grep overlay
Verify that the net.bridge.bridge-nf-call-iptables, net.bridge.bridge-nf-call-ip6tables, and net.ipv4.ip_forward system variables are set to 1 in your sysctl config by running the following command:
sysctl net.bridge.bridge-nf-call-iptables net.bridge.bridge-nf-call-ip6tables net.ipv4.ip_forwardDownload the containerd from https://github.com/containerd/containerd/releases.
curl -OJL https://github.com/containerd/containerd/releases/download/v1.7.2/containerd-1.7.2-linux-amd64.tar.gzExtract the containerd under /usr/local
sudo tar Cxzvf /usr/local containerd-1.7.2-linux-amd64.tar.gzDownload the containerd.service unit file from https://raw.githubusercontent.com/containerd/containerd/main/containerd.service into /usr/lib/systemd/system/ directory
curl -o /usr/lib/systemd/system/containerd.service https://raw.githubusercontent.com/containerd/containerd/main/containerd.serviceReload systemd manager configuration and enable the containerd service.
sudo systemctl daemon-reload
sudo systemctl enable --now containerd
Download the runc binary from https://github.com/opencontainers/runc/releases and install it as /usr/local/sbin/runc.
curl -OJL https://github.com/opencontainers/runc/releases/download/v1.1.7/runc.amd64
sudo install -m 755 runc.amd64 /usr/local/sbin/runc
Download the cni-plugins from https://github.com/containernetworking/plugins/releases and extract it under /opt/cni/bin
curl -OJL https://github.com/containernetworking/plugins/releases/download/v1.3.0/cni-plugins-linux-amd64-v1.3.0.tgz
sudo mkdir -p /opt/cni/bin
sudo tar Cxzvf /opt/cni/bin cni-plugins-linux-amd64-v1.3.0.tgz
Once, we have successfully installed the Containerd. We need to load the Containerd configurations.
Create /etc/containerd directory and generate the confguration file using containerd command.
sudo mkdir -p /etc/containerd
sudo containerd config default > /etc/containerd/config.toml
Open the configuration file /etc/containerd/config.toml and set SystemdCgroup = true
[plugins."io.containerd.grpc.v1.cri".containerd.runtimes.runc]
  ...
  [plugins."io.containerd.grpc.v1.cri".containerd.runtimes.runc.options]
    SystemdCgroup = true
To apply the changes, restart the containerd service.
sudo systemctl restart containerdInstall kubectl, kubeadm, and kubelet on Worker Node
The ports required for worker node are:
| Protocol | Port Range | Used By |
|---|---|---|
| TCP | 10250 | Kubelet API |
| TCP | 30000-32767 | NodePort Services |
The ports are required to be open in the firewall.
sudo firewall-cmd --permanent --add-port=10250/tcp
sudo firewall-cmd --permanent --add-port=30000-32767/tcp
sudo firewall-cmd --reload
Swap must be disabled in order for the kubelet to work properly. To permanently disable swap:
- Open the
/etc/fstabfile, search for a swap line and add a # (hashtag) sign in front of the line to comment on the entire line - The swap-on-zram feature can be disabled with:
sudo systemctl stop systemd-zram-setup@zram0
sudo systemctl disable systemd-zram-setup@zram0
sudo systemctl mask systemd-zram-setup@zram0 - Run
swapoff -vato disable memory swapping
Download the latest release kubectl with the command:
curl -LO "https://dl.k8s.io/release/$(curl -L -s https://dl.k8s.io/release/stable.txt)/bin/linux/amd64/kubectl"Download the kubectl checksum file:
curl -LO "https://dl.k8s.io/$(curl -L -s https://dl.k8s.io/release/stable.txt)/bin/linux/amd64/kubectl.sha256"Validate the kubectl binary against the checksum file:
echo "$(cat kubectl.sha256) kubectl" | sha256sum --checkIf valid, the output is:
kubectl: OKInstall kubectl:
sudo install -o root -g root -m 0755 kubectl /usr/local/bin/kubectlCheck the kubectl version you installed:
kubectl version --shortInstall CNI plugins (required for most pod network):
CNI_PLUGINS_VERSION="v1.3.0"
ARCH="amd64"
DEST="/opt/cni/bin"
sudo mkdir -p "$DEST"
curl -L "https://github.com/containernetworking/plugins/releases/download/${CNI_PLUGINS_VERSION}/cni-plugins-linux-${ARCH}-${CNI_PLUGINS_VERSION}.tgz" | sudo tar -C "$DEST" -xz
Define the directory to download command files:
DOWNLOAD_DIR="/usr/local/bin"
sudo mkdir -p "$DOWNLOAD_DIR"
Install crictl (required for kubeadm/kubelet Container Runtime Interface (CRI)).
CRICTL_VERSION="v1.27.0"
ARCH="amd64"
curl -L "https://github.com/kubernetes-sigs/cri-tools/releases/download/${CRICTL_VERSION}/crictl-${CRICTL_VERSION}-linux-${ARCH}.tar.gz" | sudo tar -C $DOWNLOAD_DIR -xz
Install kubeadm, kubelet, kubectl and add a kubelet systemd service:
RELEASE="$(curl -sSL https://dl.k8s.io/release/stable.txt)"
ARCH="amd64"
cd $DOWNLOAD_DIR
sudo curl -L --remote-name-all https://dl.k8s.io/release/${RELEASE}/bin/linux/${ARCH}/{kubeadm,kubelet}
sudo chmod +x {kubeadm,kubelet}
cd -
RELEASE_VERSION="v0.15.1"
curl -sSL "https://raw.githubusercontent.com/kubernetes/release/${RELEASE_VERSION}/cmd/kubepkg/templates/latest/deb/kubelet/lib/systemd/system/kubelet.service" | sed "s:/usr/bin:${DOWNLOAD_DIR}:g" | sudo tee /etc/systemd/system/kubelet.service
sudo mkdir -p /etc/systemd/system/kubelet.service.d
curl -sSL "https://raw.githubusercontent.com/kubernetes/release/${RELEASE_VERSION}/cmd/kubepkg/templates/latest/deb/kubeadm/10-kubeadm.conf" | sed "s:/usr/bin:${DOWNLOAD_DIR}:g" | sudo tee /etc/systemd/system/kubelet.service.d/10-kubeadm.confCreate /etc/kubernetes/manifests directory where kubelet should look for static pod manifests.
mkdir -p /etc/kubernetes/manifestsEnable and start kubelet:
sudo systemctl enable --now kubeletIf you have lost the kubeadm join command with the token id then you can generate a new one by running the following command on the master node
kubeadm token create --print-join-commandNow let's connect worker node to the master node using kubeadm join command:
kubeadm join kubemaster:6443 --token 2rzeso.snqfpw46z7zaszb1 --discovery-token-ca-cert-hash sha256:bd7fffd83e3fd971df50acb6950c483e7145227ea4eca388a07967e3627fba96If the join succeeds then it will print output similar to follow:
[preflight] Running pre-flight checks
[preflight] Reading configuration from the cluster...
[preflight] FYI: You can look at this config file with 'kubectl -n kube-system get cm kubeadm-config -o yaml'
[kubelet-start] Writing kubelet configuration to file "/var/lib/kubelet/config.yaml"
[kubelet-start] Writing kubelet environment file with flags to file "/var/lib/kubelet/kubeadm-flags.env"
[kubelet-start] Starting the kubelet
[kubelet-start] Waiting for the kubelet to perform the TLS Bootstrap...

This node has joined the cluster:
* Certificate signing request was sent to apiserver and a response was received.
* The Kubelet was informed of the new secure connection details.

Run 'kubectl get nodes' on the control-plane to see this node join the cluster.
To start using your cluster, you need to run the following as a regular user:
sudo mkdir -p $HOME/.kube
sudo cp -i /etc/kubernetes/kubelet.conf $HOME/.kube/config
sudo chown $(id -u):$(id -g) $HOME/.kube/config
Alternatively, if you are the root user, you can run:
export KUBECONFIG=/etc/kubernetes/kubelet.confCheck if kubectl is working:
kubectl get nodesIf kubectl is working then it will show output similar to:
NAME            STATUS   ROLES           AGE     VERSION
kubemaster    Ready    control-plane   3h17m   v1.27.3
kubeworker1   NotReady    <none>          29m     v1.27.3
The status will be NotReady as the master node is still setting up the networking.
On the master node, it will create a new calico node pod. Check the pod state using the command:
kubectl get all -AThe response should look similar to this:
NAMESPACE          NAME                                           READY   STATUS              RESTARTS        AGE
calico-apiserver   pod/calico-apiserver-746fbc54c9-m7sgk          1/1     Running             2 (6m32s ago)   22h
calico-apiserver   pod/calico-apiserver-746fbc54c9-xgsdz          1/1     Running             2 (6m32s ago)   22h
calico-system      pod/calico-kube-controllers-6cb95b98f5-bpx9g   1/1     Running             2 (6m32s ago)   22h
calico-system      pod/calico-node-lmgvk                          0/1     Init:0/2            0               63s
calico-system      pod/calico-node-phxjc                          1/1     Running             2 (6m32s ago)   22h
calico-system      pod/calico-typha-69856d85d5-frh2j              1/1     Running             2 (6m32s ago)   22h
calico-system      pod/csi-node-driver-8k2x6                      2/2     Running             4 (6m32s ago)   22h
calico-system      pod/csi-node-driver-hz2jd                      0/2     ContainerCreating   0               63s
kube-system        pod/coredns-5d78c9869d-ngzq8                   1/1     Running             2 (6m32s ago)   23h
kube-system        pod/coredns-5d78c9869d-x7pbv                   1/1     Running             2 (6m32s ago)   23h
kube-system        pod/etcd-kubemaster                            1/1     Running             2 (6m33s ago)   23h
kube-system        pod/kube-apiserver-kubemaster                  1/1     Running             2 (6m32s ago)   23h
kube-system        pod/kube-controller-manager-kubemaster         1/1     Running             2 (6m32s ago)   23h
kube-system        pod/kube-proxy-5frjt                           1/1     Running             2 (6m32s ago)   23h
kube-system        pod/kube-proxy-6wthc                           0/1     ContainerCreating   0               63s
kube-system        pod/kube-scheduler-kubemaster                  1/1     Running             2 (6m32s ago)   23h
tigera-operator    pod/tigera-operator-5f4668786-mchkg            1/1     Running             4 (6m2s ago)    22h

NAMESPACE          NAME                                      TYPE        CLUSTER-IP       EXTERNAL-IP   PORT(S)                  AGE
calico-apiserver   service/calico-api                        ClusterIP   10.105.92.196    <none>        443/TCP                  22h
calico-system      service/calico-kube-controllers-metrics   ClusterIP   None             <none>        9094/TCP                 22h
calico-system      service/calico-typha                      ClusterIP   10.100.194.232   <none>        5473/TCP                 22h
default            service/kubernetes                        ClusterIP   10.96.0.1        <none>        443/TCP                  23h
kube-system        service/kube-dns                          ClusterIP   10.96.0.10       <none>        53/UDP,53/TCP,9153/TCP   23h

NAMESPACE       NAME                             DESIRED   CURRENT   READY   UP-TO-DATE   AVAILABLE   NODE SELECTOR            AGE
calico-system   daemonset.apps/calico-node       2         2         1       2            1           kubernetes.io/os=linux   22h
calico-system   daemonset.apps/csi-node-driver   2         2         1       2            1           kubernetes.io/os=linux   22h
kube-system     daemonset.apps/kube-proxy        2         2         1       2            1           kubernetes.io/os=linux   23h

NAMESPACE          NAME                                      READY   UP-TO-DATE   AVAILABLE   AGE
calico-apiserver   deployment.apps/calico-apiserver          2/2     2            2           22h
calico-system      deployment.apps/calico-kube-controllers   1/1     1            1           22h
calico-system      deployment.apps/calico-typha              1/1     1            1           22h
kube-system        deployment.apps/coredns                   2/2     2            2           23h
tigera-operator    deployment.apps/tigera-operator           1/1     1            1           22h

NAMESPACE          NAME                                                 DESIRED   CURRENT   READY   AGE
calico-apiserver   replicaset.apps/calico-apiserver-746fbc54c9          2         2         2       22h
calico-system      replicaset.apps/calico-kube-controllers-6cb95b98f5   1         1         1       22h
calico-system      replicaset.apps/calico-typha-69856d85d5              1         1         1       22h
kube-system        replicaset.apps/coredns-5d78c9869d                   2         2         2       23h
tigera-operator    replicaset.apps/tigera-operator-5f4668786            1         1         1       22h
To see more info about the pod, use the command:
kubectl describe pod/calico-node-grfnr -n calico-systemThe response should look similar to this:
Name:                 calico-node-lmgvk
Namespace:            calico-system
Priority:             2000001000
Priority Class Name:  system-node-critical
Service Account:      calico-node
Node:                 kubeworker1/172.16.0.22
Start Time:           Thu, 20 Jul 2023 21:11:50 +0700
Labels:               app.kubernetes.io/name=calico-node
                      controller-revision-hash=57d9485f79
                      k8s-app=calico-node
                      pod-template-generation=1
Annotations:          hash.operator.tigera.io/cni-config: 9f0a12e03c58671de56ed3876cb88f1c43cef5dc
                      hash.operator.tigera.io/system: bb4746872201725da2dea19756c475aa67d9c1e9
                      hash.operator.tigera.io/tigera-ca-private: 7675b87693668c11faf4b4f275c014fd575b0c6b
Status:               Pending
IP:                   172.16.0.22
IPs:
  IP:           172.16.0.22
Controlled By:  DaemonSet/calico-node
Init Containers:
  flexvol-driver:
    Container ID:    containerd://3bc13d8131404c3f8134efd48a7cc8a169d1613ffc5358ba300ad12bcdeabae1
    Image:           docker.io/calico/pod2daemon-flexvol:v3.26.1
    Image ID:        docker.io/calico/pod2daemon-flexvol@sha256:2aefd77a4f8289c88cfe24c0db38822de3132292d1ea4ac9192abc9583e4b54c
    Port:            <none>
    Host Port:       <none>
    SeccompProfile:  RuntimeDefault
    State:           Terminated
      Reason:        Completed
      Exit Code:     0
      Started:       Thu, 20 Jul 2023 21:14:01 +0700
      Finished:      Thu, 20 Jul 2023 21:14:01 +0700
    Ready:           True
    Restart Count:   0
    Environment:     <none>
    Mounts:
      /host/driver from flexvol-driver-host (rw)
      /var/run/secrets/kubernetes.io/serviceaccount from kube-api-access-txnjv (ro)
  install-cni:
    Container ID:
    Image:           docker.io/calico/cni:v3.26.1
    Image ID:
    Port:            <none>
    Host Port:       <none>
    SeccompProfile:  RuntimeDefault
    Command:
      /opt/cni/bin/install
    State:          Waiting
      Reason:       PodInitializing
    Ready:          False
    Restart Count:  0
    Environment:
      CNI_CONF_NAME:            10-calico.conflist
      SLEEP:                    false
      CNI_NET_DIR:              /etc/cni/net.d
      CNI_NETWORK_CONFIG:       <set to the key 'config' of config map 'cni-config'>  Optional: false
      KUBERNETES_SERVICE_HOST:  10.96.0.1
      KUBERNETES_SERVICE_PORT:  443
    Mounts:
      /host/etc/cni/net.d from cni-net-dir (rw)
      /host/opt/cni/bin from cni-bin-dir (rw)
      /var/run/secrets/kubernetes.io/serviceaccount from kube-api-access-txnjv (ro)
Containers:
  calico-node:
    Container ID:
    Image:           docker.io/calico/node:v3.26.1
    Image ID:
    Port:            <none>
    Host Port:       <none>
    SeccompProfile:  RuntimeDefault
    State:           Waiting
      Reason:        PodInitializing
    Ready:           False
    Restart Count:   0
    Liveness:        http-get http://localhost:9099/liveness delay=0s timeout=10s period=10s #success=1 #failure=3
    Readiness:       exec [/bin/calico-node -bird-ready -felix-ready] delay=0s timeout=5s period=10s #success=1 #failure=3
    Environment:
      DATASTORE_TYPE:                      kubernetes
      WAIT_FOR_DATASTORE:                  true
      CLUSTER_TYPE:                        k8s,operator,bgp
      CALICO_DISABLE_FILE_LOGGING:         false
      FELIX_DEFAULTENDPOINTTOHOSTACTION:   ACCEPT
      FELIX_HEALTHENABLED:                 true
      FELIX_HEALTHPORT:                    9099
      NODENAME:                             (v1:spec.nodeName)
      NAMESPACE:                           calico-system (v1:metadata.namespace)
      FELIX_TYPHAK8SNAMESPACE:             calico-system
      FELIX_TYPHAK8SSERVICENAME:           calico-typha
      FELIX_TYPHACAFILE:                   /etc/pki/tls/certs/tigera-ca-bundle.crt
      FELIX_TYPHACERTFILE:                 /node-certs/tls.crt
      FELIX_TYPHAKEYFILE:                  /node-certs/tls.key
      FIPS_MODE_ENABLED:                   false
      FELIX_TYPHACN:                       typha-server
      CALICO_MANAGE_CNI:                   true
      CALICO_IPV4POOL_CIDR:                192.168.0.0/16
      CALICO_IPV4POOL_VXLAN:               CrossSubnet
      CALICO_IPV4POOL_BLOCK_SIZE:          26
      CALICO_IPV4POOL_NODE_SELECTOR:       all()
      CALICO_IPV4POOL_DISABLE_BGP_EXPORT:  false
      CALICO_NETWORKING_BACKEND:           bird
      IP:                                  autodetect
      IP_AUTODETECTION_METHOD:             first-found
      IP6:                                 none
      FELIX_IPV6SUPPORT:                   false
      KUBERNETES_SERVICE_HOST:             10.96.0.1
      KUBERNETES_SERVICE_PORT:             443
    Mounts:
      /etc/pki/tls/cert.pem from tigera-ca-bundle (ro,path="ca-bundle.crt")
      /etc/pki/tls/certs from tigera-ca-bundle (ro)
      /host/etc/cni/net.d from cni-net-dir (rw)
      /lib/modules from lib-modules (ro)
      /node-certs from node-certs (ro)
      /run/xtables.lock from xtables-lock (rw)
      /var/lib/calico from var-lib-calico (rw)
      /var/log/calico/cni from cni-log-dir (rw)
      /var/run/calico from var-run-calico (rw)
      /var/run/nodeagent from policysync (rw)
      /var/run/secrets/kubernetes.io/serviceaccount from kube-api-access-txnjv (ro)
Conditions:
  Type              Status
  Initialized       False
  Ready             False
  ContainersReady   False
  PodScheduled      True
Volumes:
  lib-modules:
    Type:          HostPath (bare host directory volume)
    Path:          /lib/modules
    HostPathType:
  xtables-lock:
    Type:          HostPath (bare host directory volume)
    Path:          /run/xtables.lock
    HostPathType:  FileOrCreate
  policysync:
    Type:          HostPath (bare host directory volume)
    Path:          /var/run/nodeagent
    HostPathType:  DirectoryOrCreate
  tigera-ca-bundle:
    Type:      ConfigMap (a volume populated by a ConfigMap)
    Name:      tigera-ca-bundle
    Optional:  false
  node-certs:
    Type:        Secret (a volume populated by a Secret)
    SecretName:  node-certs
    Optional:    false
  var-run-calico:
    Type:          HostPath (bare host directory volume)
    Path:          /var/run/calico
    HostPathType:
  var-lib-calico:
    Type:          HostPath (bare host directory volume)
    Path:          /var/lib/calico
    HostPathType:
  cni-bin-dir:
    Type:          HostPath (bare host directory volume)
    Path:          /opt/cni/bin
    HostPathType:
  cni-net-dir:
    Type:          HostPath (bare host directory volume)
    Path:          /etc/cni/net.d
    HostPathType:
  cni-log-dir:
    Type:          HostPath (bare host directory volume)
    Path:          /var/log/calico/cni
    HostPathType:
  flexvol-driver-host:
    Type:          HostPath (bare host directory volume)
    Path:          /usr/libexec/kubernetes/kubelet-plugins/volume/exec/nodeagent~uds
    HostPathType:  DirectoryOrCreate
  kube-api-access-txnjv:
    Type:                    Projected (a volume that contains injected data from multiple sources)
    TokenExpirationSeconds:  3607
    ConfigMapName:           kube-root-ca.crt
    ConfigMapOptional:       <nil>
    DownwardAPI:             true
QoS Class:                   BestEffort
Node-Selectors:              kubernetes.io/os=linux
Tolerations:                 :NoSchedule op=Exists
                             :NoExecute op=Exists
                             CriticalAddonsOnly op=Exists
                             node.kubernetes.io/disk-pressure:NoSchedule op=Exists
                             node.kubernetes.io/memory-pressure:NoSchedule op=Exists
                             node.kubernetes.io/network-unavailable:NoSchedule op=Exists
                             node.kubernetes.io/not-ready:NoExecute op=Exists
                             node.kubernetes.io/pid-pressure:NoSchedule op=Exists
                             node.kubernetes.io/unreachable:NoExecute op=Exists
                             node.kubernetes.io/unschedulable:NoSchedule op=Exists
Events:
  Type    Reason     Age    From               Message
  ----    ------     ----   ----               -------
  Normal  Scheduled  8m5s   default-scheduler  Successfully assigned calico-system/calico-node-lmgvk to kubeworker1
  Normal  Pulling    8m     kubelet            Pulling image "docker.io/calico/pod2daemon-flexvol:v3.26.1"
  Normal  Pulled     5m54s  kubelet            Successfully pulled image "docker.io/calico/pod2daemon-flexvol:v3.26.1" in 47.864589232s (2m5.390789865s including waiting)
  Normal  Created    5m54s  kubelet            Created container flexvol-driver
  Normal  Started    5m54s  kubelet            Started container flexvol-driver
  Normal  Pulling    5m53s  kubelet            Pulling image "docker.io/calico/cni:v3.26.1"
Wait for the pod to be in running state.
Then check the status of a Calico instance on the master node:
calicoctl node statusThe response should look similar to this:
Calico process is running.

IPv4 BGP status
+--------------+-------------------+-------+----------+-------------+
| PEER ADDRESS |     PEER TYPE     | STATE |  SINCE   |    INFO     |
+--------------+-------------------+-------+----------+-------------+
| 172.16.0.22  | node-to-node mesh | up    | 14:43:05 | Established |
+--------------+-------------------+-------+----------+-------------+

IPv6 BGP status
No IPv6 peers found.
Check the status of a Calico instance on the worker node:
calicoctl node statusThe response should look similar to this:
Calico process is running.

IPv4 BGP status
+--------------+-------------------+-------+----------+-------------+
| PEER ADDRESS |     PEER TYPE     | STATE |  SINCE   |    INFO     |
+--------------+-------------------+-------+----------+-------------+
| 172.16.0.21  | node-to-node mesh | up    | 14:43:05 | Established |
+--------------+-------------------+-------+----------+-------------+

IPv6 BGP status
No IPv6 peers found.
Install MetalLB (Load Balancer) on Master Node
Download the MetalLB manifest for the Kubernetes clusters.
curl -OJL https://raw.githubusercontent.com/metallb/metallb/v0.13.10/config/manifests/metallb-native.yamlChange the value of failurePolicy from Fail to Ignore in the metallb-native.yaml file.
sed -i 's/failurePolicy: Fail/failurePolicy: Ignore/' metallb-native.yamlTo install MetalLB, apply the manifest:
kubectl create -f metallb-native.yamlThe response should look similar to this:
namespace/metallb-system created
customresourcedefinition.apiextensions.k8s.io/addresspools.metallb.io created
customresourcedefinition.apiextensions.k8s.io/bfdprofiles.metallb.io created
customresourcedefinition.apiextensions.k8s.io/bgpadvertisements.metallb.io created
customresourcedefinition.apiextensions.k8s.io/bgppeers.metallb.io created
customresourcedefinition.apiextensions.k8s.io/communities.metallb.io created
customresourcedefinition.apiextensions.k8s.io/ipaddresspools.metallb.io created
customresourcedefinition.apiextensions.k8s.io/l2advertisements.metallb.io created
serviceaccount/controller created
serviceaccount/speaker created
role.rbac.authorization.k8s.io/controller created
role.rbac.authorization.k8s.io/pod-lister created
clusterrole.rbac.authorization.k8s.io/metallb-system:controller created
clusterrole.rbac.authorization.k8s.io/metallb-system:speaker created
rolebinding.rbac.authorization.k8s.io/controller created
rolebinding.rbac.authorization.k8s.io/pod-lister created
clusterrolebinding.rbac.authorization.k8s.io/metallb-system:controller created
clusterrolebinding.rbac.authorization.k8s.io/metallb-system:speaker created
configmap/metallb-excludel2 created
secret/webhook-server-cert created
service/webhook-service created
deployment.apps/controller created
daemonset.apps/speaker created
validatingwebhookconfiguration.admissionregistration.k8s.io/metallb-webhook-configuration created
This will deploy MetalLB to your cluster, under the metallb-system namespace. The components in the manifest are:
- The
metallb-system/controllerdeployment. This is the cluster-wide controller that handles IP address assignments - The
metallb-system/speakerdaemonset. This is the component that speaks the protocol(s) of your choice to make the services reachable - Service accounts for the controller and speaker, along with the RBAC permissions that the components need to function
The installation manifest does not include a configuration file. MetalLB's components will still start, but will remain idle until you start deploying resources.
To list all resources in metallb-system namespace, use the command:
kubectl get all -n metallb-systemThe response should look similar to this:
NAME                              READY   STATUS              RESTARTS   AGE
pod/controller-595f88d88f-gk98r   0/1     ContainerCreating   0          77s
pod/speaker-2rg52                 0/1     ContainerCreating   0          77s
pod/speaker-r8p6g                 0/1     ContainerCreating   0          77s

NAME                      TYPE        CLUSTER-IP       EXTERNAL-IP   PORT(S)   AGE
service/webhook-service   ClusterIP   10.106.144.178   <none>        443/TCP   77s

NAME                     DESIRED   CURRENT   READY   UP-TO-DATE   AVAILABLE   NODE SELECTOR            AGE
daemonset.apps/speaker   2         2         0       2            0           kubernetes.io/os=linux   77s

NAME                         READY   UP-TO-DATE   AVAILABLE   AGE
deployment.apps/controller   0/1     1            0           77s

NAME                                    DESIRED   CURRENT   READY   AGE
replicaset.apps/controller-595f88d88f   1         1         0       77s
You can see that all the resources are still not in running state. Wait for everything to be in running state.
If the error message is ErrImagePull or ImagePullBackOff then delete the pod using the command:
kubectl delete pod/controller-595f88d88f-gk98r -n metallb-systemDeployment/StatefulSet/ReplicaSet/DaemonSet will reschedule a new one in its place automatically.
When everything is in running state, the response should look similar to this:
NAME                              READY   STATUS    RESTARTS   AGE
pod/controller-595f88d88f-gk98r   1/1     Running   0          12m
pod/speaker-2rg52                 1/1     Running   0          12m
pod/speaker-r8p6g                 1/1     Running   0          12m

NAME                      TYPE        CLUSTER-IP       EXTERNAL-IP   PORT(S)   AGE
service/webhook-service   ClusterIP   10.106.144.178   <none>        443/TCP   12m

NAME                     DESIRED   CURRENT   READY   UP-TO-DATE   AVAILABLE   NODE SELECTOR            AGE
daemonset.apps/speaker   2         2         2       2            2           kubernetes.io/os=linux   12m

NAME                         READY   UP-TO-DATE   AVAILABLE   AGE
deployment.apps/controller   1/1     1            1           12m

NAME                                    DESIRED   CURRENT   READY   AGE
replicaset.apps/controller-595f88d88f   1         1         1       12m
Create a metallb-addresspool.yaml configuration file to enable the layer 2 mode as below:
apiVersion: metallb.io/v1beta1
kind: IPAddressPool
metadata:
  name: ipaddresspool
  namespace: metallb-system
spec:
  addresses:
  - 192.170.0.0/24
  avoidBuggyIPs: true
---
apiVersion: metallb.io/v1beta1
kind: L2Advertisement
metadata:
  name: l2advertisement
  namespace: metallb-system
spec:
  ipAddressPools:
  - ipaddresspool
Apply the configuration file:
kubectl create -f metallb-addresspool.yamlThe response should look similar to this:
ipaddresspool.metallb.io/ipaddresspool created
l2advertisement.metallb.io/l2advertisement created
The ports required by MetalLB In Layer 2 Mode for master node and worker node are:
| Protocol | Port Range | Used By |
|---|---|---|
| TCP | 7946 | metallb speaker |
| UDP | 7946 | metallb speaker |
The ports are required to be open in the firewall.
sudo firewall-cmd --permanent --add-port=7946/tcp
sudo firewall-cmd --permanent --add-port=7946/udp
sudo firewall-cmd --reload
Add label to kubeworker1 node, so we can assign pods to that node:
kubectl label nodes kubeworker1 nodelabel=kubeworker1The response should look similar to this:
node/kubeworker1 labeledLet's verify that the new label is added by running:
kubectl get nodes --show-labelsThe response should look similar to this:
NAME          STATUS   ROLES           AGE    VERSION   LABELS
kubemaster    Ready    control-plane   2d1h   v1.27.3   beta.kubernetes.io/arch=amd64,beta.kubernetes.io/os=linux,kubernetes.io/arch=amd64,kubernetes.io/hostname=kubemaster,kubernetes.io/os=linux,node-role.kubernetes.io/control-plane=,node.kubernetes.io/exclude-from-external-load-balancers=
kubeworker1   Ready    <none>          26h    v1.27.4   beta.kubernetes.io/arch=amd64,beta.kubernetes.io/os=linux,kubernetes.io/arch=amd64,kubernetes.io/hostname=kubeworker1,kubernetes.io/os=linux,nodelabel=kubeworker1
Install Nginx Ingress Controller on Master Node
Nginx Ingress controller is an Ingress controller for Kubernetes using NGINX as a reverse proxy and load balancer.
Download NGINX Ingress Controller manifest:
curl -o ingress-nginx.yaml https://raw.githubusercontent.com/kubernetes/ingress-nginx/controller-v1.8.1/deploy/static/provider/baremetal/deploy.yamlChange the value of failurePolicy from Fail to Ignore in the ingress-nginx.yaml file.
sed -i 's/failurePolicy: Fail/failurePolicy: Ignore/' ingress-nginx.yamlsed -i 's/--patch-failure-policy=Fail/--patch-failure-policy=Ignore/' ingress-nginx.yamlApply Nginx ingress controller manifest deployment file:
kubectl create -f ingress-nginx.yamlThe response should look similar to this:
namespace/ingress-nginx created
serviceaccount/ingress-nginx created
serviceaccount/ingress-nginx-admission created
role.rbac.authorization.k8s.io/ingress-nginx created
role.rbac.authorization.k8s.io/ingress-nginx-admission created
clusterrole.rbac.authorization.k8s.io/ingress-nginx created
clusterrole.rbac.authorization.k8s.io/ingress-nginx-admission created
rolebinding.rbac.authorization.k8s.io/ingress-nginx created
rolebinding.rbac.authorization.k8s.io/ingress-nginx-admission created
clusterrolebinding.rbac.authorization.k8s.io/ingress-nginx created
clusterrolebinding.rbac.authorization.k8s.io/ingress-nginx-admission created
configmap/ingress-nginx-controller created
service/ingress-nginx-controller created
service/ingress-nginx-controller-admission created
deployment.apps/ingress-nginx-controller created
job.batch/ingress-nginx-admission-create created
job.batch/ingress-nginx-admission-patch created
ingressclass.networking.k8s.io/nginx created
validatingwebhookconfiguration.admissionregistration.k8s.io/ingress-nginx-admission created
To list all resources in ingress-nginx namespace, use the command:
kubectl get all -n ingress-nginxThe response should look similar to this:
NAME                                            READY   STATUS              RESTARTS   AGE
pod/ingress-nginx-admission-create-7fkfc        0/1     ContainerCreating   0          15s
pod/ingress-nginx-admission-patch-vnbwf         0/1     ContainerCreating   0          15s
pod/ingress-nginx-controller-5c778bffff-4bb6x   0/1     ContainerCreating   0          15s

NAME                                         TYPE        CLUSTER-IP       EXTERNAL-IP   PORT(S)                      AGE
service/ingress-nginx-controller             NodePort    10.107.65.165    <none>        80:30609/TCP,443:30996/TCP   15s
service/ingress-nginx-controller-admission   ClusterIP   10.104.236.122   <none>        443/TCP                      15s

NAME                                       READY   UP-TO-DATE   AVAILABLE   AGE
deployment.apps/ingress-nginx-controller   0/1     1            0           15s

NAME                                                  DESIRED   CURRENT   READY   AGE
replicaset.apps/ingress-nginx-controller-5c778bffff   1         1         0       15s

NAME                                       COMPLETIONS   DURATION   AGE
job.batch/ingress-nginx-admission-create   0/1           15s        15s
job.batch/ingress-nginx-admission-patch    0/1           15s        15s
You can see that all the resources are still not in running state. Wait for everything to be in running state.
When all the resources are ready. The response should look similar to this:
NAME                                            READY   STATUS      RESTARTS   AGE
pod/ingress-nginx-admission-create-7fkfc        0/1     Completed   0          116s
pod/ingress-nginx-admission-patch-vnbwf         0/1     Completed   0          116s
pod/ingress-nginx-controller-5c778bffff-4bb6x   1/1     Running     0          116s

NAME                                         TYPE        CLUSTER-IP       EXTERNAL-IP   PORT(S)                      AGE
service/ingress-nginx-controller             NodePort    10.107.65.165    <none>        80:30609/TCP,443:30996/TCP   116s
service/ingress-nginx-controller-admission   ClusterIP   10.104.236.122   <none>        443/TCP                      116s

NAME                                       READY   UP-TO-DATE   AVAILABLE   AGE
deployment.apps/ingress-nginx-controller   1/1     1            1           116s

NAME                                                  DESIRED   CURRENT   READY   AGE
replicaset.apps/ingress-nginx-controller-5c778bffff   1         1         1       116s

NAME                                       COMPLETIONS   DURATION   AGE
job.batch/ingress-nginx-admission-create   1/1           20s        116s
job.batch/ingress-nginx-admission-patch    1/1           20s        116s
Edit ingress-nginx-controller service.
kubectl edit service/ingress-nginx-controller -n ingress-nginxChange the value of type from NodePort to LoadBalancer.
apiVersion: v1
kind: Service
metadata:
  creationTimestamp: "2023-07-25T05:22:21Z"
  labels:
    app.kubernetes.io/component: controller
    app.kubernetes.io/instance: ingress-nginx
    app.kubernetes.io/name: ingress-nginx
    app.kubernetes.io/part-of: ingress-nginx
    app.kubernetes.io/version: 1.8.1
  name: ingress-nginx-controller
  namespace: ingress-nginx
  resourceVersion: "90209"
  uid: 67865f69-35af-4e2d-aa61-897556d7ae1b
spec:
  clusterIP: 10.107.65.165
  clusterIPs:
  - 10.107.65.165
  externalTrafficPolicy: Cluster
  internalTrafficPolicy: Cluster
  ipFamilies:
  - IPv4
  ipFamilyPolicy: SingleStack
  ports:
  - appProtocol: http
    name: http
    nodePort: 30609
    port: 80
    protocol: TCP
    targetPort: http
  - appProtocol: https
    name: https
    nodePort: 30996
    port: 443
    protocol: TCP
    targetPort: https
  selector:
    app.kubernetes.io/component: controller
    app.kubernetes.io/instance: ingress-nginx
    app.kubernetes.io/name: ingress-nginx
  sessionAffinity: None
  type: LoadBalancer
status:
  loadBalancer: {}
Confirm successful edited of the service.
service/ingress-nginx-controller editedNginx Controller Service will be assigned an IP address automatically from Address Pool as configured in MetalLB and assigned ports which are required to be open.
kubectl get service ingress-nginx-controller --namespace=ingress-nginxThe response should look similar to this:
NAME                       TYPE           CLUSTER-IP      EXTERNAL-IP   PORT(S)                      AGE
ingress-nginx-controller   LoadBalancer   10.107.65.165   192.170.0.1   80:30609/TCP,443:30996/TCP   4m6s
The ports required for ingress nginx controller are:
| Protocol | Port Range | Used By |
|---|---|---|
| TCP | 80 | cluster ip, external ip |
| TCP | 443 | cluster ip, external ip |
| TCP | 30609 | node ip |
| TCP | 30996 | node ip |
The ports are required to be open in the firewall on master node.
sudo firewall-cmd --permanent --add-port=80/tcp
sudo firewall-cmd --permanent --add-port=443/tcp
sudo firewall-cmd --reload
The ports are required to be open in the firewall on worker node.
sudo firewall-cmd --permanent --add-port=80/tcp
sudo firewall-cmd --permanent --add-port=443/tcp
sudo firewall-cmd --permanent --add-port=30609/tcp
sudo firewall-cmd --permanent --add-port=30996/tcp
sudo firewall-cmd --reload
If you have multiple worker nodes, to know which worker node the ingress-nginx-controller pod is running on, run the command on the master node:
kubectl describe pod/ingress-nginx-controller-5c778bffff-4bb6x -n ingress-nginx | grep Node:The response should look similar to this:
Node: kubeworker1/172.16.0.22On worker node where ingress-nginx-controller pod is running on, use curl to test the cluster IP address of ingress-nginx-controller service:
curl http://10.107.65.165:80curl -k https://10.107.65.165:443Since there isn't any ingress resource configured, the response will return "404 Not Found" similar to follow:
<html>
<head><title>404 Not Found</title></head>
<body>
<center><h1>404 Not Found</h1></center>
<hr><center>nginx</center>
</body>
</html>
On worker node where ingress-nginx-controller pod is running on, use curl to test the external IP address of ingress-nginx-controller service:
curl http://192.170.0.1:80curl -k https://192.170.0.1:443Since there isn't any ingress resource configured, the response will return "404 Not Found" similar to follow:
<html>
<head><title>404 Not Found</title></head>
<body>
<center><h1>404 Not Found</h1></center>
<hr><center>nginx</center>
</body>
</html>
On worker node where ingress-nginx-controller pod is running on, you also can use the worker node IP address:
curl http://172.16.0.22:30609curl -k https://172.16.0.22:30996Since there isn't any ingress resource configured, the response will return "404 Not Found" similar to follow:
<html>
<head><title>404 Not Found</title></head>
<body>
<center><h1>404 Not Found</h1></center>
<hr><center>nginx</center>
</body>
</html>
On master node and other worker nodes, use curl to test tcp connection on cluster IP and on external IP address of ingress-nginx-controller service and on the worker node IP address where ingress-nginx-controller pod is running on:
curl http://10.107.65.165:80curl -k https://10.107.65.165:443curl http://192.170.0.1:80curl -k https://192.170.0.1:443curl http://172.16.0.22:30609curl -k https://172.16.0.22:30996The curl response when try to test tcp connection on cluster IP external IP address of ingress-nginx-controller service will fail since the firewall is blocking the request:
curl: (7) Failed to connect to 10.107.65.165 port 80 after 1 ms: Couldn't connect to servercurl: (7) Failed to connect to 10.107.65.165 port 443 after 1 ms: Couldn't connect to servercurl: (7) Failed to connect to 192.170.0.1 port 80 after 1 ms: Couldn't connect to servercurl: (7) Failed to connect to 192.170.0.1 port 443 after 1 ms: Couldn't connect to serverBut the curl response when try to test tcp connection on the worker node IP address where ingress-nginx-controller pod is running on will return "404 Not Found" since there isn't any ingress resource configured:
<html>
<head><title>404 Not Found</title></head>
<body>
<center><h1>404 Not Found</h1></center>
<hr><center>nginx</center>
</body>
</html>
Let's inspect why the firewall blocked the request.
Enable firewalld logging for denied packets on the worker node where ingress-nginx-controller pod is running on. Edit the /etc/firewalld/firewalld.conf. Set the value of LogDenied option from off to all.
Restart the firewalld service:
sudo systemctl restart firewalldOn master node and other worker nodes, run the curl command again:
curl http://10.107.65.165:80curl -k https://10.107.65.165:443curl http://192.170.0.1:80curl -k https://192.170.0.1:443On worker node where ingress-nginx-controller pod is running on, to view the denied packets, use dmesg command:
dmesg | grep -i REJECTThe response should look similar to this:
[ 8484.826734] filter_FWD_public_REJECT: IN=enp0s3 OUT=cali7368eccef27 MAC=08:00:27:10:a0:5f:08:00:27:fe:60:d3:08:00 SRC=172.16.0.21 DST=192.168.90.8 LEN=60 TOS=0x00 PREC=0x00 TTL=63 ID=47217 DF PROTO=TCP SPT=59916 DPT=80 WINDOW=64240 RES=0x00 SYN URGP=0 MARK=0x10000
[ 8484.842467] filter_FWD_public_REJECT: IN=enp0s3 OUT=cali7368eccef27 MAC=08:00:27:10:a0:5f:08:00:27:fe:60:d3:08:00 SRC=172.16.0.21 DST=192.168.90.8 LEN=60 TOS=0x00 PREC=0x00 TTL=63 ID=38798 DF PROTO=TCP SPT=5163 DPT=443 WINDOW=64240 RES=0x00 SYN URGP=0 MARK=0x10000
[ 8484.863771] filter_FWD_public_REJECT: IN=enp0s3 OUT=cali7368eccef27 MAC=08:00:27:10:a0:5f:08:00:27:fe:60:d3:08:00 SRC=172.16.0.21 DST=192.168.90.8 LEN=60 TOS=0x00 PREC=0x00 TTL=63 ID=15091 DF PROTO=TCP SPT=58803 DPT=80 WINDOW=64240 RES=0x00 SYN URGP=0 MARK=0x10000
[ 8484.881376] filter_FWD_public_REJECT: IN=enp0s3 OUT=cali7368eccef27 MAC=08:00:27:10:a0:5f:08:00:27:fe:60:d3:08:00 SRC=172.16.0.21 DST=192.168.90.8 LEN=60 TOS=0x00 PREC=0x00 TTL=63 ID=28939 DF PROTO=TCP SPT=19211 DPT=443 WINDOW=64240 RES=0x00 SYN URGP=0 MARK=0x10000
Create an new zone using calico network interface name (ie. cali7368eccef27). This is the zone for ingress-nginx-controller calico pod network.
sudo firewall-cmd --permanent --new-zone cali7368eccef27Then assign ingress-nginx-controller calico pod network interface cali7368eccef27 to this zone.
sudo firewall-cmd --permanent --change-interface=cali7368eccef27 --zone=cali7368eccef27Next, create a policy:
sudo firewall-cmd --permanent --new-policy cali7368eccef27polSet the policies to traffic forwarded from lan interface enp0s3 to calico network interface cali7368eccef27:
sudo firewall-cmd --permanent --policy cali7368eccef27pol --add-ingress-zone public
sudo firewall-cmd --permanent --policy cali7368eccef27pol --add-egress-zone cali7368eccef27
To finish up the policy settings, set it to accept new connections by default:
sudo firewall-cmd --permanent --policy cali7368eccef27pol --set-target ACCEPTThen load the new zone and policy into the active runtime state:
sudo firewall-cmd --reloadOn master node and other worker nodes, test to run the curl command again:
curl http://10.107.65.165:80curl -k https://10.107.65.165:443curl http://192.170.0.1:80curl -k https://192.170.0.1:443Since there isn't any ingress resource configured, the response will return "404 Not Found" similar to follow:
<html>
<head><title>404 Not Found</title></head>
<body>
<center><h1>404 Not Found</h1></center>
<hr><center>nginx</center>
</body>
</html>
Deploy a web-application using Nginx server to Worker Node from Master Node
First generate a self signed rsa key and certificate that the server can use for TLS:
mkdir ~/nginx
openssl req -x509 -nodes -days 365 -newkey rsa:4096 -keyout ~/nginx/nginx.key -out ~/nginx/nginx.crt
Fill out the certificate form:
...+........+.+...+..+......+.........+...+.+......+...+..+...+.+.....+..........+......+...+......+......+.....+.+..+...+...+++++++++++++++++++++++++++++++++++++++++++++++++++++++++++++++++*.............+.+.....+.+...........+....+...+++++++++++++++++++++++++++++++++++++++++++++++++++++++++++++++++*......+.............+......+....................+.......+..................+...............+...........+.+........+......+.............+.....+.+..............+...+.......+...............+...+..+.+........................+............+.....+.............+...+..+.+......+.........+.................+....+.....+.+.............................+.+..................+..+.......+..+.............+...........+.......+...+...........+...+.......+.....+..................+...+....+...........+.........+..................+.+.................+...+....+............+.........+.....+....+...............+......+...............+..+............+.+.....+.+...+............+...+..+.+..+++++++++++++++++++++++++++++++++++++++++++++++++++++++++++++++++
.....+...+......+...+++++++++++++++++++++++++++++++++++++++++++++++++++++++++++++++++*.....+...+...+.......+...+...+.....+....+............+.....+...+...+...............+...+....+...........+.+......+..+.+......+...+..+...+...+....+..............+......+.+..+.+.........+......+.....+............+.......+++++++++++++++++++++++++++++++++++++++++++++++++++++++++++++++++*........+..+.............+..+.......+...........+.......+.....+..............................+...+.......+......+......+...+...+...+..+....+...+...+++++++++++++++++++++++++++++++++++++++++++++++++++++++++++++++++
-----
You are about to be asked to enter information that will be incorporated
into your certificate request.
What you are about to enter is what is called a Distinguished Name or a DN.
There are quite a few fields but you can leave some blank
For some fields there will be a default value,
If you enter '.', the field will be left blank.
-----
Country Name (2 letter code) [AU]:ID
State or Province Name (full name) [Some-State]:Jakarta
Locality Name (eg, city) []:Jakarta
Organization Name (eg, company) [Internet Widgits Pty Ltd]:hemimorphite
Organizational Unit Name (eg, section) []:
Common Name (e.g. server FQDN or YOUR name) []:kubeworker1
Email Address []:yangsamuel91@gmail.com
Encode the key and certificate data in base64
cat ~/nginx/nginx.crt | base64The response should look similar to this:
LS0tLS1CRUdJTiBDRVJUSUZJQ0FURS0tLS0tCk1JSUY3VENDQTlXZ0F3SUJBZ0lVQXpObmREUWNjR1dRakMyY0w4cHpzVzlmaTBZd0RRWUpLb1pJaHZjTkFRRUwKQlFBd2dZVXhDekFKQmdOVkJBWVRBa2xFTVJBd0RnWURWUVFJREFkS1lXdGhjblJoTVJBd0RnWURWUVFIREFkSwpZV3RoY25SaE1SVXdFd1lEVlFRS0RBeG9aVzFwYlc5eWNHaHBkR1V4RkRBU0JnTlZCQU1NQzJ0MVltVjNiM0pyClpYSXhNU1V3SXdZSktvWklodmNOQVFrQkZoWjVZVzVuYzJGdGRXVnNPVEZBWjIxaGFXd3VZMjl0TUI0WERUSXoKTURjeU5URXhOVGN5TVZvWERUSTBNRGN5TkRFeE5UY3lNVm93Z1lVeEN6QUpCZ05WQkFZVEFrbEVNUkF3RGdZRApWUVFJREFkS1lXdGhjblJoTVJBd0RnWURWUVFIREFkS1lXdGhjblJoTVJVd0V3WURWUVFLREF4b1pXMXBiVzl5CmNHaHBkR1V4RkRBU0JnTlZCQU1NQzJ0MVltVjNiM0pyWlhJeE1TVXdJd1lKS29aSWh2Y05BUWtCRmhaNVlXNW4KYzJGdGRXVnNPVEZBWjIxaGFXd3VZMjl0TUlJQ0lqQU5CZ2txaGtpRzl3MEJBUUVGQUFPQ0FnOEFNSUlDQ2dLQwpBZ0VBNFlxUGpWQnJ0SWlMQysyU3UxbXFCdDNiQ1hWUXpnOENOK3VaZUJhUFJFelI1djQxaHh0S2QzZG4zNklRClU4bXFRTlNvckJSZktvejBOM3VEeGdtT0R5TG0rT0Y2REY2UGduaXA0STdHYmtva2RhWGdadFpZTE9tRzNSYnMKbEFNblRrY0xvQ0h4MFl6amIzY3duZitwQzRsa1JKWmE0UTV2eGQvR0JRZGNHUHd3bjY5UkZxOHcwVWJTTy9OZgpNcVFySDROU2JKZ3FPSzQ2MUJDYzFsWlh0ODlrWU1GdDBTc1NTaTBNdHRWWkxLYUhwRUFVc2tqcE1GUzJMZUFLCkZHNHVnbVQ1T3ZVRVgvdXZmMkZFbkZLYWl1aG0vbEF5NWlZdWZBV2RGdUFIZXMwZTNQWTdJdGRUM2RvT2xYTGgKMXgyTjk2QUdHNWpDVGFRWjZMYVo2WFUzemVHcGwxM09zWXNNWGQydzZ4aFF3UXZjTHl6NldpM1VGQm1TWXV3UQpEVWpOZUpXWlJ2SDZQeWt5bmtVNTNSaXRtUDQ5cGRTQXArL092RVo3RzF4aWgrNDh5R0Q5SzBtN0FTUnRQSG5NCkxmbDRyOU5jLzE4ZTNkdTVHRHlTMjgwcUd4SlNvcUtvUXQ1VU16ZHFlbmU2dXAwbXBsODZMdENtR3pWT01xMmcKZi9FakFQOFZ1ZVBGd1dnY296L2VXMFpzRmU4UDNXek5RZy80Tzh1aTV4VDU3ZUlSNGlIT01vOGxSNjZFLzhwUQpYV2FyYjJKRkpaMHFpOUpjeDZmY3hHdmE2TW16bG5PMzZtWi9GMy9yd3dESXd4OGVlYmQ1U2dkRGVzRlNMNXJkClFSMjVqT0VCNThvTVhSSWtwc1A0ZVF0VXhhVUpwT3dFYUdxSEtuMHBvWFRjUHVjQ0F3RUFBYU5UTUZFd0hRWUQKVlIwT0JCWUVGSVFmWEhSWDhWWVN5c3dOWFVoU2JTdFg0VElkTUI4R0ExVWRJd1FZTUJhQUZJUWZYSFJYOFZZUwp5c3dOWFVoU2JTdFg0VElkTUE4R0ExVWRFd0VCL3dRRk1BTUJBZjh3RFFZSktvWklodmNOQVFFTEJRQURnZ0lCCkFEWWc3OUdhMGpWeHVVTXl4NUJYVWFRUzhpTkZuR0kzZ2NDeWJCSHJTYU5lWVZQa0NVL0R3REJOR3dIc2JIakMKUkFxK3JUV0dueU5ZWHhFTVU5TlFUNytOY2o3N2VLMkUycjRSU0k3S0xyREVRYUxBVEFWMmN0NTVtVXMwSXVFcQppMEx5cDRJczY2NkJ0UEJXWUFWNjFaVlFKNEVNQ05DeVN5clVha3p3bDgraVV1bmFMWlVub2xmVFRMcmdNcUdrCkdReTlydGJiazl3U29KWnRmQ1liZUJtZVNWR0RwMXE3OEpSRDlTRXFYcnE5WjJGV2dvKzVTWVcyQ1NRa3o3WUkKbk5oL0hqOENwV3lneitaN2RNUitkSkZBS2tEYW93WHpmb1pZVzR6WTNyZDNEWGI3ajFWbzlWZHV2cDZCc3lQdApqS0YwSHRiOUVVZXVvSUk5cmRUM2Z5WCtIQTFyU0lsalBlWlFoNTBvN1VpUzA0cngyUTZkb3E0Smgvc2ZLc1gzCmJlOWpaZUNBeUZlOFQ3VzlKUG9WN3ZCV29HT2RsVTBYeForU1JOcVJNRXVVakZ6ak92c0hvVEJ2ZmhiWGV0STUKQmVkYVFaUFEreWxKUm9qTlM0MUVsZDl1Zk5qOUw4Y1dlTzRyY1VObXE1QWVSWnZjendDaXdtdW9rN2F4TFA2RgpqRmRjOGVmNnNLV2JSdUF1dWh5RDNVSkw3c2hwZ1FOOUR3dUNIRTFIYkRXYnR3QWZMTVZVbTMzVldaMXdhZ0pOCnhvWGZocWg3T0ViUzRQaVlaL25xdmtZdWJnQUJrbEptcWYxS093QWtZcXhld1VjekVIV1hpdlg3cFQyR0VVemcKRUUwbnMxb1hmbXJ5TTVDYjBaekJXVkd2eHFUY2swaWl4TkZPcmdPSVVxZjkKLS0tLS1FTkQgQ0VSVElGSUNBVEUtLS0tLQo=cat ~/nginx/nginx.key | base64The response should look similar to this:
LS0tLS1CRUdJTiBQUklWQVRFIEtFWS0tLS0tCk1JSUpRZ0lCQURBTkJna3Foa2lHOXcwQkFRRUZBQVNDQ1N3d2dna29BZ0VBQW9JQ0FRRGhpbytOVUd1MGlJc0wKN1pLN1dhb0czZHNKZFZET0R3STM2NWw0Rm85RVROSG0valdIRzBwM2QyZmZvaEJUeWFwQTFLaXNGRjhxalBRMwplNFBHQ1k0UEl1YjQ0WG9NWG8rQ2VLbmdqc1p1U2lSMXBlQm0xbGdzNlliZEZ1eVVBeWRPUnd1Z0lmSFJqT052CmR6Q2QvNmtMaVdSRWxscmhEbS9GMzhZRkIxd1kvRENmcjFFV3J6RFJSdEk3ODE4eXBDc2ZnMUpzbUNvNHJqclUKRUp6V1ZsZTN6MlJnd1czUkt4SktMUXkyMVZrc3BvZWtRQlN5U09rd1ZMWXQ0QW9VYmk2Q1pQazY5UVJmKzY5LwpZVVNjVXBxSzZHYitVRExtSmk1OEJaMFc0QWQ2elI3Yzlqc2kxMVBkMmc2VmN1SFhIWTMzb0FZYm1NSk5wQm5vCnRwbnBkVGZONGFtWFhjNnhpd3hkM2JEckdGREJDOXd2TFBwYUxkUVVHWkppN0JBTlNNMTRsWmxHOGZvL0tUS2UKUlRuZEdLMlkvajJsMUlDbjc4NjhSbnNiWEdLSDdqeklZUDByU2JzQkpHMDhlY3d0K1hpdjAxei9YeDdkMjdrWQpQSkxielNvYkVsS2lvcWhDM2xRek4ycDZkN3E2blNhbVh6b3UwS1liTlU0eXJhQi84U01BL3hXNTQ4WEJhQnlqClA5NWJSbXdWN3cvZGJNMUNEL2c3eTZMbkZQbnQ0aEhpSWM0eWp5Vkhyb1QveWxCZFpxdHZZa1VsblNxTDBsekgKcDl6RWE5cm95Yk9XYzdmcVpuOFhmK3ZEQU1qREh4NTV0M2xLQjBONndWSXZtdDFCSGJtTTRRSG55Z3hkRWlTbQp3L2g1QzFURnBRbWs3QVJvYW9jcWZTbWhkTncrNXdJREFRQUJBb0lDQUFoMXdwY05kSmFUMSs1N3FpQkxRLzlHCmZ3UElhN1BNVnVGYU5yK3BsUGhGRHZYa2txSEV6Z1NwU1hNNjJrb0xMeFg1eXprOU1pbFJmaG9VTzMxUFA2cEkKcndsZk5nWXFNdnB0MWlaU3N1c1lmTUc3YTJaZ0hEdGltWWp5dTNaRVN1ZUpKK2tYU1UvQnBoYi8vMExORGtWSApyY1FhYU5CaHhJYU1iRk5Cb1hqcXJGUjNTaGcxa1llWStCVzVmVHZ3am1hbW1JM3pQVHhybW15LzJUaHROUVpYCkdEcUZqRDN1WWZKTmo3ek9aRHhyUDlIVEkvY24wWW1pTFptclFZa1hwbis5aFlveGpJSVN2V0tyRThCRVA5WWEKS0Zwb1NIM1F4WnRFeHR2NWhreUZ3R1p6RmN3NDc1cVNlNkU2QjQ2L0VJNUFzSkVTaThOSHIzaHhlSkZFMjRBYgpiR3daaWJTK0I4WlFKamlXNGM1Tm5CZ2MrMVhvUWZqR0ZMMmJxR3M5QVVMcjJ6YWVxMGRxNjlmazUzazNSOWlOCllhem1zU04rVWJKQ1dVVWdNRUlDWEp1SXVxNmF6VEVpcUk2cHZod2RCckVPdjZBYnhHRklDNDNtM1l2QTNjOVQKQmZDekZLaXpwOWlHMkdUUklMS1pWVDdBbElRb0U1cHQxcStEczRLQkdOMjlkdy9Jc0hqYzhZSzA1MTk4OEhwOQp3d3RzQXZqaVdUZ2U3TkY3NmhCVW5yVjkzeFM5cHFhWVhLc0V4Mzl3SXlkUURqVTUyVWg3TlJldncwT3V4aEc1Clh3djFoS1pZc0c0cEtUbmNET0tOWnpMTUQ4c25NOGswc2ZMNjMzL1dJREl0NXZEekErQnpSTU5iR0ZLUDZ2a3YKVnhjbmVFc0NvbzBDZlhBemJINjFBb0lCQVFEek4zRUtSME5NcE81QXptbUdQenVJemIvMXVvdU5Rd3NrcU11bgpibFNFNkV1TXA5V3BJM3YwS0N4Q1RRNmZ1WWExVzhrSHQwR3Jzc2cxODBkWjVVSDdUdTF2TlVKbVlWaXJGSmNrCkZNRkNla2JZb01GSTk4RFo0Vnd5OEJCTjNPQ1MybG91ajVESTJnV2pTSHlyTFBzeVBoNEs1NkNsa1U0QjVaV3UKYlpJbDhGWlR6NmxOL05vcDFKYmxCZldxc2lpbU13eTZPbzhjYkRSMC8vSVJGcTAvWEVOOEMvb0VSRzA2ZHlhaQpwR3k5SUdhZ1g4MzVObkZEK20zZWdySmdIc0RjcjFCYTluRUJud1RBcWp1TUlKYnVkWWMrU1JwYXJvdW13QVRICldWdVRkVWhiWldpNE9pUTZQRUw1aWo0U0R5dXNHaTVudXRLUk1oRmYxbHY1SElaN0FvSUJBUUR0WlVyQzZFMUQKNlBjV1BKVndTVjNRczdDUTUrRkdpbElTeVhmQStEbVREZmNWd3Q5SXB4ckhKZWtrZ1lVMndYZFptMy9iN0U2UAp6RGRQVXAzSUJEV3E5cU1ISGtUWmNZNzh4QUhzT0RCYVMrNmJNVjNIWDZZOWFNeGxTZDI0RGxtTjRJSDRYY3ZsCkN0amZGMmtKSmg1Um5QNmw5amxXbUc1c2loMWRUV3FYaVMwTXltUjBJaFNXT01QTmdwOGtFMFJoN3RSTlEzMWwKbHlWTU9xWTE2a3Y2bzJWQTJsNkM1bUc0cnJtU2FzZDNxYjRrMlJDMGZNU05BVjVzbGw4K0tHVmhGRVBjMENNVQptTHN4T1Q0Q2VSN1pCOXFVMDlFUE9WOGhGNlhySHptNmQ3UUR0ekc5ZTFXSG9yek1GQVpWL0ZSbmp4L1d1VkpYCklXYlUrT0NOcWRPRkFvSUJBRVh0eTkrVHE4THVyTjRQT3dIeFRsSEFMcEFkYWFCZEJXZ3Q3QmdndmNaVTc5dnEKS2FGdTVXWEc0eXJROHdKem1rcXNzRGs2dEhRRWZGSWV0NFllUjRGVktTbFBXOThKNEMrWVJQaUh5eVVzK1EreAo4TURsRXhyU0UrdEZZTHF5WmhOekduakdxRzlIV0ZXaE1zOFlxTVRDWFdydlBCNCtqL28xbzNxNllFbnVOelB6CndnNzlRMURCb2YwSllLQUtoMnQ1eEJBTFpEaGMyQnhIdHJhNUdXamRRejM0UjVOUWhVTkpITitvZk9kSDJKb0YKMGJmMHNrNUVRN0MxVFVvYnJZSUdHZ2w5VC9LU1lSQndJWnpoaGVQY0FOMmtzU0lmaTJHUFZoQm5IZEJnNlVQMQovVXp5MHBXMzI5M1pwSTBXdFl6UEhrYU96Wm9YbGkxQytjQy9OZDhDZ2dFQkFMVEpQODhBdzk2a3FvNm5vcEo1CmZOVjBFbEc0Rk9uNGFwcGVEVEhLbDJYeTY2a0oxNnJuZjFBTUFlbklMUi9PNDhvOHpuazRFM2dVNkVZalAzOVUKSFY3T0pzZEQrT0N6UjFZZEd1Mit1S3Y3U1lHc2JhTm9weHY3RkRWS3RHdjNtYUdmU0x0UkN2YXBkUkVvTGRoRwp6QzRRNWlpVFE0VTczbFFRTmw2WWwwVkJ0U29aYzdpeFA0WkxRbW5lUUwxall0OUYxeTNqNkxvV0NkUnNrYWxiCmZYTXBQZkhPbXMwTEQzNXFxVzNrblhUMnNwUXpMaktWRmNYZ05mMXg0cVJlZFI0aUpiQWlYYVRRenpXa1J5SHgKQlZuNFRqQ3F3bm5ha2lTTWN0R0UzUnl4RGtrS0dQb1kwOERRWVFEMWV3RytnTFRBM1ZsVGxtNCtSS2FKeGRCOApkVlVDZ2dFQVg2Tk1uZE1vQnJ3enBMZVc3c3JwSXVWRFBnRkg4TXNFVlZUZnlURm54WWNtNEkrNlF6clJFeVM5CkVoTjA0WWRXdEErU3h3Y3FrQjNNZ3pjV0JDa0xIZ0kyWHFpS2NKWEtsT0tqZHdEWkpRK2hZRHhsLzduWW1Ncm8KMEU0QWU1OENXWnhpTXFJQ2VjL2ZCamdQUzBocHFuOEZEdVdHT3dxWHpkRE5mQm11aklmeUE1SmN4K2Z1VkF3ZgpTclZ4MEJkRWhpOUhveUplTEtuNGtucTZneHhzaElVUXJmQTVTYWNlQ0YzV2NRM1l5UWZHOE1sNUhsSEJhZkx4Cnl5U0NkMU8wUzRCeE1yaW4vYWkyK3lrMUJMQUY5ZXNSWDJISVVJdVdHVUs3OTZsSk1pelpLOTJoN3FOWThlU3oKMTZSNHhsaDBEdnRkdWhOREVMcjA3VC8wZHFKeThRPT0KLS0tLS1FTkQgUFJJVkFURSBLRVktLS0tLQo=Then create your NGINX server configuration file default.conf:
server {
    listen 80 default_server;
    listen [::]:80 default_server ipv6only=on;

    listen 443 ssl;

    root /usr/share/nginx/html;
    index index.html;

    server_name localhost;
    ssl_certificate /etc/nginx/ssl/tls.crt;
    ssl_certificate_key /etc/nginx/ssl/tls.key;

    location / {
            try_files $uri $uri/ =404;
    }
}
Create a kubernetes yaml tls secret file for creating a secret named nginx-secret
apiVersion: v1
data:
  tls.crt: LS0tLS1CRUdJTiBDRVJUSUZJQ0FURS0tLS0tCk1JSUY3VENDQTlXZ0F3SUJBZ0lVQXpObmREUWNjR1dRakMyY0w4cHpzVzlmaTBZd0RRWUpLb1pJaHZjTkFRRUwKQlFBd2dZVXhDekFKQmdOVkJBWVRBa2xFTVJBd0RnWURWUVFJREFkS1lXdGhjblJoTVJBd0RnWURWUVFIREFkSwpZV3RoY25SaE1SVXdFd1lEVlFRS0RBeG9aVzFwYlc5eWNHaHBkR1V4RkRBU0JnTlZCQU1NQzJ0MVltVjNiM0pyClpYSXhNU1V3SXdZSktvWklodmNOQVFrQkZoWjVZVzVuYzJGdGRXVnNPVEZBWjIxaGFXd3VZMjl0TUI0WERUSXoKTURjeU5URXhOVGN5TVZvWERUSTBNRGN5TkRFeE5UY3lNVm93Z1lVeEN6QUpCZ05WQkFZVEFrbEVNUkF3RGdZRApWUVFJREFkS1lXdGhjblJoTVJBd0RnWURWUVFIREFkS1lXdGhjblJoTVJVd0V3WURWUVFLREF4b1pXMXBiVzl5CmNHaHBkR1V4RkRBU0JnTlZCQU1NQzJ0MVltVjNiM0pyWlhJeE1TVXdJd1lKS29aSWh2Y05BUWtCRmhaNVlXNW4KYzJGdGRXVnNPVEZBWjIxaGFXd3VZMjl0TUlJQ0lqQU5CZ2txaGtpRzl3MEJBUUVGQUFPQ0FnOEFNSUlDQ2dLQwpBZ0VBNFlxUGpWQnJ0SWlMQysyU3UxbXFCdDNiQ1hWUXpnOENOK3VaZUJhUFJFelI1djQxaHh0S2QzZG4zNklRClU4bXFRTlNvckJSZktvejBOM3VEeGdtT0R5TG0rT0Y2REY2UGduaXA0STdHYmtva2RhWGdadFpZTE9tRzNSYnMKbEFNblRrY0xvQ0h4MFl6amIzY3duZitwQzRsa1JKWmE0UTV2eGQvR0JRZGNHUHd3bjY5UkZxOHcwVWJTTy9OZgpNcVFySDROU2JKZ3FPSzQ2MUJDYzFsWlh0ODlrWU1GdDBTc1NTaTBNdHRWWkxLYUhwRUFVc2tqcE1GUzJMZUFLCkZHNHVnbVQ1T3ZVRVgvdXZmMkZFbkZLYWl1aG0vbEF5NWlZdWZBV2RGdUFIZXMwZTNQWTdJdGRUM2RvT2xYTGgKMXgyTjk2QUdHNWpDVGFRWjZMYVo2WFUzemVHcGwxM09zWXNNWGQydzZ4aFF3UXZjTHl6NldpM1VGQm1TWXV3UQpEVWpOZUpXWlJ2SDZQeWt5bmtVNTNSaXRtUDQ5cGRTQXArL092RVo3RzF4aWgrNDh5R0Q5SzBtN0FTUnRQSG5NCkxmbDRyOU5jLzE4ZTNkdTVHRHlTMjgwcUd4SlNvcUtvUXQ1VU16ZHFlbmU2dXAwbXBsODZMdENtR3pWT01xMmcKZi9FakFQOFZ1ZVBGd1dnY296L2VXMFpzRmU4UDNXek5RZy80Tzh1aTV4VDU3ZUlSNGlIT01vOGxSNjZFLzhwUQpYV2FyYjJKRkpaMHFpOUpjeDZmY3hHdmE2TW16bG5PMzZtWi9GMy9yd3dESXd4OGVlYmQ1U2dkRGVzRlNMNXJkClFSMjVqT0VCNThvTVhSSWtwc1A0ZVF0VXhhVUpwT3dFYUdxSEtuMHBvWFRjUHVjQ0F3RUFBYU5UTUZFd0hRWUQKVlIwT0JCWUVGSVFmWEhSWDhWWVN5c3dOWFVoU2JTdFg0VElkTUI4R0ExVWRJd1FZTUJhQUZJUWZYSFJYOFZZUwp5c3dOWFVoU2JTdFg0VElkTUE4R0ExVWRFd0VCL3dRRk1BTUJBZjh3RFFZSktvWklodmNOQVFFTEJRQURnZ0lCCkFEWWc3OUdhMGpWeHVVTXl4NUJYVWFRUzhpTkZuR0kzZ2NDeWJCSHJTYU5lWVZQa0NVL0R3REJOR3dIc2JIakMKUkFxK3JUV0dueU5ZWHhFTVU5TlFUNytOY2o3N2VLMkUycjRSU0k3S0xyREVRYUxBVEFWMmN0NTVtVXMwSXVFcQppMEx5cDRJczY2NkJ0UEJXWUFWNjFaVlFKNEVNQ05DeVN5clVha3p3bDgraVV1bmFMWlVub2xmVFRMcmdNcUdrCkdReTlydGJiazl3U29KWnRmQ1liZUJtZVNWR0RwMXE3OEpSRDlTRXFYcnE5WjJGV2dvKzVTWVcyQ1NRa3o3WUkKbk5oL0hqOENwV3lneitaN2RNUitkSkZBS2tEYW93WHpmb1pZVzR6WTNyZDNEWGI3ajFWbzlWZHV2cDZCc3lQdApqS0YwSHRiOUVVZXVvSUk5cmRUM2Z5WCtIQTFyU0lsalBlWlFoNTBvN1VpUzA0cngyUTZkb3E0Smgvc2ZLc1gzCmJlOWpaZUNBeUZlOFQ3VzlKUG9WN3ZCV29HT2RsVTBYeForU1JOcVJNRXVVakZ6ak92c0hvVEJ2ZmhiWGV0STUKQmVkYVFaUFEreWxKUm9qTlM0MUVsZDl1Zk5qOUw4Y1dlTzRyY1VObXE1QWVSWnZjendDaXdtdW9rN2F4TFA2RgpqRmRjOGVmNnNLV2JSdUF1dWh5RDNVSkw3c2hwZ1FOOUR3dUNIRTFIYkRXYnR3QWZMTVZVbTMzVldaMXdhZ0pOCnhvWGZocWg3T0ViUzRQaVlaL25xdmtZdWJnQUJrbEptcWYxS093QWtZcXhld1VjekVIV1hpdlg3cFQyR0VVemcKRUUwbnMxb1hmbXJ5TTVDYjBaekJXVkd2eHFUY2swaWl4TkZPcmdPSVVxZjkKLS0tLS1FTkQgQ0VSVElGSUNBVEUtLS0tLQo=
  tls.key: LS0tLS1CRUdJTiBQUklWQVRFIEtFWS0tLS0tCk1JSUpRZ0lCQURBTkJna3Foa2lHOXcwQkFRRUZBQVNDQ1N3d2dna29BZ0VBQW9JQ0FRRGhpbytOVUd1MGlJc0wKN1pLN1dhb0czZHNKZFZET0R3STM2NWw0Rm85RVROSG0valdIRzBwM2QyZmZvaEJUeWFwQTFLaXNGRjhxalBRMwplNFBHQ1k0UEl1YjQ0WG9NWG8rQ2VLbmdqc1p1U2lSMXBlQm0xbGdzNlliZEZ1eVVBeWRPUnd1Z0lmSFJqT052CmR6Q2QvNmtMaVdSRWxscmhEbS9GMzhZRkIxd1kvRENmcjFFV3J6RFJSdEk3ODE4eXBDc2ZnMUpzbUNvNHJqclUKRUp6V1ZsZTN6MlJnd1czUkt4SktMUXkyMVZrc3BvZWtRQlN5U09rd1ZMWXQ0QW9VYmk2Q1pQazY5UVJmKzY5LwpZVVNjVXBxSzZHYitVRExtSmk1OEJaMFc0QWQ2elI3Yzlqc2kxMVBkMmc2VmN1SFhIWTMzb0FZYm1NSk5wQm5vCnRwbnBkVGZONGFtWFhjNnhpd3hkM2JEckdGREJDOXd2TFBwYUxkUVVHWkppN0JBTlNNMTRsWmxHOGZvL0tUS2UKUlRuZEdLMlkvajJsMUlDbjc4NjhSbnNiWEdLSDdqeklZUDByU2JzQkpHMDhlY3d0K1hpdjAxei9YeDdkMjdrWQpQSkxielNvYkVsS2lvcWhDM2xRek4ycDZkN3E2blNhbVh6b3UwS1liTlU0eXJhQi84U01BL3hXNTQ4WEJhQnlqClA5NWJSbXdWN3cvZGJNMUNEL2c3eTZMbkZQbnQ0aEhpSWM0eWp5Vkhyb1QveWxCZFpxdHZZa1VsblNxTDBsekgKcDl6RWE5cm95Yk9XYzdmcVpuOFhmK3ZEQU1qREh4NTV0M2xLQjBONndWSXZtdDFCSGJtTTRRSG55Z3hkRWlTbQp3L2g1QzFURnBRbWs3QVJvYW9jcWZTbWhkTncrNXdJREFRQUJBb0lDQUFoMXdwY05kSmFUMSs1N3FpQkxRLzlHCmZ3UElhN1BNVnVGYU5yK3BsUGhGRHZYa2txSEV6Z1NwU1hNNjJrb0xMeFg1eXprOU1pbFJmaG9VTzMxUFA2cEkKcndsZk5nWXFNdnB0MWlaU3N1c1lmTUc3YTJaZ0hEdGltWWp5dTNaRVN1ZUpKK2tYU1UvQnBoYi8vMExORGtWSApyY1FhYU5CaHhJYU1iRk5Cb1hqcXJGUjNTaGcxa1llWStCVzVmVHZ3am1hbW1JM3pQVHhybW15LzJUaHROUVpYCkdEcUZqRDN1WWZKTmo3ek9aRHhyUDlIVEkvY24wWW1pTFptclFZa1hwbis5aFlveGpJSVN2V0tyRThCRVA5WWEKS0Zwb1NIM1F4WnRFeHR2NWhreUZ3R1p6RmN3NDc1cVNlNkU2QjQ2L0VJNUFzSkVTaThOSHIzaHhlSkZFMjRBYgpiR3daaWJTK0I4WlFKamlXNGM1Tm5CZ2MrMVhvUWZqR0ZMMmJxR3M5QVVMcjJ6YWVxMGRxNjlmazUzazNSOWlOCllhem1zU04rVWJKQ1dVVWdNRUlDWEp1SXVxNmF6VEVpcUk2cHZod2RCckVPdjZBYnhHRklDNDNtM1l2QTNjOVQKQmZDekZLaXpwOWlHMkdUUklMS1pWVDdBbElRb0U1cHQxcStEczRLQkdOMjlkdy9Jc0hqYzhZSzA1MTk4OEhwOQp3d3RzQXZqaVdUZ2U3TkY3NmhCVW5yVjkzeFM5cHFhWVhLc0V4Mzl3SXlkUURqVTUyVWg3TlJldncwT3V4aEc1Clh3djFoS1pZc0c0cEtUbmNET0tOWnpMTUQ4c25NOGswc2ZMNjMzL1dJREl0NXZEekErQnpSTU5iR0ZLUDZ2a3YKVnhjbmVFc0NvbzBDZlhBemJINjFBb0lCQVFEek4zRUtSME5NcE81QXptbUdQenVJemIvMXVvdU5Rd3NrcU11bgpibFNFNkV1TXA5V3BJM3YwS0N4Q1RRNmZ1WWExVzhrSHQwR3Jzc2cxODBkWjVVSDdUdTF2TlVKbVlWaXJGSmNrCkZNRkNla2JZb01GSTk4RFo0Vnd5OEJCTjNPQ1MybG91ajVESTJnV2pTSHlyTFBzeVBoNEs1NkNsa1U0QjVaV3UKYlpJbDhGWlR6NmxOL05vcDFKYmxCZldxc2lpbU13eTZPbzhjYkRSMC8vSVJGcTAvWEVOOEMvb0VSRzA2ZHlhaQpwR3k5SUdhZ1g4MzVObkZEK20zZWdySmdIc0RjcjFCYTluRUJud1RBcWp1TUlKYnVkWWMrU1JwYXJvdW13QVRICldWdVRkVWhiWldpNE9pUTZQRUw1aWo0U0R5dXNHaTVudXRLUk1oRmYxbHY1SElaN0FvSUJBUUR0WlVyQzZFMUQKNlBjV1BKVndTVjNRczdDUTUrRkdpbElTeVhmQStEbVREZmNWd3Q5SXB4ckhKZWtrZ1lVMndYZFptMy9iN0U2UAp6RGRQVXAzSUJEV3E5cU1ISGtUWmNZNzh4QUhzT0RCYVMrNmJNVjNIWDZZOWFNeGxTZDI0RGxtTjRJSDRYY3ZsCkN0amZGMmtKSmg1Um5QNmw5amxXbUc1c2loMWRUV3FYaVMwTXltUjBJaFNXT01QTmdwOGtFMFJoN3RSTlEzMWwKbHlWTU9xWTE2a3Y2bzJWQTJsNkM1bUc0cnJtU2FzZDNxYjRrMlJDMGZNU05BVjVzbGw4K0tHVmhGRVBjMENNVQptTHN4T1Q0Q2VSN1pCOXFVMDlFUE9WOGhGNlhySHptNmQ3UUR0ekc5ZTFXSG9yek1GQVpWL0ZSbmp4L1d1VkpYCklXYlUrT0NOcWRPRkFvSUJBRVh0eTkrVHE4THVyTjRQT3dIeFRsSEFMcEFkYWFCZEJXZ3Q3QmdndmNaVTc5dnEKS2FGdTVXWEc0eXJROHdKem1rcXNzRGs2dEhRRWZGSWV0NFllUjRGVktTbFBXOThKNEMrWVJQaUh5eVVzK1EreAo4TURsRXhyU0UrdEZZTHF5WmhOekduakdxRzlIV0ZXaE1zOFlxTVRDWFdydlBCNCtqL28xbzNxNllFbnVOelB6CndnNzlRMURCb2YwSllLQUtoMnQ1eEJBTFpEaGMyQnhIdHJhNUdXamRRejM0UjVOUWhVTkpITitvZk9kSDJKb0YKMGJmMHNrNUVRN0MxVFVvYnJZSUdHZ2w5VC9LU1lSQndJWnpoaGVQY0FOMmtzU0lmaTJHUFZoQm5IZEJnNlVQMQovVXp5MHBXMzI5M1pwSTBXdFl6UEhrYU96Wm9YbGkxQytjQy9OZDhDZ2dFQkFMVEpQODhBdzk2a3FvNm5vcEo1CmZOVjBFbEc0Rk9uNGFwcGVEVEhLbDJYeTY2a0oxNnJuZjFBTUFlbklMUi9PNDhvOHpuazRFM2dVNkVZalAzOVUKSFY3T0pzZEQrT0N6UjFZZEd1Mit1S3Y3U1lHc2JhTm9weHY3RkRWS3RHdjNtYUdmU0x0UkN2YXBkUkVvTGRoRwp6QzRRNWlpVFE0VTczbFFRTmw2WWwwVkJ0U29aYzdpeFA0WkxRbW5lUUwxall0OUYxeTNqNkxvV0NkUnNrYWxiCmZYTXBQZkhPbXMwTEQzNXFxVzNrblhUMnNwUXpMaktWRmNYZ05mMXg0cVJlZFI0aUpiQWlYYVRRenpXa1J5SHgKQlZuNFRqQ3F3bm5ha2lTTWN0R0UzUnl4RGtrS0dQb1kwOERRWVFEMWV3RytnTFRBM1ZsVGxtNCtSS2FKeGRCOApkVlVDZ2dFQVg2Tk1uZE1vQnJ3enBMZVc3c3JwSXVWRFBnRkg4TXNFVlZUZnlURm54WWNtNEkrNlF6clJFeVM5CkVoTjA0WWRXdEErU3h3Y3FrQjNNZ3pjV0JDa0xIZ0kyWHFpS2NKWEtsT0tqZHdEWkpRK2hZRHhsLzduWW1Ncm8KMEU0QWU1OENXWnhpTXFJQ2VjL2ZCamdQUzBocHFuOEZEdVdHT3dxWHpkRE5mQm11aklmeUE1SmN4K2Z1VkF3ZgpTclZ4MEJkRWhpOUhveUplTEtuNGtucTZneHhzaElVUXJmQTVTYWNlQ0YzV2NRM1l5UWZHOE1sNUhsSEJhZkx4Cnl5U0NkMU8wUzRCeE1yaW4vYWkyK3lrMUJMQUY5ZXNSWDJISVVJdVdHVUs3OTZsSk1pelpLOTJoN3FOWThlU3oKMTZSNHhsaDBEdnRkdWhOREVMcjA3VC8wZHFKeThRPT0KLS0tLS1FTkQgUFJJVkFURSBLRVktLS0tLQo=
kind: Secret
metadata:
  name: nginx-secret
  namespace: default
type: kubernetes.io/tls
Apply the tls secret manifest file:
kubectl create -f nginx-secret.yamlThe response should look similar to this:
secret/nginx-secret createdCreate a ConfigMap that stores Nginx configuration:
kubectl create configmap nginx-configmap --from-file=default.confThe response should look similar to this:
configmap/nginx-configmap createdCreate a kubernetes yaml deployment file for deploying a pod named nginx-server that running Nginx image:
apiVersion: apps/v1
kind: Deployment
metadata:
  name: nginx-server
  namespace: default
  labels:
    app: web
spec:
  selector:
    matchLabels:
      app: web
  template:
    metadata:
      labels:
        app: web
    spec:
      volumes:
      - name: secret-volume
        secret:
          secretName: nginx-secret
      - name: configmap-volume
        configMap:
          name: nginx-configmap
      containers:
      - name: nginx
        image: nginx:latest
        ports:
        - containerPort: 80
        - containerPort: 443
        volumeMounts:
        - mountPath: /etc/nginx/ssl
          name: secret-volume
        - mountPath: /etc/nginx/conf.d
          name: configmap-volume
      nodeSelector:
        nodelabel: kubeworker1
Apply the nginx server manifest deployment file:
kubectl create -f nginx-server.yamlThe response should look similar to this:
deployment.apps/nginx-server createdCreate a kubernetes yaml load balancer service file for exposing the pod with the label app=web to a service named nginx-server-service on a TCP port of 80:
apiVersion: v1
kind: Service
metadata:
  name: nginx-server-service
  namespace: default
spec:
  selector:
    app: web
  ports:
    - name: web-http
      protocol: TCP
      appProtocol: http
      targetPort: http
      port: 80
      targetPort: 80
    - name: web-https
      protocol: TCP
      appProtocol: https
      targetPort: https
      port: 443
      targetPort: 443
  type: LoadBalancer
Apply the nginx server service manifest file:
kubectl create -f nginx-server-service.yamlThe response should look similar to this:
service/nginx-server-service createdNginx Controller Service will be assigned an IP address automatically from Address Pool as configured in MetalLB and assigned ports which are required to be open.
kubectl get service nginx-server-service --namespace=defaultThe response should look similar to this:
NAME                   TYPE           CLUSTER-IP      EXTERNAL-IP   PORT(S)                      AGE
nginx-server-service   LoadBalancer   10.107.131.88   192.170.0.2   80:31653/TCP,443:30552/TCP   5m23s
The ports required by nginx server service are:
| Protocol | Port Range | Used By |
|---|---|---|
| TCP | 80 | cluster ip, external ip |
| TCP | 443 | cluster ip, external ip |
| TCP | 31653 | node ip |
| TCP | 30552 | node ip |
The ports are required to be open in the firewall on master node.
sudo firewall-cmd --permanent --add-port=80/tcp
sudo firewall-cmd --permanent --add-port=443/tcp
sudo firewall-cmd --reload
The ports are required to be open in the firewall on worker node.
sudo firewall-cmd --permanent --add-port=80/tcp
sudo firewall-cmd --permanent --add-port=443/tcp
sudo firewall-cmd --permanent --add-port=31025/tcp
sudo firewall-cmd --permanent --add-port=30625/tcp
sudo firewall-cmd --reload
If you have multiple worker nodes, you need to know which worker node the nginx-server pod is running on. To know which worker node the pod is running on, run the command:
kubectl describe pod/ingress-nginx-controller-5c778bffff-4bb6x -n ingress-nginx | grep Node:The response should look similar to this:
Node: kubeworker1/172.16.0.22On worker node where the nginx-server pod is running on, try to access your application using the cluster IP and the external IP address of nginx-server-service and the worker node IP which the nginx-server pod is running on:
curl http://10.107.131.88:80curl -k https://10.107.131.88:443curl http://192.170.0.2:80curl -k https://192.170.0.2:443curl http://172.16.0.22:31653curl -k https://172.16.0.22:30552The response to a successful request is similar to:
<!DOCTYPE html>
<html>
<head>
<title>Welcome to nginx!</title>
<style>
html { color-scheme: light dark; }
body { width: 35em; margin: 0 auto;
font-family: Tahoma, Verdana, Arial, sans-serif; }
</style>
</head>
<body>
<h1>Welcome to nginx!</h1>
<p>If you see this page, the nginx web server is successfully installed and
working. Further configuration is required.</p>

<p>For online documentation and support please refer to
<a href="http://nginx.org/">nginx.org</a>.<br/>
Commercial support is available at
<a href="http://nginx.com/">nginx.com</a>.</p>

<p><em>Thank you for using nginx.</em></p>
</body>
</html>
On master node and other worker nodes, try to access your application using the cluster IP, external IP and node IP address of nginx-server-service:
curl http://10.107.131.88:80curl -k https://10.107.131.88:443curl http://192.170.0.2:80curl -k https://192.170.0.2:443The curl response when try to test tcp connection on cluster IP external IP address of nginx-server-service will fail since the firewall is blocking the request:
curl: (7) Failed to connect to 10.107.131.88 port 80 after 1 ms: Couldn't connect to servercurl: (7) Failed to connect to 10.107.131.88 port 443 after 1 ms: Couldn't connect to servercurl: (7) Failed to connect to 192.170.0.2 port 80 after 1 ms: Couldn't connect to servercurl: (7) Failed to connect to 192.170.0.2 port 443 after 1 ms: Couldn't connect to serverBut otherwise the curl response when try to test tcp connection on the worker node IP address where ingress-nginx-controller pod is running on returns:
<!DOCTYPE html>
<html>
<head>
<title>Welcome to nginx!</title>
<style>
html { color-scheme: light dark; }
body { width: 35em; margin: 0 auto;
font-family: Tahoma, Verdana, Arial, sans-serif; }
</style>
</head>
<body>
<h1>Welcome to nginx!</h1>
<p>If you see this page, the nginx web server is successfully installed and
working. Further configuration is required.</p>

<p>For online documentation and support please refer to
<a href="http://nginx.org/">nginx.org</a>.<br/>
Commercial support is available at
<a href="http://nginx.com/">nginx.com</a>.</p>

<p><em>Thank you for using nginx.</em></p>
</body>
</html>
On worker node where the nginx-server pod is running on, use dmesg command to view the denied packets:
dmesg | grep -i REJECTThe response should look similar to this:
[29039.265405] filter_FWD_public_REJECT: IN=enp0s3 OUT=cali9aba158b53d MAC=08:00:27:10:a0:5f:08:00:27:fe:60:d3:08:00 SRC=172.16.0.21 DST=192.168.90.11 LEN=60 TOS=0x00 PREC=0x00 TTL=63 ID=15179 DF PROTO=TCP SPT=35290 DPT=80 WINDOW=64240 RES=0x00 SYN URGP=0 MARK=0x10000
[29039.291039] filter_FWD_public_REJECT: IN=enp0s3 OUT=cali9aba158b53d MAC=08:00:27:10:a0:5f:08:00:27:fe:60:d3:08:00 SRC=172.16.0.21 DST=192.168.90.11 LEN=60 TOS=0x00 PREC=0x00 TTL=63 ID=21020 DF PROTO=TCP SPT=4065 DPT=443 WINDOW=64240 RES=0x00 SYN URGP=0 MARK=0x10000
[29039.302519] filter_FWD_public_REJECT: IN=enp0s3 OUT=cali9aba158b53d MAC=08:00:27:10:a0:5f:08:00:27:fe:60:d3:08:00 SRC=172.16.0.21 DST=192.168.90.11 LEN=60 TOS=0x00 PREC=0x00 TTL=63 ID=26229 DF PROTO=TCP SPT=7973 DPT=80 WINDOW=64240 RES=0x00 SYN URGP=0 MARK=0x10000
[29039.310790] filter_FWD_public_REJECT: IN=enp0s3 OUT=cali9aba158b53d MAC=08:00:27:10:a0:5f:08:00:27:fe:60:d3:08:00 SRC=172.16.0.21 DST=192.168.90.11 LEN=60 TOS=0x00 PREC=0x00 TTL=63 ID=58856 DF PROTO=TCP SPT=9648 DPT=443 WINDOW=64240 RES=0x00 SYN URGP=0 MARK=0x10000
Create an new zone using calico network interface name (ie. cali9aba158b53d). cali9aba158b53d is the zone for nginx-server calico pod network.
sudo firewall-cmd --permanent --new-zone cali9aba158b53dThen assign nginx-server calico pod network interface cali9aba158b53d to this zone.
sudo firewall-cmd --permanent --change-interface=cali9aba158b53d --zone=cali9aba158b53dNext, create a policy:
sudo firewall-cmd --permanent --new-policy cali9aba158b53dpolSet the policies to traffic forwarded from lan interface enp0s3 to calico network interface cali7368eccef27:
sudo firewall-cmd --permanent --policy cali9aba158b53dpol --add-ingress-zone public
sudo firewall-cmd --permanent --policy cali9aba158b53dpol --add-egress-zone cali9aba158b53d
To finish up the policy settings, set it to accept new connections by default:
sudo firewall-cmd --permanent --policy cali9aba158b53dpol --set-target ACCEPTThen load the new zone and policy into the active runtime state:
sudo firewall-cmd --reloadOn master node and other worker nodes, test to run the curl command again:
curl http://10.107.131.88:80curl -k https://10.107.131.88:443curl http://192.170.0.2:80curl -k https://192.170.0.2:443curl http://172.16.0.22:31653curl -k https://172.16.0.22:30552The request should be successful now.
<!DOCTYPE html>
<html>
<head>
<title>Welcome to nginx!</title>
<style>
html { color-scheme: light dark; }
body { width: 35em; margin: 0 auto;
font-family: Tahoma, Verdana, Arial, sans-serif; }
</style>
</head>
<body>
<h1>Welcome to nginx!</h1>
<p>If you see this page, the nginx web server is successfully installed and
working. Further configuration is required.</p>

<p>For online documentation and support please refer to
<a href="http://nginx.org/">nginx.org</a>.<br/>
Commercial support is available at
<a href="http://nginx.com/">nginx.com</a>.</p>

<p><em>Thank you for using nginx.</em></p>
</body>
</html>
Generate a self signed rsa key and certificate that later the ingress resource can use for TLS:
openssl req -x509 -nodes -days 365 -newkey rsa:4096 -keyout ~/nginx/ingress.key -out ~/nginx/ingress.crtFill out the certificate form:
..+.........+...+.............+.........+..+...+..........+........+....+...+........+...+.+...+...+...+.....+.+.....+....+...........+.+++++++++++++++++++++++++++++++++++++++++++++++++++++++++++++++++*.+...+..+.+...........+.........+.+..............+....+..+.+..+......+.+........+.+.....+.......+.....+.........+....+.....+....+.....................+..+....+......+..+...+..........+...+...........+...+..........+++++++++++++++++++++++++++++++++++++++++++++++++++++++++++++++++*.........+.....+....+.....+................+......+..............+................+.....+...+......+....+...........+..........+.........+...+..................+............+........+.......+...............+...+.....+............+.........+.............+......+......+.....+...+.+............+.........+...+.....+......+..........+..+.........+++++++++++++++++++++++++++++++++++++++++++++++++++++++++++++++++
....+.+...+......+...........+.+...+......+...+..................+..............+.+..+...+++++++++++++++++++++++++++++++++++++++++++++++++++++++++++++++++*.................+....+...+......+..+....+......+.....+...+......+...+............+++++++++++++++++++++++++++++++++++++++++++++++++++++++++++++++++*........+......+........+.......+...+......+.....+......+........................+....+......+...........+...+...............+......+....+.......................+.......+..+...................+..+..........+..+.+.....+.......+.........+..............+...............+.....................+....+...........+...+...+...............+...+..........+......+......+.........+........+......+++++++++++++++++++++++++++++++++++++++++++++++++++++++++++++++++
-----
You are about to be asked to enter information that will be incorporated
into your certificate request.
What you are about to enter is what is called a Distinguished Name or a DN.
There are quite a few fields but you can leave some blank
For some fields there will be a default value,
If you enter '.', the field will be left blank.
-----
Country Name (2 letter code) [XX]:ID
State or Province Name (full name) []:Jakarta
Locality Name (eg, city) [Default City]:Jakarta
Organization Name (eg, company) [Default Company Ltd]:hemimorphite
Organizational Unit Name (eg, section) []:
Common Name (eg, your name or your server's hostname) []:hemimorphite.app
Email Address []:yangsamuel91@gmail.com
Encode the key and certificate data in base64
cat ~/nginx/ingress.crt | base64The response should look similar to this:
LS0tLS1CRUdJTiBDRVJUSUZJQ0FURS0tLS0tCk1JSUY5ekNDQTkrZ0F3SUJBZ0lVV1JpZmlKTi9ZTWJHeE1HK0d1MmJJY2FQeThvd0RRWUpLb1pJaHZjTkFRRUwKQlFBd2dZb3hDekFKQmdOVkJBWVRBa2xFTVJBd0RnWURWUVFJREFkS1lXdGhjblJoTVJBd0RnWURWUVFIREFkSwpZV3RoY25SaE1SVXdFd1lEVlFRS0RBeG9aVzFwYlc5eWNHaHBkR1V4R1RBWEJnTlZCQU1NRUdobGJXbHRiM0p3CmFHbDBaUzVoY0hBeEpUQWpCZ2txaGtpRzl3MEJDUUVXRm5saGJtZHpZVzExWld3NU1VQm5iV0ZwYkM1amIyMHcKSGhjTk1qTXdOekkzTURreE9UQTVXaGNOTWpRd056STJNRGt4T1RBNVdqQ0JpakVMTUFrR0ExVUVCaE1DU1VReApFREFPQmdOVkJBZ01CMHBoYTJGeWRHRXhFREFPQmdOVkJBY01CMHBoYTJGeWRHRXhGVEFUQmdOVkJBb01ER2hsCmJXbHRiM0p3YUdsMFpURVpNQmNHQTFVRUF3d1FhR1Z0YVcxdmNuQm9hWFJsTG1Gd2NERWxNQ01HQ1NxR1NJYjMKRFFFSkFSWVdlV0Z1WjNOaGJYVmxiRGt4UUdkdFlXbHNMbU52YlRDQ0FpSXdEUVlKS29aSWh2Y05BUUVCQlFBRApnZ0lQQURDQ0Fnb0NnZ0lCQU01aC8vOUNSZXltZjhjVk1SWXl1RXBPeUloRStaYm9RNWNLSWFwbUxQZkR2R00rCmdUbEw3UDd4NG5DU3VTNE84Ylg4UHh1cEZ4bXRNb2RBSFJ1cHI1cjBJRHJpTkQ0OVVWMkpRUnVjUU83dTFZS0gKZFBhRnV2aXZGdmpmalg0TTc0a3dUeXBGT3lSbDBUb1dLQ3pPTGU2cHhIWHFwV1g3cHhqb0lBbzQxb2I5OEdzZwoxUjFTeWFSeXZzcXJwdmRHNGlJY2RKNXJJaS9qeWVDMCtQNGhGZ0VJRTJIeGZYTVpsN3gyZzJSVnJlT28yM3QyCnRQeXZObGYxRE0xb3BmMGtOQzBrbE5IWDRzMWZVUlJyMWlBalFxdmo2WDEvamtZWTgwdDVuL0p0L3BYaHZlL3oKam1UZkdlcWoyVkEyMjVNVHBlREZBVHV3ZFIzM2RHQkFwQVY1T2xKL25MbXlsc1p5SnVVczNUSnpoU0RQRHBIUgozbGZKdEo0S0l1ODc0dlRDZHhhd0g0R1dVNERFKzBpN3Z4d0FVeTVtUVZBSmZFejJDalE2MW44OHgwYWNyK2tQCitiL1FMR3dGWjVzY2M0OUs2MXlxYjBDMEZiWGpiL3pGRUx1MmdsbjUxc0t6MjE0S2dibWM3QzV3RHR2T1hRNm8KakpoR3hEWUgraGZ6NWZIMnUyaksycXh6Y21VV0U2TXRGaDZQR2FScVZsaTh1VFppRWIwb2MyRHplaHgzTVNMcgpiTjdmY3B4TzdMNzNGVEdyTWJMUXgwdEU3UUxWalhRM0hOREZFTkpia1VCQU1UR2EycGFDK2wwdkliMnJFOUlRCkFVTmw5STFzSzNjcjBDL3pVRCs3RVpkMkdaSml6MFVFRG83ZnozUktMUFRrLzArMDdlSkp6NjFuUEFtWEFnTUIKQUFHalV6QlJNQjBHQTFVZERnUVdCQlIzcmtjRGFuWU16UmlVbUJpeFFsS1BIZE9KeVRBZkJnTlZIU01FR0RBVwpnQlIzcmtjRGFuWU16UmlVbUJpeFFsS1BIZE9KeVRBUEJnTlZIUk1CQWY4RUJUQURBUUgvTUEwR0NTcUdTSWIzCkRRRUJDd1VBQTRJQ0FRQTU2RkpuYWJtbXR2WWk2cVdYOFZSY3ZpUVpjeDZwV09LOVhzN3ZPWVI0cVBEUHVPcmQKT21wL3RRVVRrRkNvSHQ4U0NYeTROZmRVOVpTVU82Y1liMFpqQjNxN0FuNEdJOFE1M3BnbXhhR3RDUC9kb2JyaApvZUVaeDZpbkZJVlQ4b3NkdXpDOUwwQUF1TmNLMTZJZE5ML1E4M2dzSFhxWUJ3eXBtMS83TFlwOHNpL0JxRXgvClc0aTRSeStUZ0ViTmRybng5bEpTUWttVUg3a3pYT1pYaFlvenNDSi93Umt5Y0t0anF1KzZhVHB6SEFneVdEZ3MKV1l5Tk5yK2pSS3FzMWlxdVVyMm4yWFRvZW5DME4vOUFCWEtPZEJSWmVzTFc3ZWx6TEdqYjI1TmFLVmNkRXo1YQpaSDBqd2hPUkhTYjE1aUI2Z1dVeDBYV1FPTHpTdDJBbGU4cncrcDNrSUU1TklxWXNvcmh3R241anVab0I1Um50CkVLYTFoNHQ0bDF6NUdFQnRKYVgzbmpIckNqaitqd2hqdlFwdU5KSXpPWHJwRE1GaE45NEVueEk1SWsySEN2NS8KZ2htbFBmZStsMjlUUVFneGJtZUlueFgwMmRhRkpjUHl0eWFVN3pPM0hwMXloTnhYL0VETEY2d0U1cnpSVWRPbAphVkpMQVdVOXVOU01ZNHZHa1Vqckd0OU9BdUNMcWtqT0RqRXBMWkFLRmNKaFAvelRndVIxdWN1RDVhNzFhT0Q1CjUwU29LM1FsTDlkY004c1dQV29YRlVJWHVJWmc3OGpWdlM1T2NPUk1mamdTb0laVXRxK3NHWmxSS2NPUEZSZ2MKako3UGVVMHVkdTRLeDc4bzZueFh2cVVTckI4Y05qRXVvRkFlR0pPU1ZFaFExaXJZbW1FWnVERnI2Zz09Ci0tLS0tRU5EIENFUlRJRklDQVRFLS0tLS0Kcat ~/nginx/ingress.key | base64The response should look similar to this:
LS0tLS1CRUdJTiBQUklWQVRFIEtFWS0tLS0tCk1JSUpRZ0lCQURBTkJna3Foa2lHOXcwQkFRRUZBQVNDQ1N3d2dna29BZ0VBQW9JQ0FRRE9ZZi8vUWtYc3BuL0gKRlRFV01yaEtUc2lJUlBtVzZFT1hDaUdxWml6M3c3eGpQb0U1Uyt6KzhlSndrcmt1RHZHMS9EOGJxUmNaclRLSApRQjBicWErYTlDQTY0alErUFZGZGlVRWJuRUR1N3RXQ2gzVDJoYnI0cnhiNDM0MStETytKTUU4cVJUc2taZEU2CkZpZ3N6aTN1cWNSMTZxVmwrNmNZNkNBS09OYUcvZkJySU5VZFVzbWtjcjdLcTZiM1J1SWlISFNlYXlJdjQ4bmcKdFBqK0lSWUJDQk5oOFgxekdaZThkb05rVmEzanFOdDdkclQ4cnpaWDlRek5hS1g5SkRRdEpKVFIxK0xOWDFFVQphOVlnSTBLcjQrbDlmNDVHR1BOTGVaL3liZjZWNGIzdjg0NWszeG5xbzlsUU50dVRFNlhneFFFN3NIVWQ5M1JnClFLUUZlVHBTZjV5NXNwYkdjaWJsTE4weWM0VWd6dzZSMGQ1WHliU2VDaUx2TytMMHduY1dzQitCbGxPQXhQdEkKdTc4Y0FGTXVaa0ZRQ1h4TTlnbzBPdFovUE1kR25LL3BEL20vMEN4c0JXZWJISE9QU3V0Y3FtOUF0QlcxNDIvOAp4UkM3dG9KWitkYkNzOXRlQ29HNW5Pd3VjQTdiemwwT3FJeVlSc1EyQi9vWDgrWHg5cnRveXRxc2MzSmxGaE9qCkxSWWVqeG1rYWxaWXZMazJZaEc5S0hOZzgzb2NkekVpNjJ6ZTMzS2NUdXkrOXhVeHF6R3kwTWRMUk8wQzFZMTAKTnh6UXhSRFNXNUZBUURFeG10cVdndnBkTHlHOXF4UFNFQUZEWmZTTmJDdDNLOUF2ODFBL3V4R1hkaG1TWXM5RgpCQTZPMzg5MFNpejA1UDlQdE8zaVNjK3RaendKbHdJREFRQUJBb0lDQUVYc05ndUpySjh0R2dXZFRIQTA1dk5tCkZkTDFhNHFSVHJVUm5hNVp4OHA1Nm8zRlU0clNDbzJsN2c0dDU4ZVBFSjJUeE4zZVFCRlcrTk9TQ1VxaUJ2ajgKMVI2ZUhRMHBRVFBybUw5K0JSSHVvVEFFTE1DSk5udWk5cW1ETkRFTXVPdEdEc3hIZ0c0b2dPYXBNeHRiRDN6WQp6OU1UbU00Z29OQnpkTWVCMGswU0pDNW5oVXpXQzdOSG5SU1ZhNUJEMThHdTJtUUI4Q2RCaWRneitGaEJaVzhjCkNWVVp1R01TdkxJQmhTcXRUS2poUU50bnNKSWIydEdhR0toUFdFMlh3b1c0NnlMZGZkNE8rUzF1QzdIL3dFcjAKZ05zZ0tGZmZoQzZDR29yTWNZRGVacmV4VVFFa0JXZlY4MzZWMTNiUkpWWXQ2T2tNTStIZlFQS0xkQWJXdDhjMwpOckNKWXRjSjJzZ0ZXSFBTN01LUkJrdzZtU21TdDY3NzJRSFB1U2dIRC9udkdWYmJIZW15YmJZekg3bjdJOVl3CmljSjdTV1p6VlFnQkhabDFwdEZBbS9FM2xvQXJuRVo4bC9XeGF4Rkw0MzQ0RHRRa0NoMUxoK2dFV3VOcWN6RkUKc2pXWmxybUV1M3ZhMjVzMCtjenJxendRUlFsZTJJZzJmN1hsU2RhK1hPYjcyOU5yOWJVL01ZOE9nbVBYS1hGWgovV0VhdERxV1R3SGxHVU1KaUZPU0JNQjN0bElQeTYweUZWVjRMK0RHeTZOUnByVU0rZ3BMYmRkejJKNmk2ZGNLCm5zZ2tLU0dodFZDbjNDblhTM2dDWGYyV2xLZER1V2Q0emF5Y2huZDJyWGRuRGltYjliY0xMRGlLTHJ5TkMyRWQKUFBhNTAvVnk5bEF3OS9QODIvUmhBb0lCQVFEODNMN1FLNHZJWXkwSkJvT3czalhlZmRpWnVlQm1VUXdwQ2t2Twp3eDJqTjBMWnZIUkxaNlBKVzkrQ0R4UW5MYjJ6SXlUdmVqS1phTno3VHA2Mis2YjA0NGFFbFVGaS9yWlQyQ083CnhYTXNXc2ozSjB0c3hCTkZyVDliS2Z3TFFpV2tPTDBrMklxdTVjMjlMaERwVHl4RTlDSUJvc1NlbXd3OFR0MW4KS2tCSVFqV1k5MW1zak1RSzZJQXFSczJCN2tDc1BveHYxa2VIakRnMnYvVy9lUm9UU1pPRmJueUJORkdhejZ1Mwp2eVFtNXpJVmNYVitjdlZQL1l6QnQ4dTVybU1URktjd1Fad2F6Z056SSs1M1NtdVd0SGFFVHRzRlpkSzlKeE9wCkhYY2tFYlFJQ2dTOGVHVjA0UThwZDNTVkZWbDJySnAzanFEMDdjblpubWgrM3Z1bEFvSUJBUURROFpzTS9pZlcKelBla2pFZjRqcGl3NmF1YXJpQkY1N2xRdjJHYms3RHZHaThScyt1SGR4VmhqTVd1a3ZhMG1aaCt1b1RoZytlVAo0cWE3QkFycDNpejNrWVIrSFNjQ1JiYURnYkprZjhhNG9xRitwZ2xDdWlzK2owY1NoVTN0VHJ3YlNNVCsrem41CjY0T1RHZDJ4VGN5SEpmYmxXQjhuTVlWOUxWNWZLLzJXMGE4K054VGpxVmJVWlBGTGtTczNpWGJMdGx5T1QvRE8Kc20rTFZEcml0S0FoM0MrK3BXY01PYzZVaWpIeHdCelgyZ3NTQTIvL05sQnI5eFVrVVpOU3hQZEhmMGw1bjR5RgpSY2VIeDlielhUVnJVOS94Zjh1U2Z0UHVSdzhMSUJGQUZYb1RpVCt3Um9UMVJZK1NTUzJlSjZma3VibGw1RnE4ClhCdzZhdHY2OHh1TEFvSUJBSHZlQnZzaTJjN0lCbit0V1VXREZSQnd4WEpJdzh4YlY0R2pNWStQdFMwSEhSQmMKYVB1blFXeWFQTnNSVitYNVdqd3VzeUU4MHh5amFkMFJubDQwMkl5T0NJOWFMalc0WU1paDBKOWpFaEJnU0tJSgo5Y0RLTEVhdG42T2c1WDcrWUVJYUtVMnJaZ1JYUG5tMTMwTHJMZHg1VzA5QjFOOTlSSGttaVA3SWk4VFo2amVNCnM3ajdHKzNjQnl5dWttMWJzUUt2Z1V3bnc5SjZ0ZTdjQ2g1SnpLUTJIclgyY2JjNVVlQnNhc29RTUQxK2MrSmQKT2hrL1p6eFFFR3UxQlc5b0pkQnJCWnQyQ0dwNUVPZU9hbnExVWc3NVNEVjRDNEtSWnJLU09lZFdMODdUZlVXUwo0czhRaTJLOS9SZHJGUWtTOUVoV05UVHNBWno1L3k5RGtoelVUcUVDZ2dFQkFJd0lBRlFhMlhSWjlmWXZsZVI5CkhOUWtKc0FKeHROUzA1M01SWXhRMVJuSndKWHFzUVVleUJPU2xzSEMrTmhjd0JqZXhFT25kVUpsZWp5SUh4QlIKdUcxSzl6TFdNdGlSQkJycWh6WlhkRVUxcVdvSnVOY2hrZTNoZEU1elRLQ29UZVV6UmVObFY1dXBQWXNPb01jOQpUcitjci9WUXM4QStyaW9RaDlqYzBKMk5kaGNLTDFQTW44YkV4L3BQRmxtb0pSZXQ1aVh5YVg3OWswZ2JjVU9TCnJtZEMvRFNYQVpMdUF3Y0YveWI0Qzl5VjR5bDFhRS93aE1GMjNKSjBvWG10UzlSOCtDOHN3SzVvNzZxT1FmN2sKRHZNWlNWSyt4UjR2SmJYaHBiRmRFbktTY2pnNW1aZDRDNCtkeVBUUFdtVk9TblUrQzRUQUlCZHcyL0pDdjU5Vgo0clVDZ2dFQWJSeDJRTXFYSjJuTld4Zk5xeEptL3VKaVVtbHhyVkZsVW9KVTJ5MnFXeVA1dGIydGFBUlZVRFI1CjJVK29pcVNGdWlXK2h4VHlnY0RzZmFnV000cU5mNE5sNzdEaTgxSEt2VE9GWlUxajA1dnJYVDExakgzUTZBWTYKcDFKSm1mKzNValpJZWhucjBjVUtPRUp4T3lra1dLVUUzR2VwVkhlUGZZOFVHZHVFWUNQUnVobWZDNDlrVGhQRApyT05zYUVzTmVJUi9rWS9jNitmNUlKZC9GUGs3dWxSNXZ4WnNWYkxlWlhUYXVmSGsyUGxhSzBScTMzcUlGZUsyCmFGVG41c2Zoc1p4b213dkJPZk1aa2hPUHNIdlhScERlTGgzMitRWFdvWUQrWWNSN3pjLy9ZY09pVktZa2lLNFoKVnZHMkpEajIrcEk3NzJFWUJxamk1Sk5zR2pibHJBPT0KLS0tLS1FTkQgUFJJVkFURSBLRVktLS0tLQo=Create a kubernetes yaml tls secret file for creating a secret named ingress-secret
apiVersion: v1
data:
  tls.crt: LS0tLS1CRUdJTiBDRVJUSUZJQ0FURS0tLS0tCk1JSUY5ekNDQTkrZ0F3SUJBZ0lVV1JpZmlKTi9ZTWJHeE1HK0d1MmJJY2FQeThvd0RRWUpLb1pJaHZjTkFRRUwKQlFBd2dZb3hDekFKQmdOVkJBWVRBa2xFTVJBd0RnWURWUVFJREFkS1lXdGhjblJoTVJBd0RnWURWUVFIREFkSwpZV3RoY25SaE1SVXdFd1lEVlFRS0RBeG9aVzFwYlc5eWNHaHBkR1V4R1RBWEJnTlZCQU1NRUdobGJXbHRiM0p3CmFHbDBaUzVoY0hBeEpUQWpCZ2txaGtpRzl3MEJDUUVXRm5saGJtZHpZVzExWld3NU1VQm5iV0ZwYkM1amIyMHcKSGhjTk1qTXdOekkzTURreE9UQTVXaGNOTWpRd056STJNRGt4T1RBNVdqQ0JpakVMTUFrR0ExVUVCaE1DU1VReApFREFPQmdOVkJBZ01CMHBoYTJGeWRHRXhFREFPQmdOVkJBY01CMHBoYTJGeWRHRXhGVEFUQmdOVkJBb01ER2hsCmJXbHRiM0p3YUdsMFpURVpNQmNHQTFVRUF3d1FhR1Z0YVcxdmNuQm9hWFJsTG1Gd2NERWxNQ01HQ1NxR1NJYjMKRFFFSkFSWVdlV0Z1WjNOaGJYVmxiRGt4UUdkdFlXbHNMbU52YlRDQ0FpSXdEUVlKS29aSWh2Y05BUUVCQlFBRApnZ0lQQURDQ0Fnb0NnZ0lCQU01aC8vOUNSZXltZjhjVk1SWXl1RXBPeUloRStaYm9RNWNLSWFwbUxQZkR2R00rCmdUbEw3UDd4NG5DU3VTNE84Ylg4UHh1cEZ4bXRNb2RBSFJ1cHI1cjBJRHJpTkQ0OVVWMkpRUnVjUU83dTFZS0gKZFBhRnV2aXZGdmpmalg0TTc0a3dUeXBGT3lSbDBUb1dLQ3pPTGU2cHhIWHFwV1g3cHhqb0lBbzQxb2I5OEdzZwoxUjFTeWFSeXZzcXJwdmRHNGlJY2RKNXJJaS9qeWVDMCtQNGhGZ0VJRTJIeGZYTVpsN3gyZzJSVnJlT28yM3QyCnRQeXZObGYxRE0xb3BmMGtOQzBrbE5IWDRzMWZVUlJyMWlBalFxdmo2WDEvamtZWTgwdDVuL0p0L3BYaHZlL3oKam1UZkdlcWoyVkEyMjVNVHBlREZBVHV3ZFIzM2RHQkFwQVY1T2xKL25MbXlsc1p5SnVVczNUSnpoU0RQRHBIUgozbGZKdEo0S0l1ODc0dlRDZHhhd0g0R1dVNERFKzBpN3Z4d0FVeTVtUVZBSmZFejJDalE2MW44OHgwYWNyK2tQCitiL1FMR3dGWjVzY2M0OUs2MXlxYjBDMEZiWGpiL3pGRUx1MmdsbjUxc0t6MjE0S2dibWM3QzV3RHR2T1hRNm8KakpoR3hEWUgraGZ6NWZIMnUyaksycXh6Y21VV0U2TXRGaDZQR2FScVZsaTh1VFppRWIwb2MyRHplaHgzTVNMcgpiTjdmY3B4TzdMNzNGVEdyTWJMUXgwdEU3UUxWalhRM0hOREZFTkpia1VCQU1UR2EycGFDK2wwdkliMnJFOUlRCkFVTmw5STFzSzNjcjBDL3pVRCs3RVpkMkdaSml6MFVFRG83ZnozUktMUFRrLzArMDdlSkp6NjFuUEFtWEFnTUIKQUFHalV6QlJNQjBHQTFVZERnUVdCQlIzcmtjRGFuWU16UmlVbUJpeFFsS1BIZE9KeVRBZkJnTlZIU01FR0RBVwpnQlIzcmtjRGFuWU16UmlVbUJpeFFsS1BIZE9KeVRBUEJnTlZIUk1CQWY4RUJUQURBUUgvTUEwR0NTcUdTSWIzCkRRRUJDd1VBQTRJQ0FRQTU2RkpuYWJtbXR2WWk2cVdYOFZSY3ZpUVpjeDZwV09LOVhzN3ZPWVI0cVBEUHVPcmQKT21wL3RRVVRrRkNvSHQ4U0NYeTROZmRVOVpTVU82Y1liMFpqQjNxN0FuNEdJOFE1M3BnbXhhR3RDUC9kb2JyaApvZUVaeDZpbkZJVlQ4b3NkdXpDOUwwQUF1TmNLMTZJZE5ML1E4M2dzSFhxWUJ3eXBtMS83TFlwOHNpL0JxRXgvClc0aTRSeStUZ0ViTmRybng5bEpTUWttVUg3a3pYT1pYaFlvenNDSi93Umt5Y0t0anF1KzZhVHB6SEFneVdEZ3MKV1l5Tk5yK2pSS3FzMWlxdVVyMm4yWFRvZW5DME4vOUFCWEtPZEJSWmVzTFc3ZWx6TEdqYjI1TmFLVmNkRXo1YQpaSDBqd2hPUkhTYjE1aUI2Z1dVeDBYV1FPTHpTdDJBbGU4cncrcDNrSUU1TklxWXNvcmh3R241anVab0I1Um50CkVLYTFoNHQ0bDF6NUdFQnRKYVgzbmpIckNqaitqd2hqdlFwdU5KSXpPWHJwRE1GaE45NEVueEk1SWsySEN2NS8KZ2htbFBmZStsMjlUUVFneGJtZUlueFgwMmRhRkpjUHl0eWFVN3pPM0hwMXloTnhYL0VETEY2d0U1cnpSVWRPbAphVkpMQVdVOXVOU01ZNHZHa1Vqckd0OU9BdUNMcWtqT0RqRXBMWkFLRmNKaFAvelRndVIxdWN1RDVhNzFhT0Q1CjUwU29LM1FsTDlkY004c1dQV29YRlVJWHVJWmc3OGpWdlM1T2NPUk1mamdTb0laVXRxK3NHWmxSS2NPUEZSZ2MKako3UGVVMHVkdTRLeDc4bzZueFh2cVVTckI4Y05qRXVvRkFlR0pPU1ZFaFExaXJZbW1FWnVERnI2Zz09Ci0tLS0tRU5EIENFUlRJRklDQVRFLS0tLS0K
  tls.key: LS0tLS1CRUdJTiBQUklWQVRFIEtFWS0tLS0tCk1JSUpRZ0lCQURBTkJna3Foa2lHOXcwQkFRRUZBQVNDQ1N3d2dna29BZ0VBQW9JQ0FRRE9ZZi8vUWtYc3BuL0gKRlRFV01yaEtUc2lJUlBtVzZFT1hDaUdxWml6M3c3eGpQb0U1Uyt6KzhlSndrcmt1RHZHMS9EOGJxUmNaclRLSApRQjBicWErYTlDQTY0alErUFZGZGlVRWJuRUR1N3RXQ2gzVDJoYnI0cnhiNDM0MStETytKTUU4cVJUc2taZEU2CkZpZ3N6aTN1cWNSMTZxVmwrNmNZNkNBS09OYUcvZkJySU5VZFVzbWtjcjdLcTZiM1J1SWlISFNlYXlJdjQ4bmcKdFBqK0lSWUJDQk5oOFgxekdaZThkb05rVmEzanFOdDdkclQ4cnpaWDlRek5hS1g5SkRRdEpKVFIxK0xOWDFFVQphOVlnSTBLcjQrbDlmNDVHR1BOTGVaL3liZjZWNGIzdjg0NWszeG5xbzlsUU50dVRFNlhneFFFN3NIVWQ5M1JnClFLUUZlVHBTZjV5NXNwYkdjaWJsTE4weWM0VWd6dzZSMGQ1WHliU2VDaUx2TytMMHduY1dzQitCbGxPQXhQdEkKdTc4Y0FGTXVaa0ZRQ1h4TTlnbzBPdFovUE1kR25LL3BEL20vMEN4c0JXZWJISE9QU3V0Y3FtOUF0QlcxNDIvOAp4UkM3dG9KWitkYkNzOXRlQ29HNW5Pd3VjQTdiemwwT3FJeVlSc1EyQi9vWDgrWHg5cnRveXRxc2MzSmxGaE9qCkxSWWVqeG1rYWxaWXZMazJZaEc5S0hOZzgzb2NkekVpNjJ6ZTMzS2NUdXkrOXhVeHF6R3kwTWRMUk8wQzFZMTAKTnh6UXhSRFNXNUZBUURFeG10cVdndnBkTHlHOXF4UFNFQUZEWmZTTmJDdDNLOUF2ODFBL3V4R1hkaG1TWXM5RgpCQTZPMzg5MFNpejA1UDlQdE8zaVNjK3RaendKbHdJREFRQUJBb0lDQUVYc05ndUpySjh0R2dXZFRIQTA1dk5tCkZkTDFhNHFSVHJVUm5hNVp4OHA1Nm8zRlU0clNDbzJsN2c0dDU4ZVBFSjJUeE4zZVFCRlcrTk9TQ1VxaUJ2ajgKMVI2ZUhRMHBRVFBybUw5K0JSSHVvVEFFTE1DSk5udWk5cW1ETkRFTXVPdEdEc3hIZ0c0b2dPYXBNeHRiRDN6WQp6OU1UbU00Z29OQnpkTWVCMGswU0pDNW5oVXpXQzdOSG5SU1ZhNUJEMThHdTJtUUI4Q2RCaWRneitGaEJaVzhjCkNWVVp1R01TdkxJQmhTcXRUS2poUU50bnNKSWIydEdhR0toUFdFMlh3b1c0NnlMZGZkNE8rUzF1QzdIL3dFcjAKZ05zZ0tGZmZoQzZDR29yTWNZRGVacmV4VVFFa0JXZlY4MzZWMTNiUkpWWXQ2T2tNTStIZlFQS0xkQWJXdDhjMwpOckNKWXRjSjJzZ0ZXSFBTN01LUkJrdzZtU21TdDY3NzJRSFB1U2dIRC9udkdWYmJIZW15YmJZekg3bjdJOVl3CmljSjdTV1p6VlFnQkhabDFwdEZBbS9FM2xvQXJuRVo4bC9XeGF4Rkw0MzQ0RHRRa0NoMUxoK2dFV3VOcWN6RkUKc2pXWmxybUV1M3ZhMjVzMCtjenJxendRUlFsZTJJZzJmN1hsU2RhK1hPYjcyOU5yOWJVL01ZOE9nbVBYS1hGWgovV0VhdERxV1R3SGxHVU1KaUZPU0JNQjN0bElQeTYweUZWVjRMK0RHeTZOUnByVU0rZ3BMYmRkejJKNmk2ZGNLCm5zZ2tLU0dodFZDbjNDblhTM2dDWGYyV2xLZER1V2Q0emF5Y2huZDJyWGRuRGltYjliY0xMRGlLTHJ5TkMyRWQKUFBhNTAvVnk5bEF3OS9QODIvUmhBb0lCQVFEODNMN1FLNHZJWXkwSkJvT3czalhlZmRpWnVlQm1VUXdwQ2t2Twp3eDJqTjBMWnZIUkxaNlBKVzkrQ0R4UW5MYjJ6SXlUdmVqS1phTno3VHA2Mis2YjA0NGFFbFVGaS9yWlQyQ083CnhYTXNXc2ozSjB0c3hCTkZyVDliS2Z3TFFpV2tPTDBrMklxdTVjMjlMaERwVHl4RTlDSUJvc1NlbXd3OFR0MW4KS2tCSVFqV1k5MW1zak1RSzZJQXFSczJCN2tDc1BveHYxa2VIakRnMnYvVy9lUm9UU1pPRmJueUJORkdhejZ1Mwp2eVFtNXpJVmNYVitjdlZQL1l6QnQ4dTVybU1URktjd1Fad2F6Z056SSs1M1NtdVd0SGFFVHRzRlpkSzlKeE9wCkhYY2tFYlFJQ2dTOGVHVjA0UThwZDNTVkZWbDJySnAzanFEMDdjblpubWgrM3Z1bEFvSUJBUURROFpzTS9pZlcKelBla2pFZjRqcGl3NmF1YXJpQkY1N2xRdjJHYms3RHZHaThScyt1SGR4VmhqTVd1a3ZhMG1aaCt1b1RoZytlVAo0cWE3QkFycDNpejNrWVIrSFNjQ1JiYURnYkprZjhhNG9xRitwZ2xDdWlzK2owY1NoVTN0VHJ3YlNNVCsrem41CjY0T1RHZDJ4VGN5SEpmYmxXQjhuTVlWOUxWNWZLLzJXMGE4K054VGpxVmJVWlBGTGtTczNpWGJMdGx5T1QvRE8Kc20rTFZEcml0S0FoM0MrK3BXY01PYzZVaWpIeHdCelgyZ3NTQTIvL05sQnI5eFVrVVpOU3hQZEhmMGw1bjR5RgpSY2VIeDlielhUVnJVOS94Zjh1U2Z0UHVSdzhMSUJGQUZYb1RpVCt3Um9UMVJZK1NTUzJlSjZma3VibGw1RnE4ClhCdzZhdHY2OHh1TEFvSUJBSHZlQnZzaTJjN0lCbit0V1VXREZSQnd4WEpJdzh4YlY0R2pNWStQdFMwSEhSQmMKYVB1blFXeWFQTnNSVitYNVdqd3VzeUU4MHh5amFkMFJubDQwMkl5T0NJOWFMalc0WU1paDBKOWpFaEJnU0tJSgo5Y0RLTEVhdG42T2c1WDcrWUVJYUtVMnJaZ1JYUG5tMTMwTHJMZHg1VzA5QjFOOTlSSGttaVA3SWk4VFo2amVNCnM3ajdHKzNjQnl5dWttMWJzUUt2Z1V3bnc5SjZ0ZTdjQ2g1SnpLUTJIclgyY2JjNVVlQnNhc29RTUQxK2MrSmQKT2hrL1p6eFFFR3UxQlc5b0pkQnJCWnQyQ0dwNUVPZU9hbnExVWc3NVNEVjRDNEtSWnJLU09lZFdMODdUZlVXUwo0czhRaTJLOS9SZHJGUWtTOUVoV05UVHNBWno1L3k5RGtoelVUcUVDZ2dFQkFJd0lBRlFhMlhSWjlmWXZsZVI5CkhOUWtKc0FKeHROUzA1M01SWXhRMVJuSndKWHFzUVVleUJPU2xzSEMrTmhjd0JqZXhFT25kVUpsZWp5SUh4QlIKdUcxSzl6TFdNdGlSQkJycWh6WlhkRVUxcVdvSnVOY2hrZTNoZEU1elRLQ29UZVV6UmVObFY1dXBQWXNPb01jOQpUcitjci9WUXM4QStyaW9RaDlqYzBKMk5kaGNLTDFQTW44YkV4L3BQRmxtb0pSZXQ1aVh5YVg3OWswZ2JjVU9TCnJtZEMvRFNYQVpMdUF3Y0YveWI0Qzl5VjR5bDFhRS93aE1GMjNKSjBvWG10UzlSOCtDOHN3SzVvNzZxT1FmN2sKRHZNWlNWSyt4UjR2SmJYaHBiRmRFbktTY2pnNW1aZDRDNCtkeVBUUFdtVk9TblUrQzRUQUlCZHcyL0pDdjU5Vgo0clVDZ2dFQWJSeDJRTXFYSjJuTld4Zk5xeEptL3VKaVVtbHhyVkZsVW9KVTJ5MnFXeVA1dGIydGFBUlZVRFI1CjJVK29pcVNGdWlXK2h4VHlnY0RzZmFnV000cU5mNE5sNzdEaTgxSEt2VE9GWlUxajA1dnJYVDExakgzUTZBWTYKcDFKSm1mKzNValpJZWhucjBjVUtPRUp4T3lra1dLVUUzR2VwVkhlUGZZOFVHZHVFWUNQUnVobWZDNDlrVGhQRApyT05zYUVzTmVJUi9rWS9jNitmNUlKZC9GUGs3dWxSNXZ4WnNWYkxlWlhUYXVmSGsyUGxhSzBScTMzcUlGZUsyCmFGVG41c2Zoc1p4b213dkJPZk1aa2hPUHNIdlhScERlTGgzMitRWFdvWUQrWWNSN3pjLy9ZY09pVktZa2lLNFoKVnZHMkpEajIrcEk3NzJFWUJxamk1Sk5zR2pibHJBPT0KLS0tLS1FTkQgUFJJVkFURSBLRVktLS0tLQo=
kind: Secret
metadata:
  name: ingress-secret
  namespace: default
type: kubernetes.io/tls
Apply the tls secret manifest file:
kubectl create -f ingress-secret.yamlThe response should look similar to this:
secret/ingress-secret createdCreate a ingress resource that contains rules with a rewrite annotation for redirecting the request path /something to nginx-server-service on a TCP port of 80 and 443:
apiVersion: networking.k8s.io/v1
kind: Ingress
metadata:
  name: nginx-server-ingress
  namespace: default
  annotations:
    nginx.ingress.kubernetes.io/use-regex: "true"
    nginx.ingress.kubernetes.io/rewrite-target: /$2
spec:
  ingressClassName: nginx
  tls:
  - secretName: ingress-secret
  rules:
  - http:
      paths:
      - path: /something(/|$)(.*)
        pathType: ImplementationSpecific
        backend:
          service:
            name: nginx-server-service
            port:
              number: 80
$2 means the second regex group of /something(/|$)(.*), that is (.*). Any characters captured by (.*) will be assigned to $2 in the rewrite-target annotation (eg. /something rewrites to /, /something/new rewrites to /new).
Apply the ingress resource manifest file:
kubectl create -f nginx-server-ingress.yamlThe response should look similar to this:
ingress.networking.k8s.io/nginx-server-ingress createdTo list all ingress resources, use the command:
kubectl get ingressesThe response should look similar to this:
NAME                   CLASS   HOSTS   ADDRESS       PORTS     AGE
nginx-server-ingress   nginx   *       172.16.0.22   80, 443   5m51s
On master node and worker nodes, try to access your application using the cluster IP and the external IP address of ingress-nginx-controller service and the worker node IP address where ingress-nginx-controller pod is running on:
curl http://10.107.65.165:80/somethingcurl -k https://10.107.65.165:443/somethingcurl http://192.170.0.1:80/somethingcurl -k https://192.170.0.1:443/somethingcurl http://172.16.0.22:30609/somethingcurl -k https://172.16.0.22:30996/somethingThe curl response will return "502 Bad Gateway" since the firewall is blocking the curl request.
<html>
<head><title>502 Bad Gateway</title></head>
<body>
<center><h1>502 Bad Gateway</h1></center>
<hr><center>nginx</center>
</body>
</html>
On worker node, to view the denied packets, use dmesg command:
dmesg | grep -i REJECTThe response should look similar to this:
[27430.987420] filter_FWD_cali7368eccef27_REJECT: IN=cali7368eccef27 OUT=cali9aba158b53d MAC=ee:ee:ee:ee:ee:ee:26:4a:27:49:ea:e9:08:00 SRC=192.168.90.13 DST=192.168.90.12 LEN=60 TOS=0x00 PREC=0x00 TTL=63 ID=6053 DF PROTO=TCP SPT=49274 DPT=80 WINDOW=64860 RES=0x00 SYN URGP=0 MARK=0x10000
[27430.988258] filter_FWD_cali7368eccef27_REJECT: IN=cali7368eccef27 OUT=cali9aba158b53d MAC=ee:ee:ee:ee:ee:ee:26:4a:27:49:ea:e9:08:00 SRC=192.168.90.13 DST=192.168.90.12 LEN=60 TOS=0x00 PREC=0x00 TTL=63 ID=46895 DF PROTO=TCP SPT=49280 DPT=80 WINDOW=64860 RES=0x00 SYN URGP=0 MARK=0x10000
[27430.992201] filter_FWD_cali7368eccef27_REJECT: IN=cali7368eccef27 OUT=cali9aba158b53d MAC=ee:ee:ee:ee:ee:ee:26:4a:27:49:ea:e9:08:00 SRC=192.168.90.13 DST=192.168.90.12 LEN=60 TOS=0x00 PREC=0x00 TTL=63 ID=21590 DF PROTO=TCP SPT=49284 DPT=80 WINDOW=64860 RES=0x00 SYN URGP=0 MARK=0x10000
[27431.041655] filter_FWD_cali7368eccef27_REJECT: IN=cali7368eccef27 OUT=cali9aba158b53d MAC=ee:ee:ee:ee:ee:ee:26:4a:27:49:ea:e9:08:00 SRC=192.168.90.13 DST=192.168.90.12 LEN=60 TOS=0x00 PREC=0x00 TTL=63 ID=50033 DF PROTO=TCP SPT=49290 DPT=80 WINDOW=64860 RES=0x00 SYN URGP=0 MARK=0x10000
[27431.042189] filter_FWD_cali7368eccef27_REJECT: IN=cali7368eccef27 OUT=cali9aba158b53d MAC=ee:ee:ee:ee:ee:ee:26:4a:27:49:ea:e9:08:00 SRC=192.168.90.13 DST=192.168.90.12 LEN=60 TOS=0x00 PREC=0x00 TTL=63 ID=20178 DF PROTO=TCP SPT=49298 DPT=80 WINDOW=64860 RES=0x00 SYN URGP=0 MARK=0x10000
[27431.043061] filter_FWD_cali7368eccef27_REJECT: IN=cali7368eccef27 OUT=cali9aba158b53d MAC=ee:ee:ee:ee:ee:ee:26:4a:27:49:ea:e9:08:00 SRC=192.168.90.13 DST=192.168.90.12 LEN=60 TOS=0x00 PREC=0x00 TTL=63 ID=23163 DF PROTO=TCP SPT=49310 DPT=80 WINDOW=64860 RES=0x00 SYN URGP=0 MARK=0x10000
[27431.052636] filter_FWD_cali7368eccef27_REJECT: IN=cali7368eccef27 OUT=cali9aba158b53d MAC=ee:ee:ee:ee:ee:ee:26:4a:27:49:ea:e9:08:00 SRC=192.168.90.13 DST=192.168.90.12 LEN=60 TOS=0x00 PREC=0x00 TTL=63 ID=23192 DF PROTO=TCP SPT=49320 DPT=80 WINDOW=64860 RES=0x00 SYN URGP=0 MARK=0x10000
[27431.979329] filter_FWD_cali7368eccef27_REJECT: IN=cali7368eccef27 OUT=cali9aba158b53d MAC=ee:ee:ee:ee:ee:ee:26:4a:27:49:ea:e9:08:00 SRC=192.168.90.13 DST=192.168.90.12 LEN=60 TOS=0x00 PREC=0x00 TTL=63 ID=23193 DF PROTO=TCP SPT=49320 DPT=80 WINDOW=64860 RES=0x00 SYN URGP=0 MARK=0x10000
[27431.980157] filter_FWD_cali7368eccef27_REJECT: IN=cali7368eccef27 OUT=cali9aba158b53d MAC=ee:ee:ee:ee:ee:ee:26:4a:27:49:ea:e9:08:00 SRC=192.168.90.13 DST=192.168.90.12 LEN=60 TOS=0x00 PREC=0x00 TTL=63 ID=55915 DF PROTO=TCP SPT=49330 DPT=80 WINDOW=64860 RES=0x00 SYN URGP=0 MARK=0x10000
[27432.924389] filter_FWD_cali7368eccef27_REJECT: IN=cali7368eccef27 OUT=cali9aba158b53d MAC=ee:ee:ee:ee:ee:ee:26:4a:27:49:ea:e9:08:00 SRC=192.168.90.13 DST=192.168.90.12 LEN=60 TOS=0x00 PREC=0x00 TTL=63 ID=55916 DF PROTO=TCP SPT=49330 DPT=80 WINDOW=64860 RES=0x00 SYN URGP=0 MARK=0x10000
[27432.925277] filter_FWD_cali7368eccef27_REJECT: IN=cali7368eccef27 OUT=cali9aba158b53d MAC=ee:ee:ee:ee:ee:ee:26:4a:27:49:ea:e9:08:00 SRC=192.168.90.13 DST=192.168.90.12 LEN=60 TOS=0x00 PREC=0x00 TTL=63 ID=15452 DF PROTO=TCP SPT=49342 DPT=80 WINDOW=64860 RES=0x00 SYN URGP=0 MARK=0x10000
[27433.869141] filter_FWD_cali7368eccef27_REJECT: IN=cali7368eccef27 OUT=cali9aba158b53d MAC=ee:ee:ee:ee:ee:ee:26:4a:27:49:ea:e9:08:00 SRC=192.168.90.13 DST=192.168.90.12 LEN=60 TOS=0x00 PREC=0x00 TTL=63 ID=15453 DF PROTO=TCP SPT=49342 DPT=80 WINDOW=64860 RES=0x00 SYN URGP=0 MARK=0x10000
[27433.961525] filter_FWD_cali7368eccef27_REJECT: IN=cali7368eccef27 OUT=cali9aba158b53d MAC=ee:ee:ee:ee:ee:ee:26:4a:27:49:ea:e9:08:00 SRC=192.168.90.13 DST=192.168.90.12 LEN=60 TOS=0x00 PREC=0x00 TTL=63 ID=43556 DF PROTO=TCP SPT=49348 DPT=80 WINDOW=64860 RES=0x00 SYN URGP=0 MARK=0x10000
[27434.932766] filter_FWD_cali7368eccef27_REJECT: IN=cali7368eccef27 OUT=cali9aba158b53d MAC=ee:ee:ee:ee:ee:ee:26:4a:27:49:ea:e9:08:00 SRC=192.168.90.13 DST=192.168.90.12 LEN=60 TOS=0x00 PREC=0x00 TTL=63 ID=43557 DF PROTO=TCP SPT=49348 DPT=80 WINDOW=64860 RES=0x00 SYN URGP=0 MARK=0x10000
[27434.934358] filter_FWD_cali7368eccef27_REJECT: IN=cali7368eccef27 OUT=cali9aba158b53d MAC=ee:ee:ee:ee:ee:ee:26:4a:27:49:ea:e9:08:00 SRC=192.168.90.13 DST=192.168.90.12 LEN=60 TOS=0x00 PREC=0x00 TTL=63 ID=12923 DF PROTO=TCP SPT=49354 DPT=80 WINDOW=64860 RES=0x00 SYN URGP=0 MARK=0x10000
[27435.877665] filter_FWD_cali7368eccef27_REJECT: IN=cali7368eccef27 OUT=cali9aba158b53d MAC=ee:ee:ee:ee:ee:ee:26:4a:27:49:ea:e9:08:00 SRC=192.168.90.13 DST=192.168.90.12 LEN=60 TOS=0x00 PREC=0x00 TTL=63 ID=12924 DF PROTO=TCP SPT=49354 DPT=80 WINDOW=64860 RES=0x00 SYN URGP=0 MARK=0x10000
[27435.878217] filter_FWD_cali7368eccef27_REJECT: IN=cali7368eccef27 OUT=cali9aba158b53d MAC=ee:ee:ee:ee:ee:ee:26:4a:27:49:ea:e9:08:00 SRC=192.168.90.13 DST=192.168.90.12 LEN=60 TOS=0x00 PREC=0x00 TTL=63 ID=5169 DF PROTO=TCP SPT=49364 DPT=80 WINDOW=64860 RES=0x00 SYN URGP=0 MARK=0x10000
[27436.823613] filter_FWD_cali7368eccef27_REJECT: IN=cali7368eccef27 OUT=cali9aba158b53d MAC=ee:ee:ee:ee:ee:ee:26:4a:27:49:ea:e9:08:00 SRC=192.168.90.13 DST=192.168.90.12 LEN=60 TOS=0x00 PREC=0x00 TTL=63 ID=5170 DF PROTO=TCP SPT=49364 DPT=80 WINDOW=64860 RES=0x00 SYN URGP=0 MARK=0x10000
[27436.922655] filter_FWD_cali7368eccef27_REJECT: IN=cali7368eccef27 OUT=cali9aba158b53d MAC=ee:ee:ee:ee:ee:ee:26:4a:27:49:ea:e9:08:00 SRC=192.168.90.13 DST=192.168.90.12 LEN=60 TOS=0x00 PREC=0x00 TTL=63 ID=9553 DF PROTO=TCP SPT=49380 DPT=80 WINDOW=64860 RES=0x00 SYN URGP=0 MARK=0x10000
[27437.886286] filter_FWD_cali7368eccef27_REJECT: IN=cali7368eccef27 OUT=cali9aba158b53d MAC=ee:ee:ee:ee:ee:ee:26:4a:27:49:ea:e9:08:00 SRC=192.168.90.13 DST=192.168.90.12 LEN=60 TOS=0x00 PREC=0x00 TTL=63 ID=9554 DF PROTO=TCP SPT=49380 DPT=80 WINDOW=64860 RES=0x00 SYN URGP=0 MARK=0x10000
[27437.887678] filter_FWD_cali7368eccef27_REJECT: IN=cali7368eccef27 OUT=cali9aba158b53d MAC=ee:ee:ee:ee:ee:ee:26:4a:27:49:ea:e9:08:00 SRC=192.168.90.13 DST=192.168.90.12 LEN=60 TOS=0x00 PREC=0x00 TTL=63 ID=47980 DF PROTO=TCP SPT=49390 DPT=80 WINDOW=64860 RES=0x00 SYN URGP=0 MARK=0x10000
[27438.831341] filter_FWD_cali7368eccef27_REJECT: IN=cali7368eccef27 OUT=cali9aba158b53d MAC=ee:ee:ee:ee:ee:ee:26:4a:27:49:ea:e9:08:00 SRC=192.168.90.13 DST=192.168.90.12 LEN=60 TOS=0x00 PREC=0x00 TTL=63 ID=47981 DF PROTO=TCP SPT=49390 DPT=80 WINDOW=64860 RES=0x00 SYN URGP=0 MARK=0x10000
[27438.831926] filter_FWD_cali7368eccef27_REJECT: IN=cali7368eccef27 OUT=cali9aba158b53d MAC=ee:ee:ee:ee:ee:ee:26:4a:27:49:ea:e9:08:00 SRC=192.168.90.13 DST=192.168.90.12 LEN=60 TOS=0x00 PREC=0x00 TTL=63 ID=27766 DF PROTO=TCP SPT=49398 DPT=80 WINDOW=64860 RES=0x00 SYN URGP=0 MARK=0x10000
[27439.776698] filter_FWD_cali7368eccef27_REJECT: IN=cali7368eccef27 OUT=cali9aba158b53d MAC=ee:ee:ee:ee:ee:ee:26:4a:27:49:ea:e9:08:00 SRC=192.168.90.13 DST=192.168.90.12 LEN=60 TOS=0x00 PREC=0x00 TTL=63 ID=27767 DF PROTO=TCP SPT=49398 DPT=80 WINDOW=64860 RES=0x00 SYN URGP=0 MARK=0x10000
Create two new zones using calico network interface names (ie. cali7368eccef27 and cali9aba158b53d). cali7368eccef27 is the zone for ingress-nginx-controller calico pod network and cali9aba158b53d is the zone for nginx-server calico pod network.
sudo firewall-cmd --permanent --new-zone cali7368eccef27
sudo firewall-cmd --permanent --new-zone cali9aba158b53d
Then assign cali7368eccef27 zone with cali7368eccef27 network interface and assign cali9aba158b53d zone with cali9aba158b53d network interface.
sudo firewall-cmd --permanent --change-interface=cali7368eccef27 --zone=cali7368eccef27
sudo firewall-cmd --permanent --change-interface=cali9aba158b53d --zone=cali9aba158b53d
Create a policy:
sudo firewall-cmd --permanent --new-policy cali736cali9abpolSet the policies to traffic forwarded from calico network interface cali7368eccef27 to calico network interface cali9aba158b53d:
sudo firewall-cmd --permanent --policy cali736cali9abpol --add-ingress-zone cali7368eccef27
sudo firewall-cmd --permanent --policy cali736cali9abpol --add-egress-zone cali9aba158b53d
To finish up the policy settings, set it to accept new connections by default:
sudo firewall-cmd --permanent --policy cali736cali9abpol --set-target ACCEPTThen load the new zone and policy into the active runtime state:
sudo firewall-cmd --reloadOn master node and worker nodes, test to run the curl command again:
curl http://10.107.65.165:80/somethingcurl -k https://10.107.65.165:443/somethingcurl http://192.170.0.1:80/somethingcurl -k https://192.170.0.1:443/somethingcurl http://172.16.0.22:30609/somethingcurl -k https://172.16.0.22:30996/somethingThe request should be successful now.
<!DOCTYPE html>
<html>
<head>
<title>Welcome to nginx!</title>
<style>
html { color-scheme: light dark; }
body { width: 35em; margin: 0 auto;
font-family: Tahoma, Verdana, Arial, sans-serif; }
</style>
</head>
<body>
<h1>Welcome to nginx!</h1>
<p>If you see this page, the nginx web server is successfully installed and
working. Further configuration is required.</p>

<p>For online documentation and support please refer to
<a href="http://nginx.org/">nginx.org</a>.<br/>
Commercial support is available at
<a href="http://nginx.com/">nginx.com</a>.</p>

<p><em>Thank you for using nginx.</em></p>
</body>
</html>
Create a port forward from the remote port on the ingress-nginx-controller service to the local port on local address 114.122.37.100 on your machine:
kubectl port-forward --address 114.122.37.100 service/ingress-nginx-controller -n ingress-nginx 80:80 443:443If the port forwarding is successful, the response should look similar to this:
Forwarding from 114.122.37.100:80 -> 80
Forwarding from 114.122.37.100:443 -> 443
Now, you can access your application on the local clients LAN by
curl http://114.122.37.100/something
curl https://114.122.37.100/something
Opening a web browser and navigating to http://114.122.37.100/something or https://114.122.37.100/something.