Welcome to configuring Fedora Server 38 as a router tutorial series!
- Setup Fedora Server 38 as a NAT Router with Qemu/KVM, Part 1
- Setup Fedora Server 38 as a DHCP Server with Qemu/KVM, Part 2
- Setup Fedora Server 38 as a DNS Server with Qemu/KVM, Part 3
One of the most popular programs for Linux operating systems providing DHCP service is dnsmasq.
Install dnsmasq:
sudo dnf -y install dnsmasqThe response should look similar to this:
Fedora 38 - x86_64                                                                        1.3 MB/s |  83 MB     01:02
Fedora 38 openh264 (From Cisco) - x86_64                                                  504  B/s | 2.5 kB     00:05
Fedora Modular 38 - x86_64                                                                376 kB/s | 2.8 MB     00:07
Fedora 38 - x86_64 - Updates                                                              1.4 MB/s |  30 MB     00:21
Fedora Modular 38 - x86_64 - Updates                                                      402 kB/s | 2.1 MB     00:05
Dependencies resolved.
==========================================================================================================================
 Package                     Architecture               Version                         Repository                   Size
==========================================================================================================================
Installing:
 dnsmasq                     x86_64                     2.89-5.fc38                     updates                     357 k

Transaction Summary
==========================================================================================================================
Install  1 Package

Total download size: 357 k
Installed size: 768 k
Downloading Packages:
dnsmasq-2.89-5.fc38.x86_64.rpm                                                            253 kB/s | 357 kB     00:01
--------------------------------------------------------------------------------------------------------------------------
Total                                                                                     126 kB/s | 357 kB     00:02
Fedora 38 - x86_64 - Updates                                                              1.2 MB/s | 1.6 kB     00:00
Importing GPG key 0xEB10B464:
 Userid     : "Fedora (38) <fedora-38-primary@fedoraproject.org>"
 Fingerprint: 6A51 BBAB BA3D 5467 B617 1221 809A 8D7C EB10 B464
 From       : /etc/pki/rpm-gpg/RPM-GPG-KEY-fedora-38-x86_64
Key imported successfully
Running transaction check
Transaction check succeeded.
Running transaction test
Transaction test succeeded.
Running transaction
  Preparing        :                                                                                                  1/1
  Running scriptlet: dnsmasq-2.89-5.fc38.x86_64                                                                       1/1
  Installing       : dnsmasq-2.89-5.fc38.x86_64                                                                       1/1
  Running scriptlet: dnsmasq-2.89-5.fc38.x86_64                                                                       1/1
  Verifying        : dnsmasq-2.89-5.fc38.x86_64                                                                       1/1

Installed:
  dnsmasq-2.89-5.fc38.x86_64

Complete!
To enable DHCP service, you need to configure /etc/dnsmasq.conf.
By default dnsmasq enables DNS service. You can turn it off by changing the port to 0:
port=0The DHCPv4 server is activated by specifying an IPv4 address range and a router:
dhcp-range=set:enp0s5v4,172.16.0.2,172.16.0.254,255.255.255.0,12h

dhcp-option=tag:enp0s5v4,option:router,172.16.0.1
The above configuration instructs dnsmasq to offer IPv4 addresses between 172.16.0.2 and 172.16.0.254 with a subnet 255.255.255.0 on the interface enp0s5. Issued IPs will have a lease lifetime of twelve hours, after which clients will need to request a renewed lease.
Make sure the following options and other options are commented out:
#interface=lo

#bind-interfaces
dhcp-range=set:enp0s5v4,172.16.0.2,172.16.0.254,255.255.255.0,12h
dhcp-option=tag:enp0s5v4,option:router,172.16.0.1Restart the dnsmasq service to apply your changes:
sudo systemctl restart dnsmasqBy default DHCP uses UDP ports 68 and 67 to initiate communication between the IPv4 client and server. If port 67 is in use by another process, DHCP server cannot communicate with DHCPv4 clients.
To open UDP port 67 in ufw, run:
sudo firewall-cmd --zone=public --permanent --add-port=67/udpTo apply the configuration, run:
sudo firewall-cmd --reloadDnsmasq also provides full IPv6 support.
The DHCPv6 server is activated by specifying an IPv6 address range and enabling IPv6 Router Advertisement feature:
dhcp-range=set:enp0s5v6,::2,::ffff,constructor:enp0s5,slaac,64,12h

enable-ra
The above configuration instructs dnsmasq to offer IPv6 addresses between fd62:bf06:3a25:7670::2 and fd62:bf06:3a25:7670::ffff with prefix length 64 bits on the interface enp0s5.
Restart the dnsmasq service to apply your changes:
sudo systemctl restart dnsmasqBy default DHCP uses UDP ports 546 and 547 to initiate communication between the IPv6 client and server. If port 547 is in use by another process, DHCP server cannot communicate with DHCPv6 clients.
To open UDP port 547 in ufw, run:
sudo firewall-cmd --zone=public --permanent --add-port=547/udpTo apply the configuration, run:
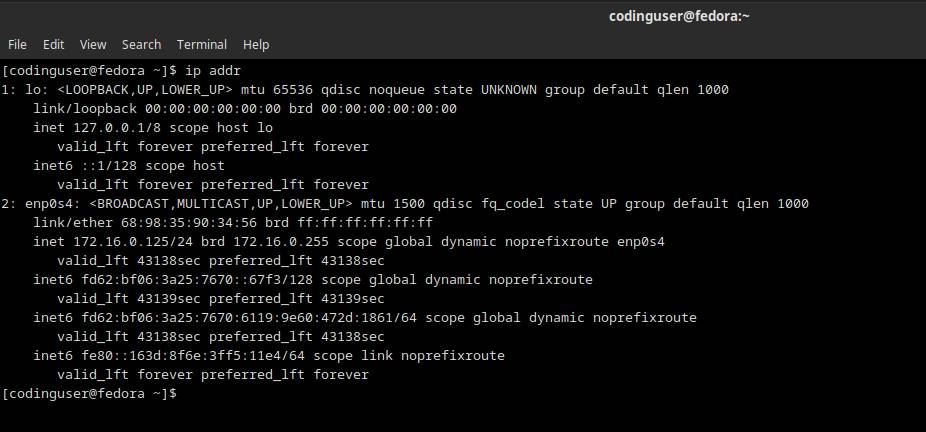
sudo firewall-cmd --reloadNow the client computers should obtain IPv4 address and IPv6 address automatically.


