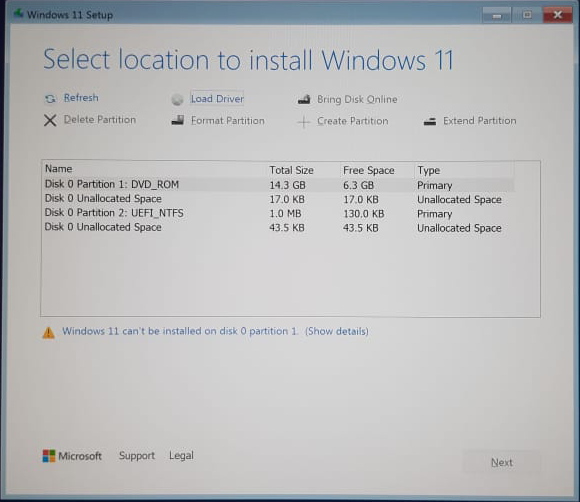
Intel 11th (Tiger Lake), 12th (Alder Lake), and 13th (Raptor Lake) generation processors use Intel Volume Management Device (VMD) technology to improve storage performance and power efficiency. On systems with VMD enabled by default (which is often not configurable in BIOS/UEFI), the Windows 10/11 retail installer cannot detect NVMe drives unless the Intel Rapid Storage Technology (IRST) driver is manually loaded during installation. To proceed, you must download the appropriate IRST (VMD) driver, place it on a USB drive, and load it when prompted by the installer to detect available storage devices.
In this tutorial, you will learn how to install windows 10/11 with Intel VMD technology enabled.
Step 1: Download the Intel IRST/VMD driver from your laptop/pc manufacturer's site
Here are the official driver download pages for Acer, ASUS, Dell, Lenovo, and HP:
- Acer: https://www.acer.com/us-en/support/drivers-and-manuals
- ASUS: https://www.asus.com/support/Download-Center/
- Dell: https://www.dell.com/support/home/en-id?app=drivers
- Lenovo: https://pcsupport.lenovo.com/us/en/products/laptops-and-netbooks/3-series/ideapad-3-15iil05/81we/videos/vid100754-how-to-download-and-install-a-driver-from-the-lenovo-support-site
- HP: https://support.hp.com/us-en/drivers
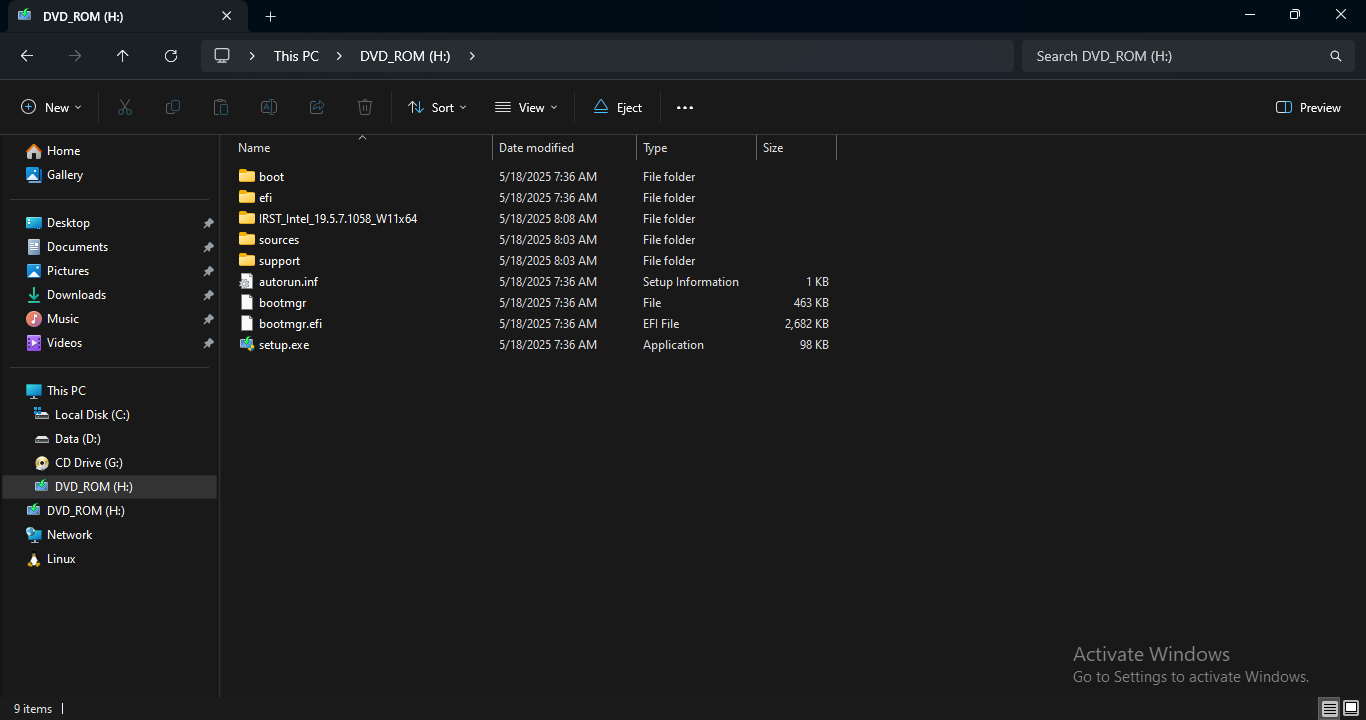
Most often the drivers come as a self-extracting executable (.exe) or archived (.zip) file. Extract the downloaded IRST driver files and copy to your USB installation media.
Step 2: Boot into Windows Installation
Plug in your Windows USB installer and power on the laptop/PC.
During startup, press the boot menu key (this is usually F12, F9, Esc, or another key depending on your laptop/PC brand) to open the boot options menu.
From the list, select the USB device to boot from your Windows installation media.
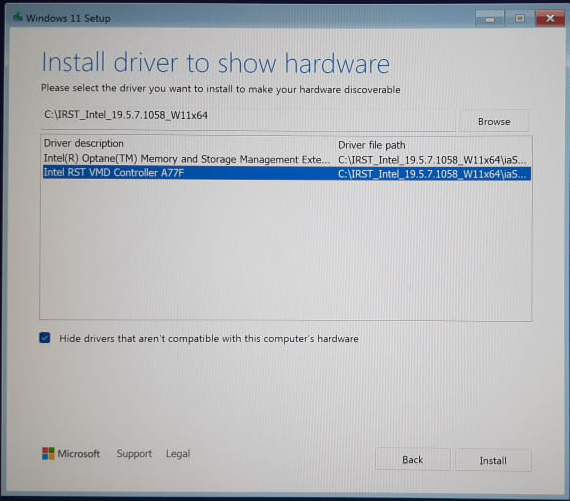
When prompted where do you want to install Windows, click Load driver.
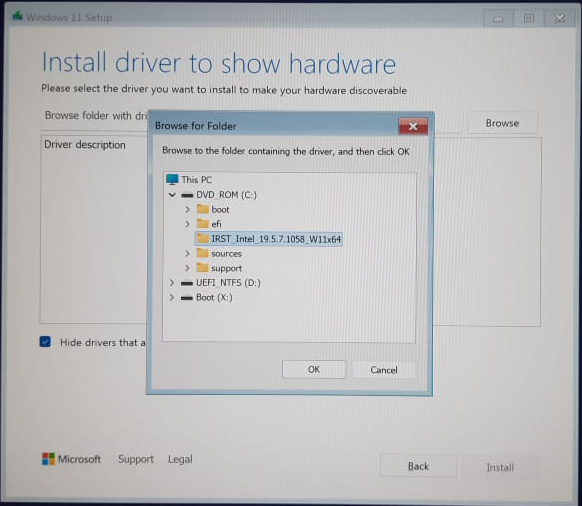
Click Browse.
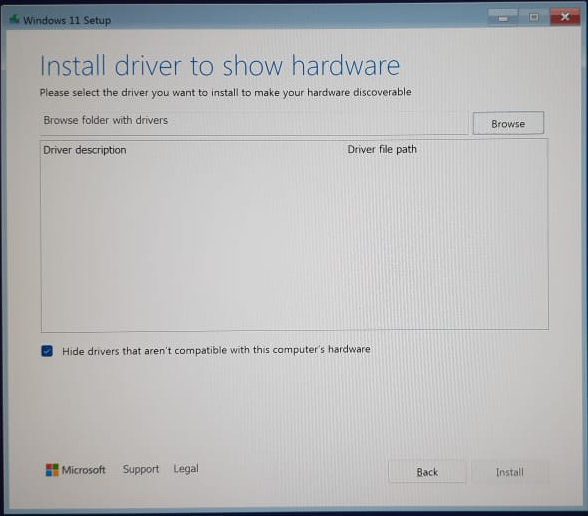
Navigate and select the folder where you placed the driver files, and click OK.
Choose the driver shown on the list, and click Install.
Once the driver is loaded successfully, you should see your drives listed.
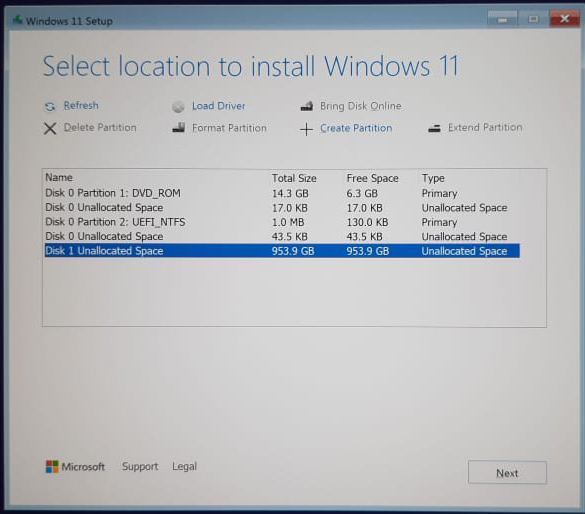
You can now continue with the rest of the Windows installation as usual.