On Windows 11, using a Microsoft account is the default option during setup, providing enhanced security, seamless integration with Microsoft services, and automatic syncing of files, apps, and settings across all your devices.
If you prefer a traditional local account, switching from a Microsoft account is easy through the Settings app. Alternatively, you can create a new local administrator account and transfer your files to it, rather than disconnecting from your cloud-based Microsoft account.
To create a local administrator account on Windows 11, follow these steps:
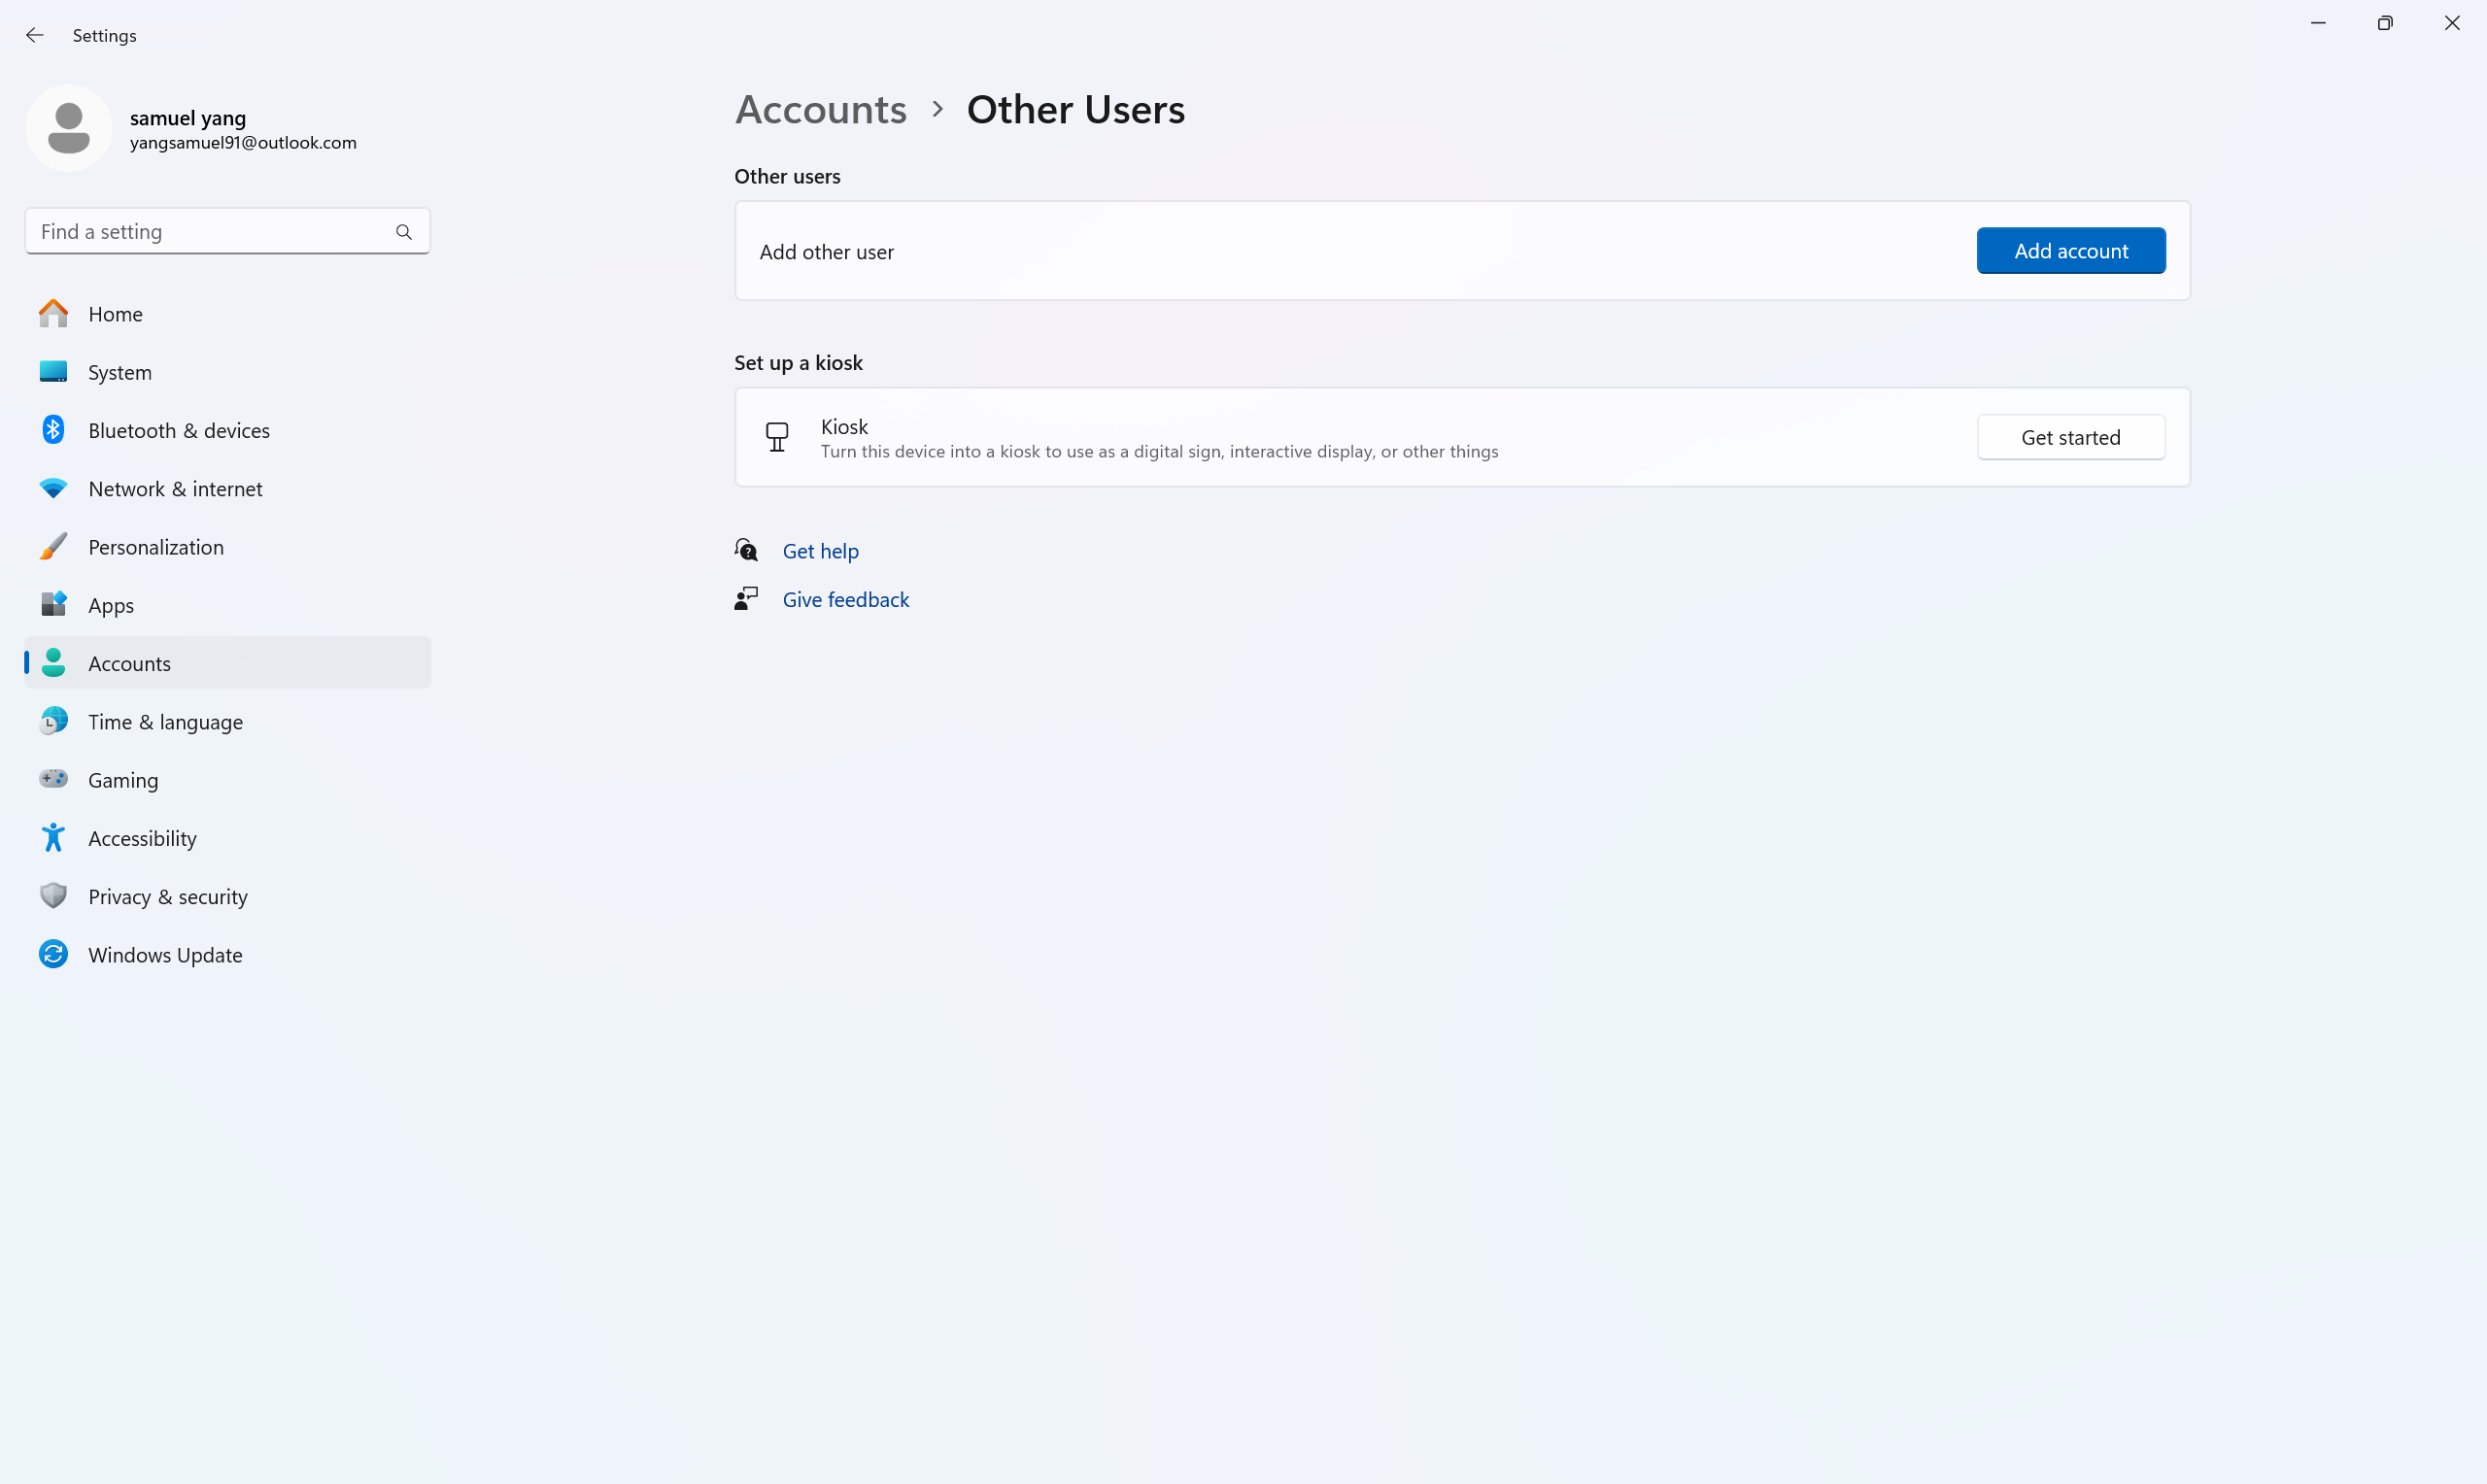
Open Settings on Windows 11.
Click on Accounts.
Click the Other users tab.
Click the Add account button.
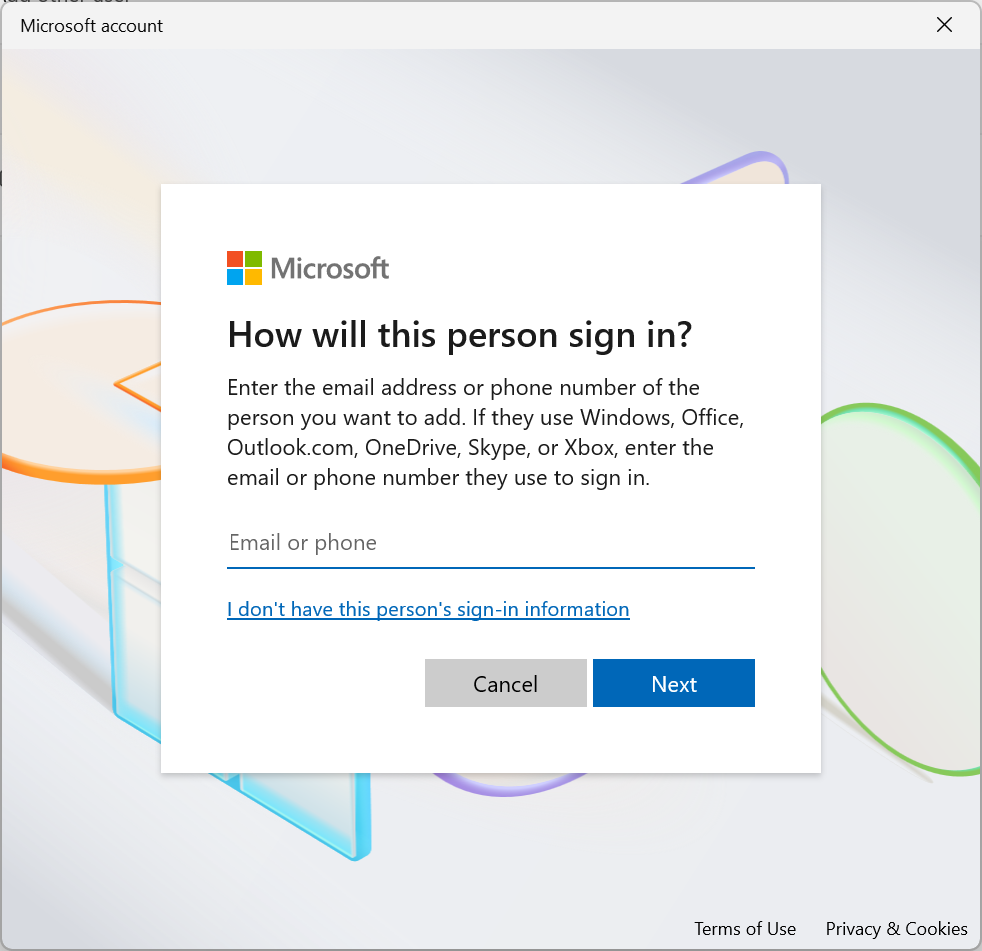
Click the I don't have this person's sign-in information option.
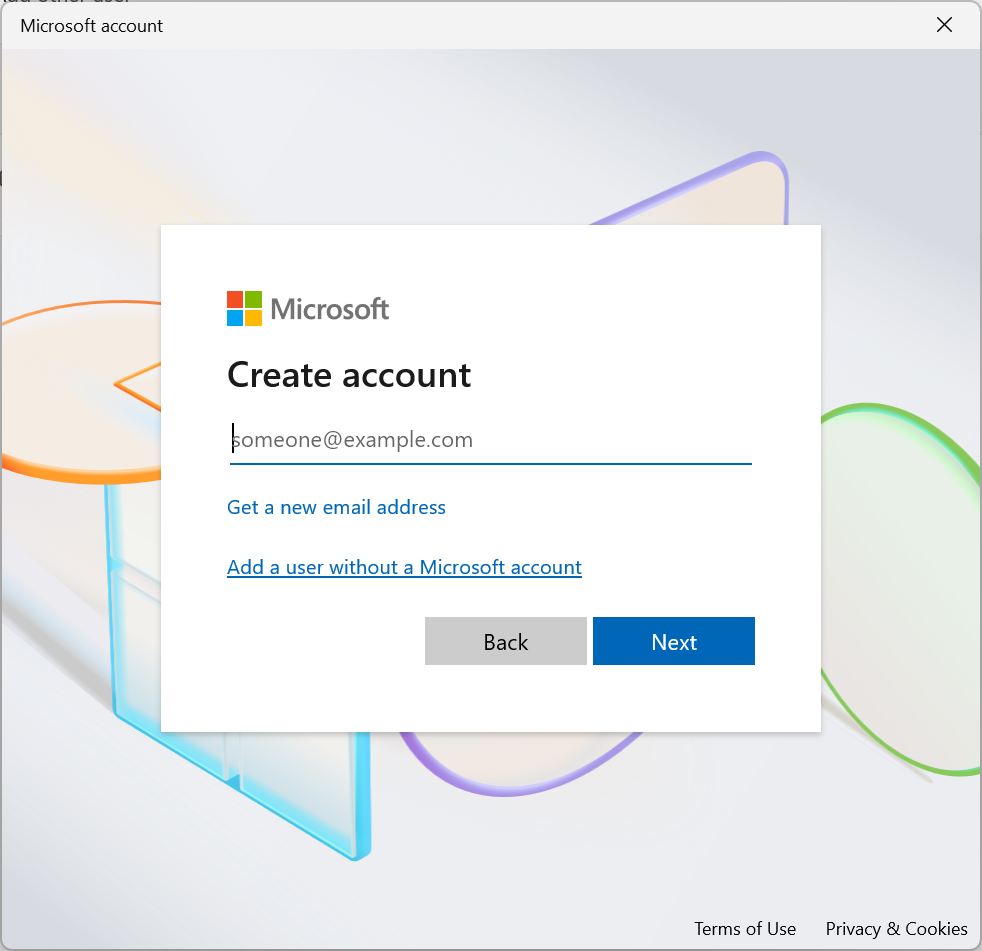
Click the Add a user without a Microsoft account option.
Create a Windows 11 account by confirming a name and password.
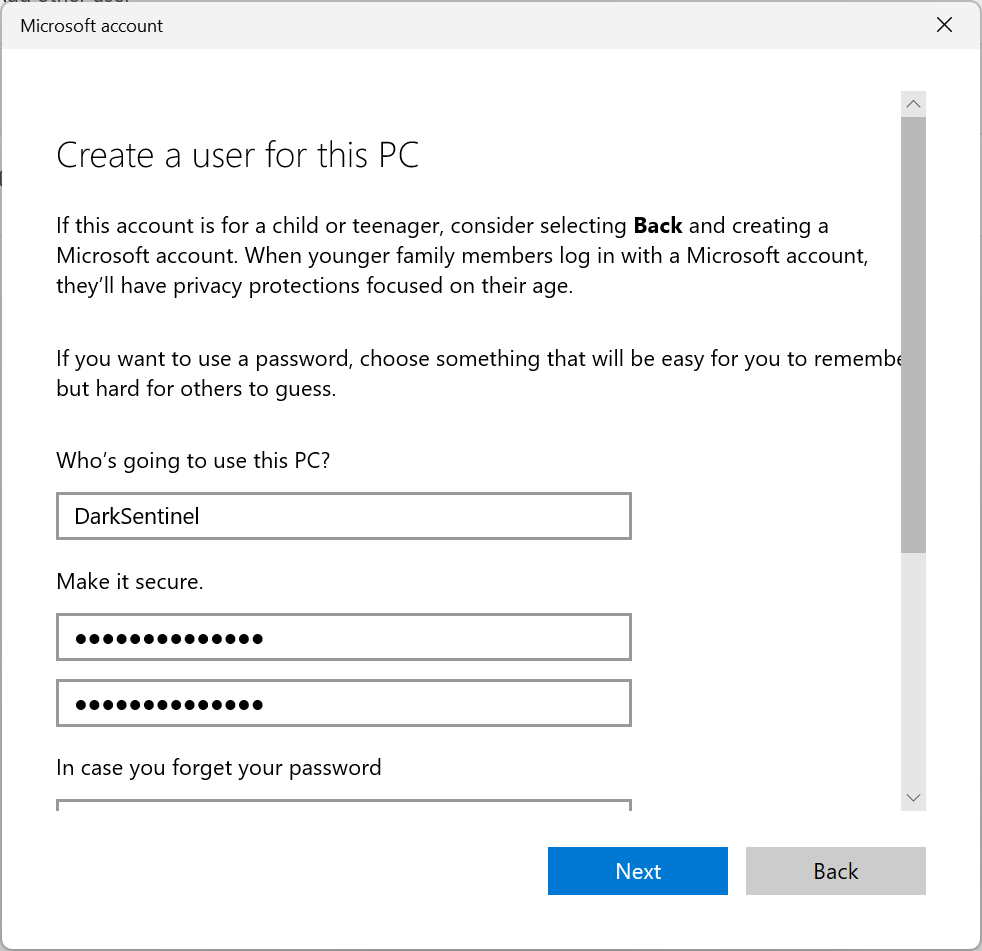
Click the Next button.
Select the newly created account and click the Change account type button to change the account from Standard to Administrator.
Choose the Administrator option using the Account type setting.
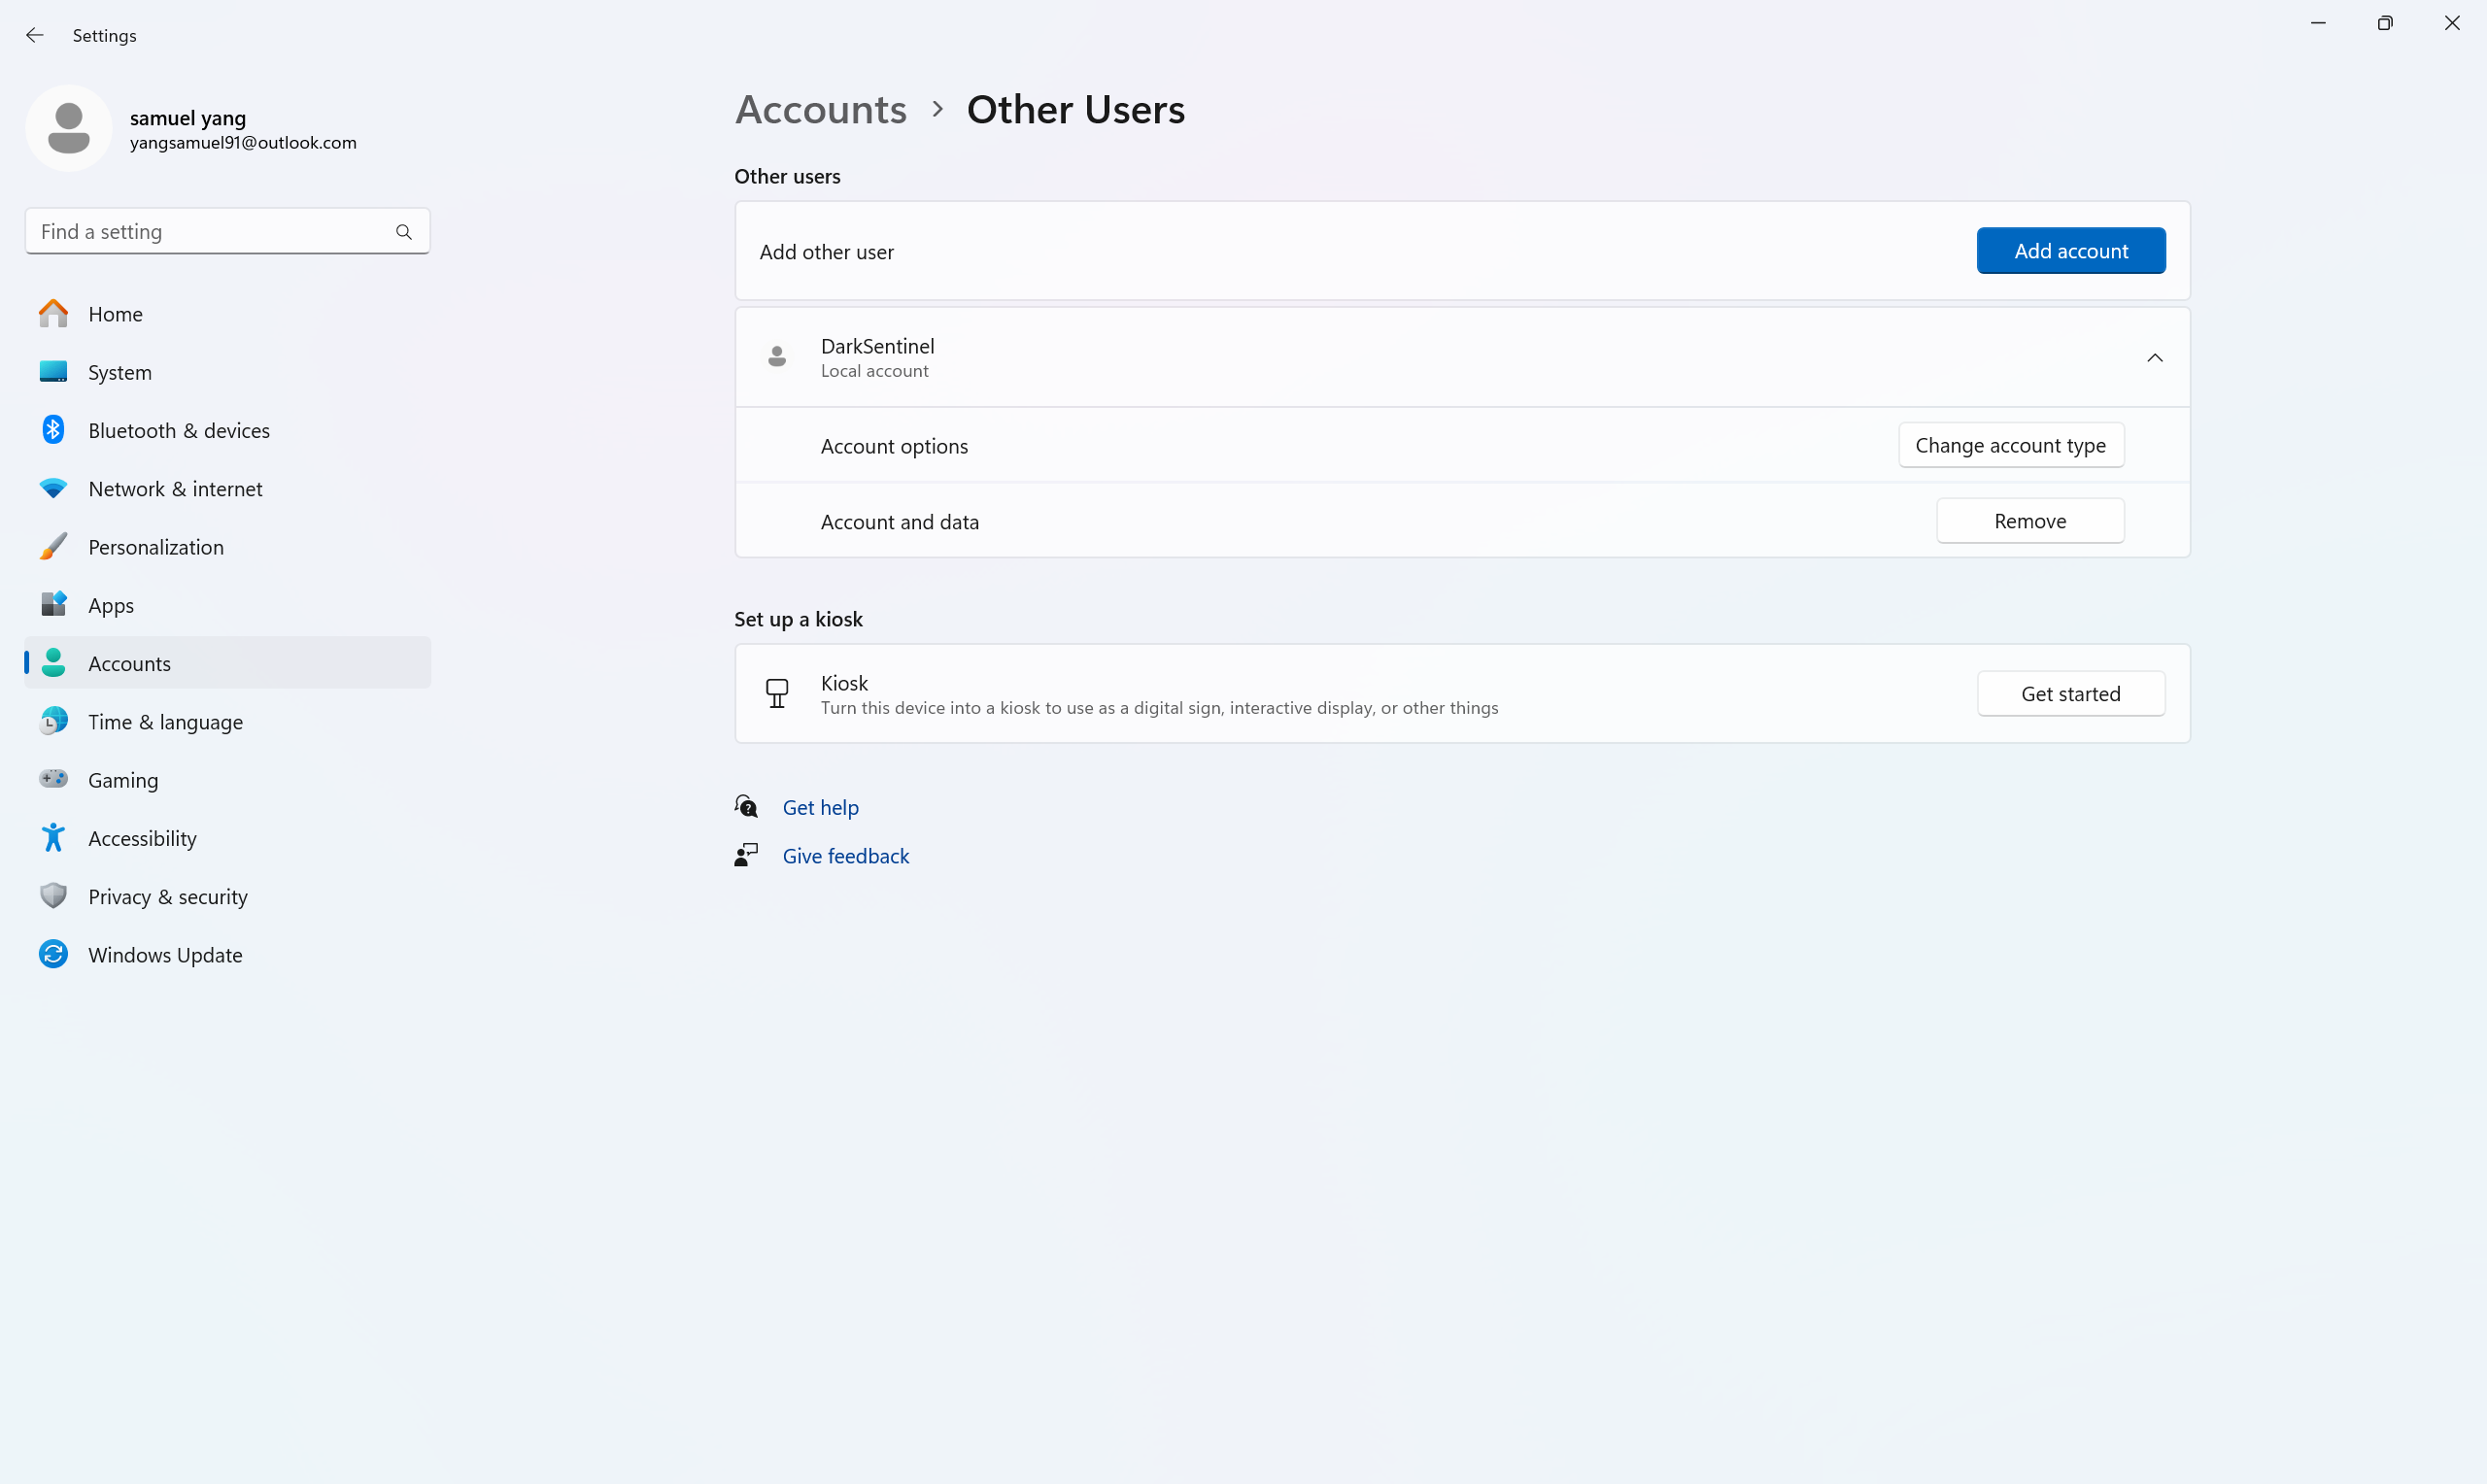

Click the OK button.
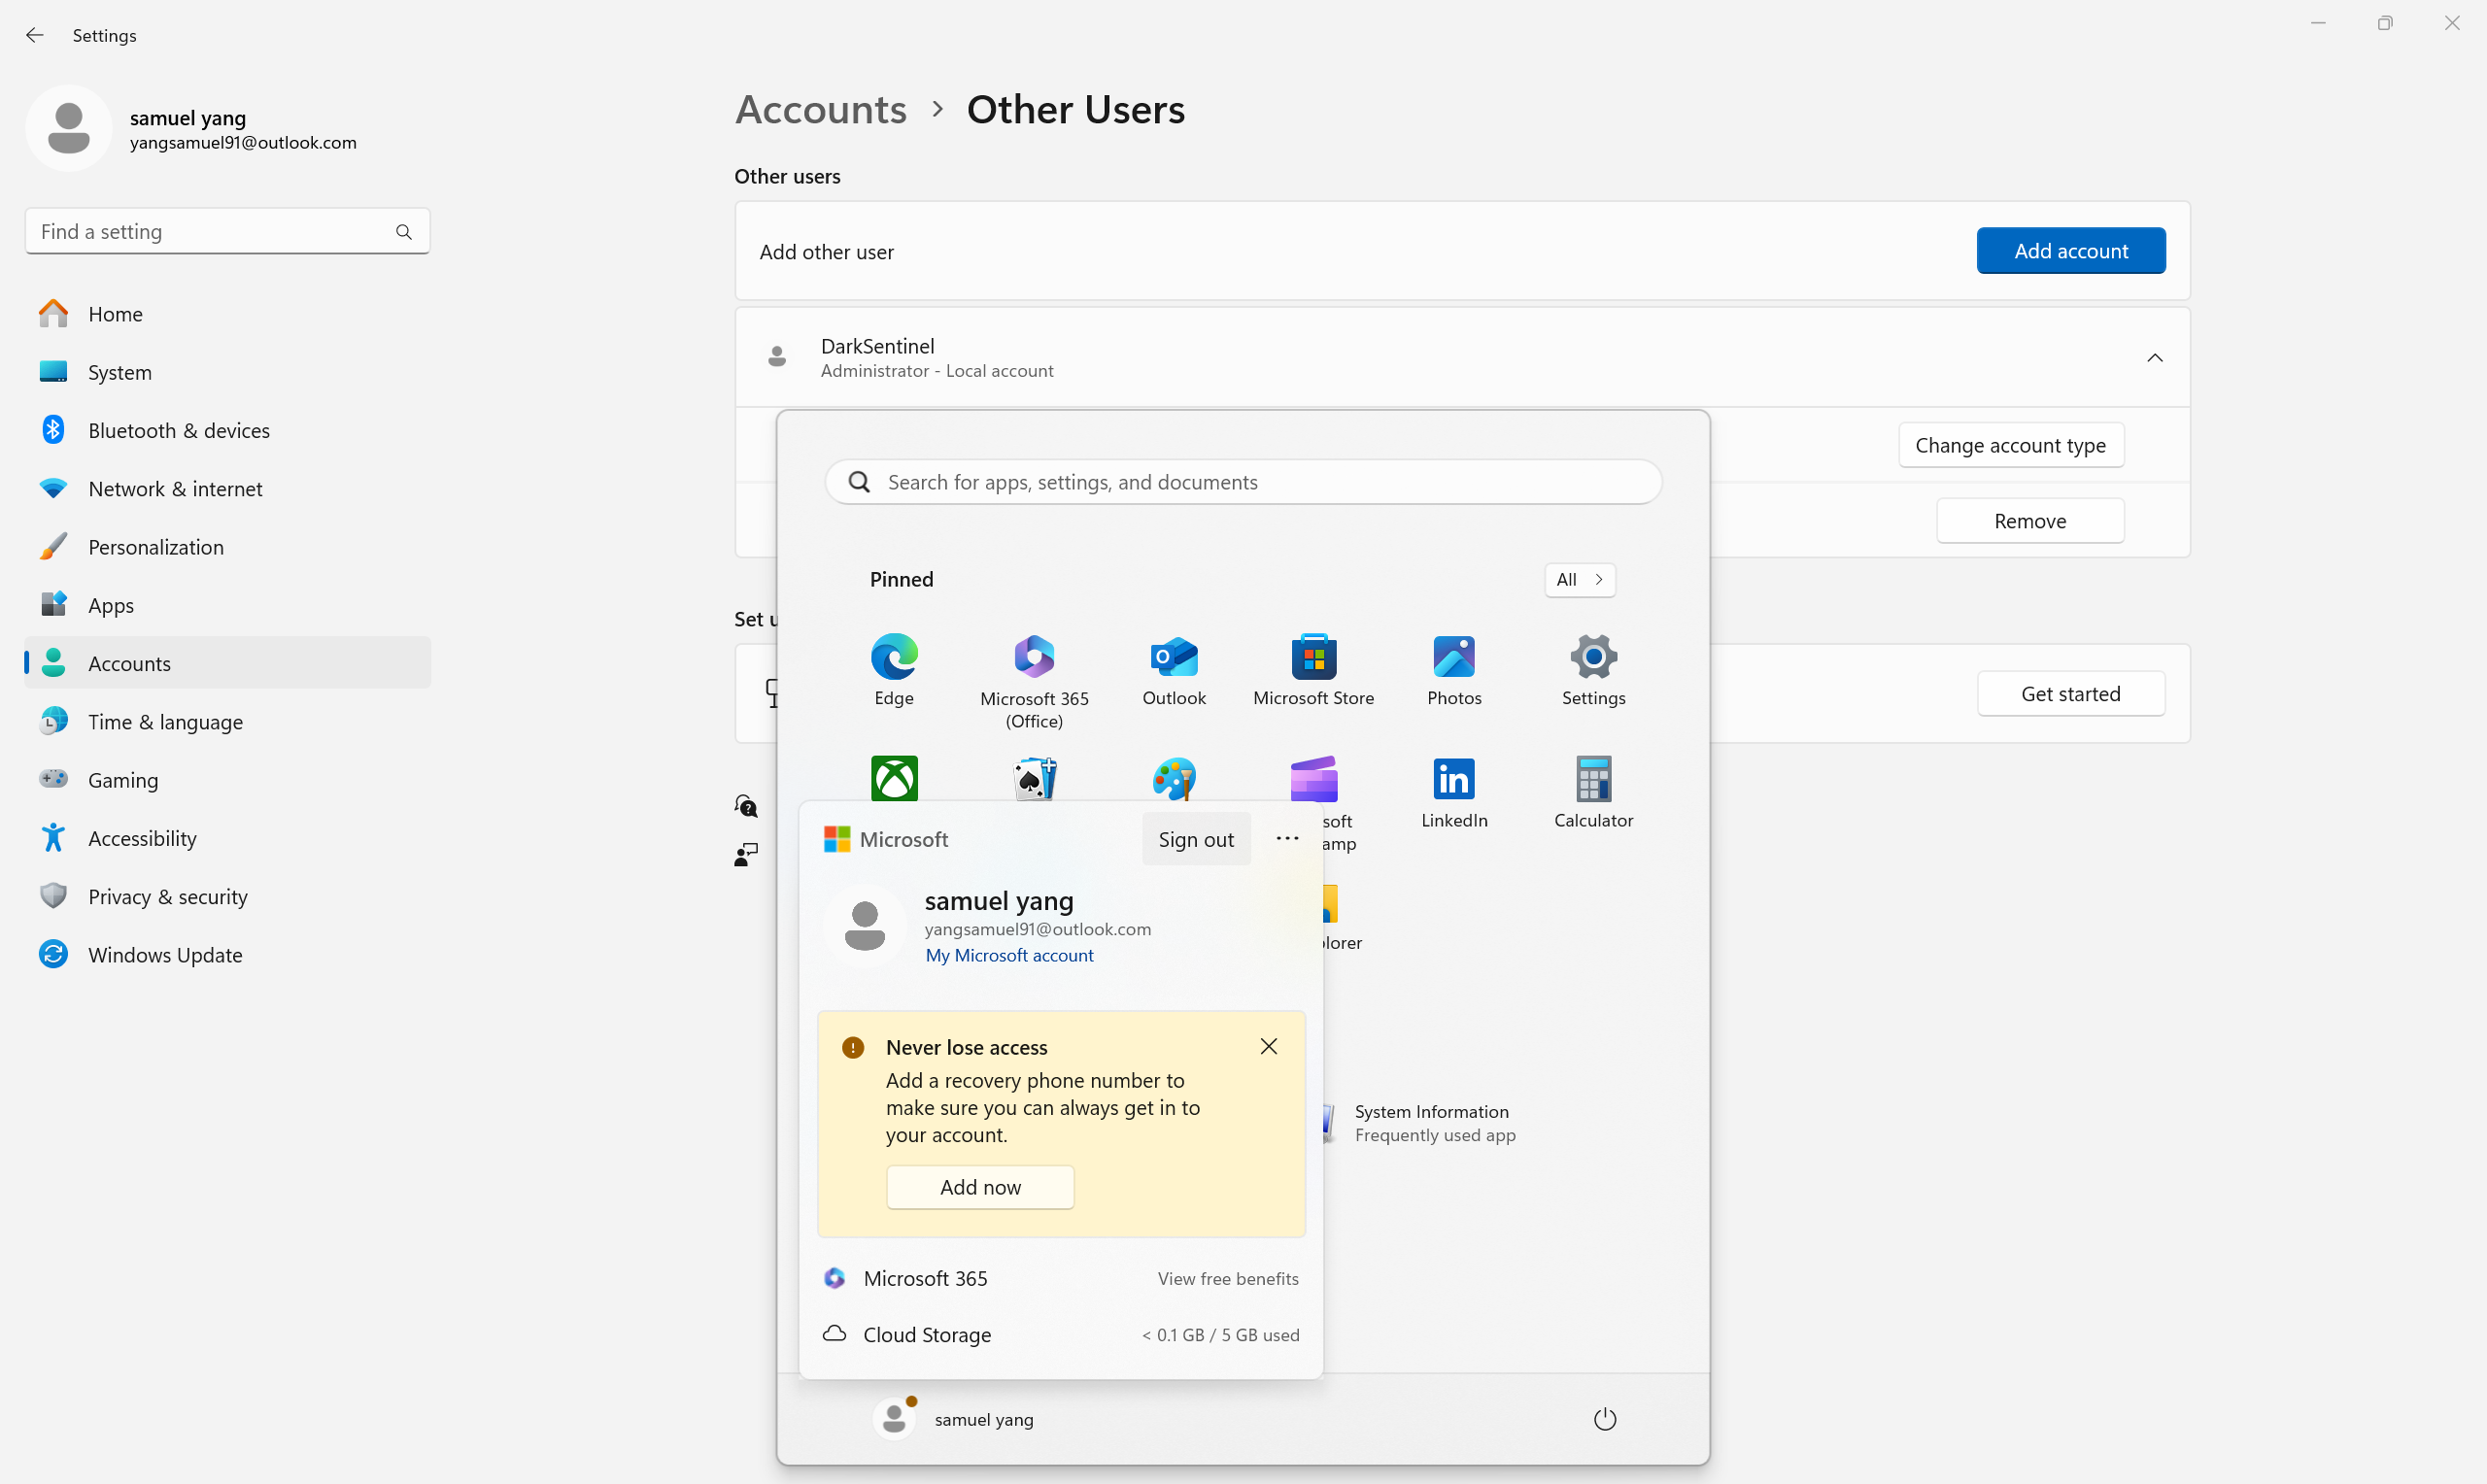
Open the Start menu, click your user account icon, and select the Sign out option.
Select the new local account and sign in.
Open Settings.
Click on Accounts.
Click the Other users page.
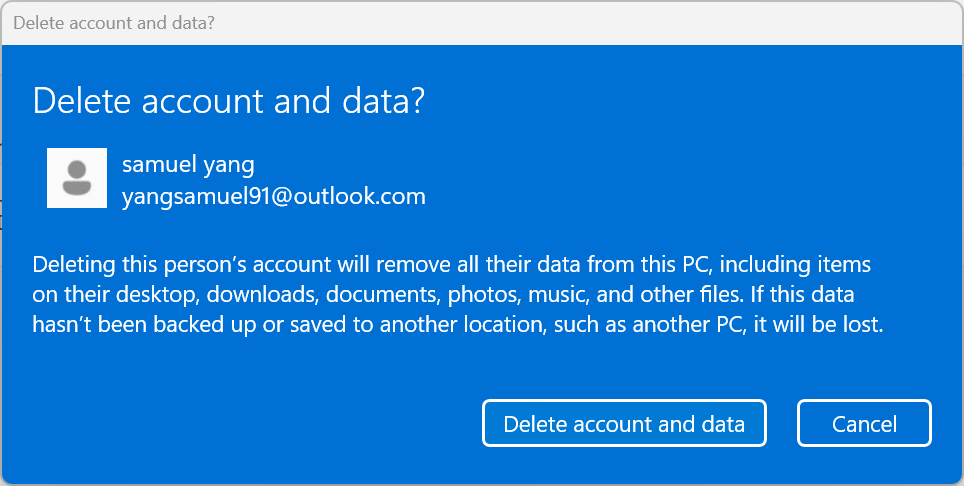
Select the account and click the Remove button.
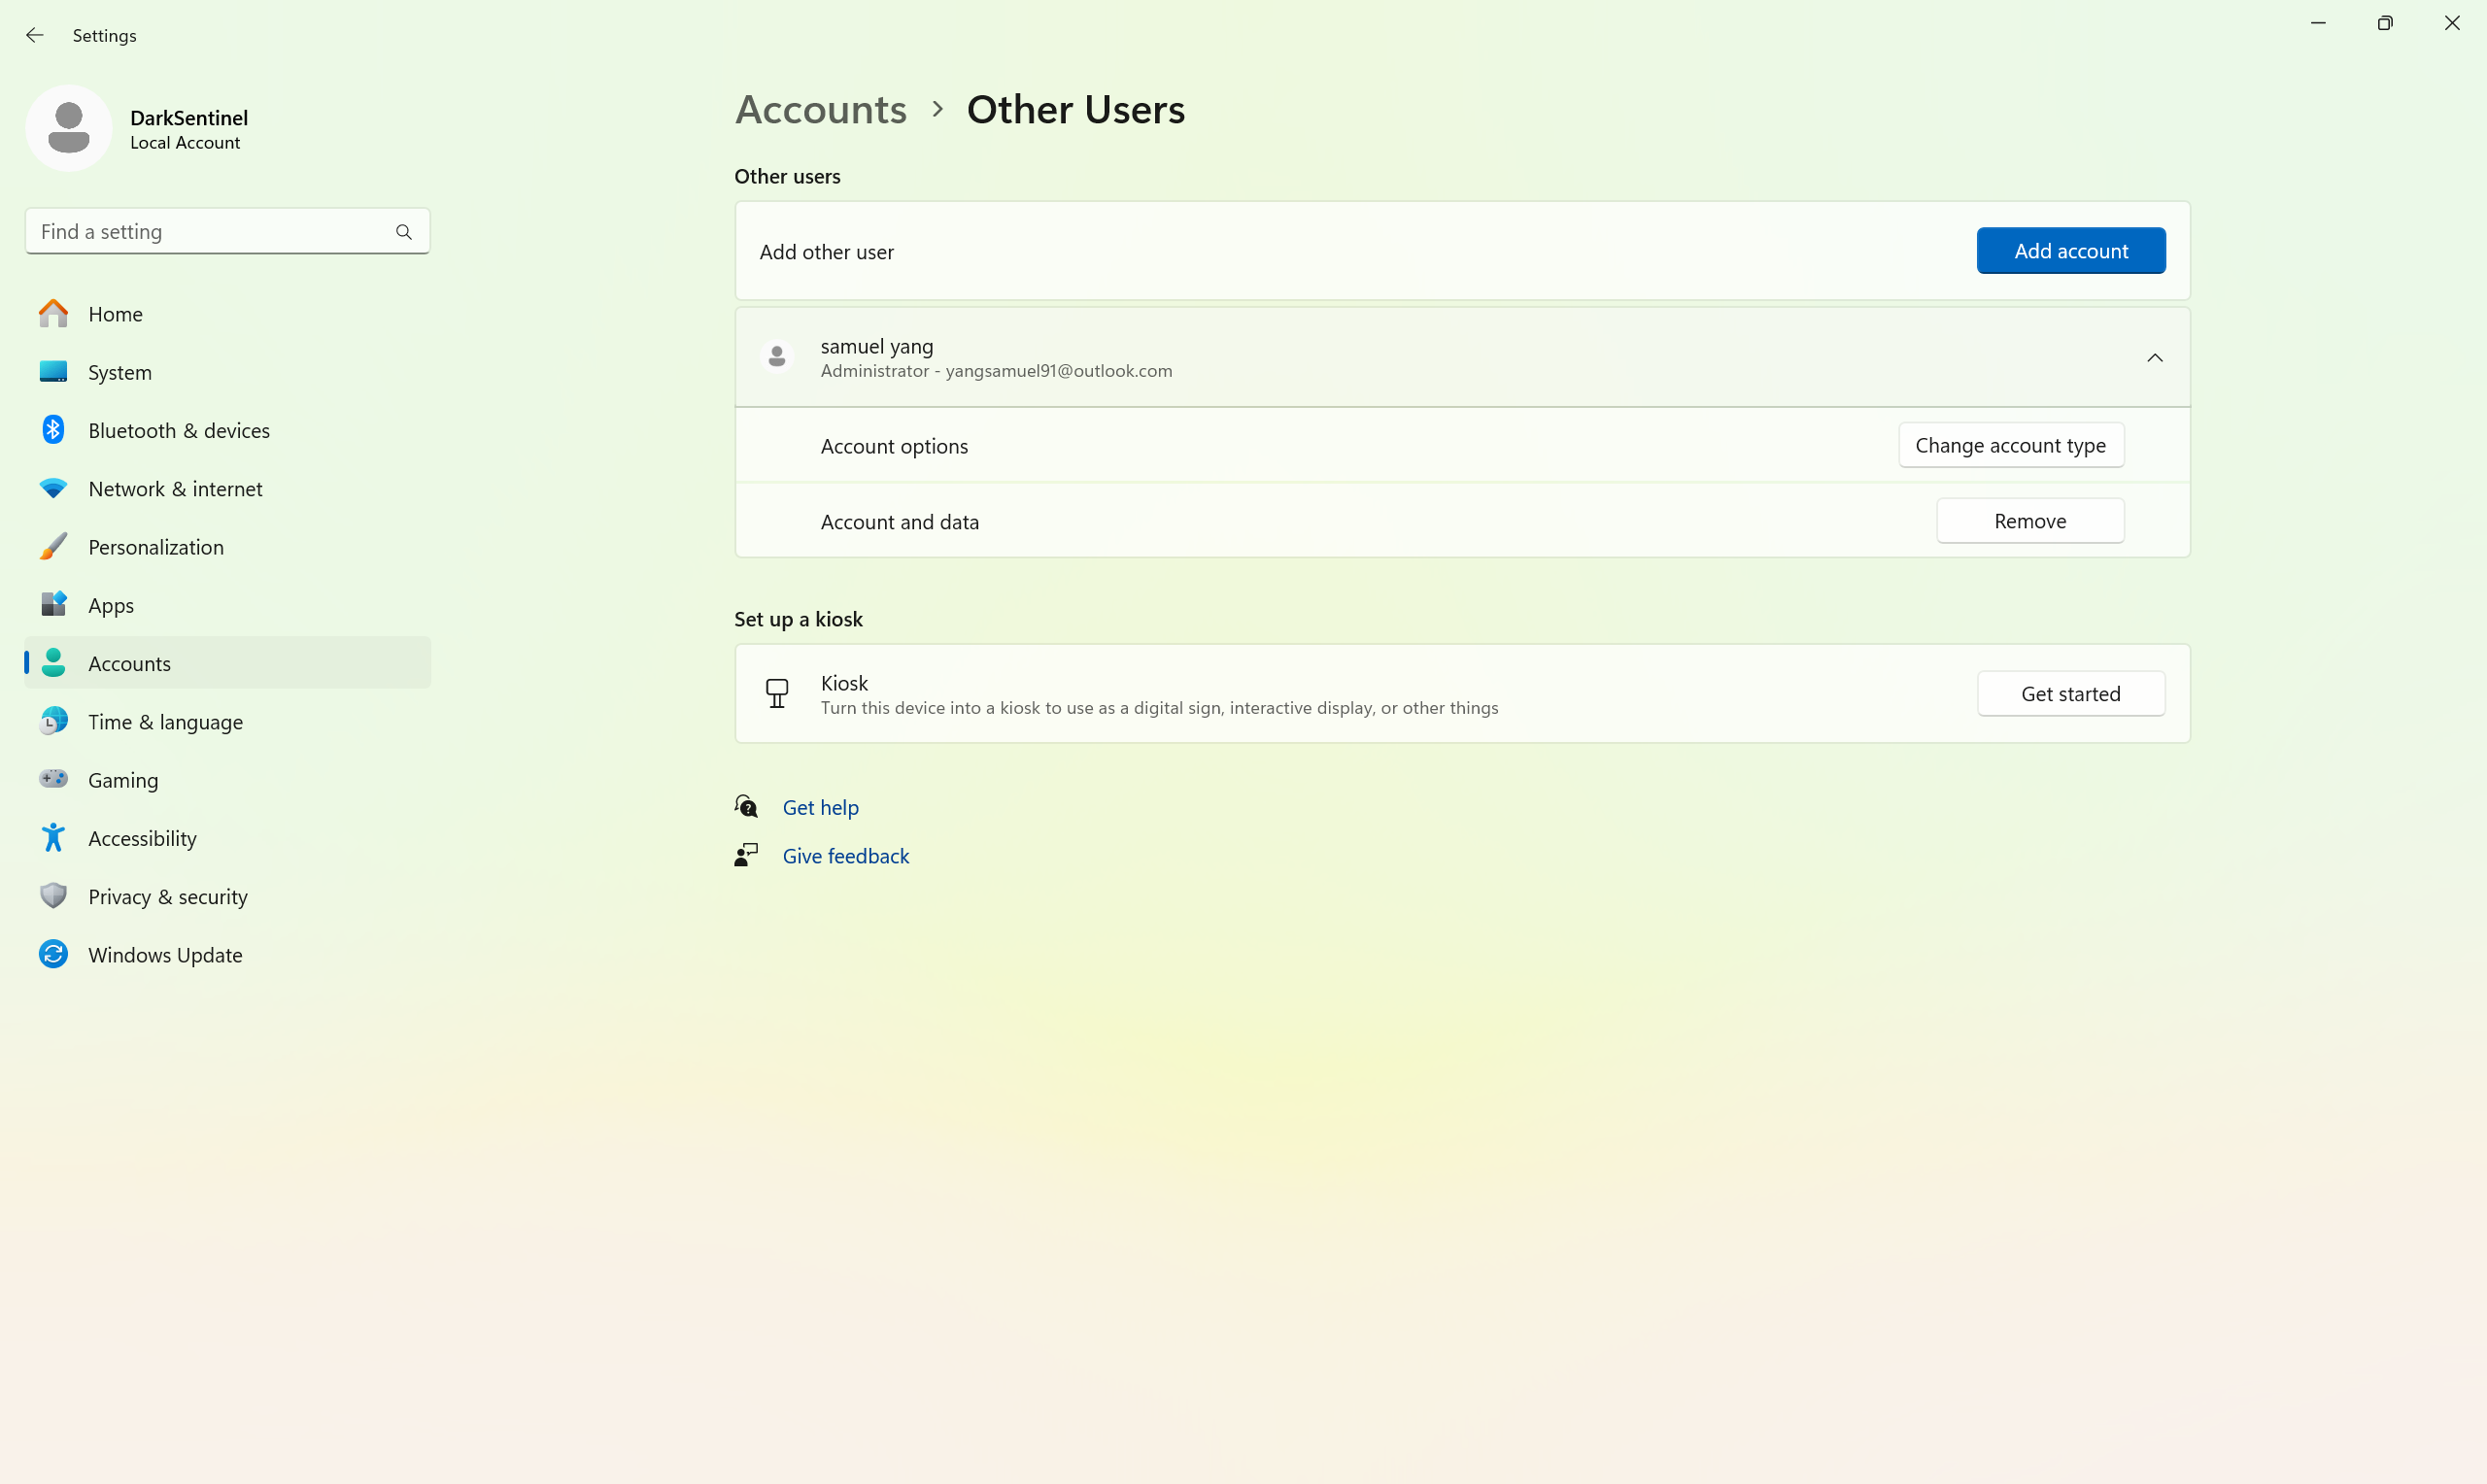
Click the Delete account and data button.
After you complete the steps, you can start using the new local account disconnected from the Microsoft cloud services.